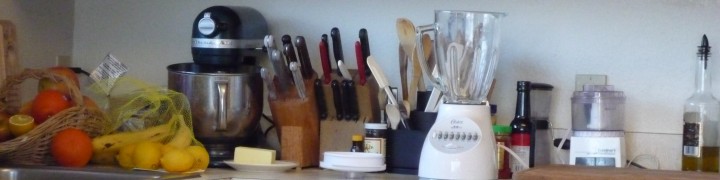
I usually, not always, use Certo Liquid Fruit Pectin for my jam. The recipe booklet that I use is from 1975 when the liquid pectin came in bottles. Now the pectin comes in sealed envelopes and each envelope is equivalent to one half-bottle. My recipe booklet is falling apart. The new recipe sheet that comes inside the packages now isn’t as comprehensive as the old one. I do not water-bath can my jam. There is enough sugar in it to act as a preservative. Using canning lids keeps air from getting in. When I was a child, my mother only used paraffin to cover the jam and many people still do it that way. I have heard that you should not increase the recipe and/or cut the amount of sugar, something about cooking time and setting and preserving. So, stick to the recipe.

  • This is how I prep for a jam-making session
  • Set out enough sanitized jars and rings to match the yield of the recipe, either pints, cups, or half-cups.
  • Put the appropriate number of lids into a small saucepan of water over low heat.
  • Set out my canning funnel, a ladle, metal serving spoon, and small dish.
  • Cut open the envelope of Certo and set it in the small dish.
  • [The small dish is for the foam (which is just as delicious as the jam, only foamy)]
  • Rhubarb-Strawberry Jam
  • Yield: 6-1/4 cups (4 lb.) jam
  • 3-1/2 cups prepared fruit (about 1 lb. rhubarb and 1 quart strawberries)
  • 6-1/2 cups (2 lb. 6 oz.) sugar
  • 1 envelope Certo Liquid Fruit Pectin

Slice one pound rhubarb and put into saucepan. Add 1/4 cup water and bring to a boil. Reduce heat and let simmer until rhubarb is soft, about 1 minute. Thoroughly crush about 1 quart fully ripe strawberries. Mix the fruits together and measure out 3-1/2 cups. Place the fruit in a LARGE pan. Add sugar to pan and mix well.

Over high heat, bring to a full rolling boil and boil hard 1 minute, stirring constantly. Remove from heat; at once stir in Certo. Skim the foam off with a metal spoon. Continue to stir and skim. Ladle into jars, leaving 1/2″ room at the top.

Wipe the rims of the jars and screw on the lids. Turn the jars upside down for at least thirty minutes (or as long as hours and hours–doesn’t matter). If the fruit is floating, give the jars a shake every once in awhile. Turn the jars right side up and let cool completely before marking and storing.

Many times it can take more than a day for the jam to set. Try not to worry. If it really does not set, then you have a nice batch of syrup or you can try to process it again. I have never done that, I just go the syrup route. C’est la vie.

This recipe originates with Jamie Oliver. It is gluten-free. I have made it many times and it’s incredibly delicious. My blog has turned into a place for me to remember how I did something in case the recipe goes away at the original site. That really happens a lot. So, my pictures are awful. But rest assured, the food is good!
  • Ingredient List
  • One whole chicken
  • Olive oil
  • Salt and pepper
  • 2-3 Tbsp. butter and equal amount olive oil
  • 2-1/2 cups milk
  • Zest of two lemons
  • One handful fresh sage leaves, whole
  • 8 cloves garlic, whole or smashed

Preheat oven to 375 degrees F. Pat chicken dry and rub with olive oil. Sprinkle inside and out with salt and pepper. In a Dutch oven or large pot, heat butter and olive oil over medium-high heat. Brown chicken on all sides.

Remove chicken to plate. Drain fat from pan. Add milk, lemon zest, garlic cloves, and sage leaves. Return chicken to pan. Cover the pan and bake at 375 degrees F, covered, for 45 minutes. Remove the lid and continue baking, uncovered, for 45 minutes.

Remove the chicken to a plate and let cool enough to handle. Stir and scrape the curdled milk product in the pan. Remove the bigger sage leaves and discard them.

Pull the meat off the bones of the chicken and serve it with the “sauce” in bowls over mashed potatoes or polenta or rice or mashed cauliflower, whatever or nothing.

I’ve got herbs growing on my back deck for the first time. And included in those herbs is sage. It was so nice to just pick what I needed instead of wondering whether or not the store would have fresh sage. On this day I served the chicken dish over Creamy Cheesy Baked Polenta, but I’ve also served it over Twice-Baked Cauliflower.

This recipe originates at Taste of Home. It satisfies both your sweet tooth and your chocolate craving in three layers. There is no baking involved, so it makes a great summertime treat.

  • First Layer
  • 1 cup butter
  • 1/2 cup baking cocoa
  • 1 egg yolk, room temperature
  • 2 cups graham cracker crumbs (I crushed one packet)
  • 1/2 cup powdered sugar (confectioners’ sugar)
  • 1 tsp. vanilla extract or paste

Prepare a 9×13″ pan by spraying with non-stick spray or greasing.

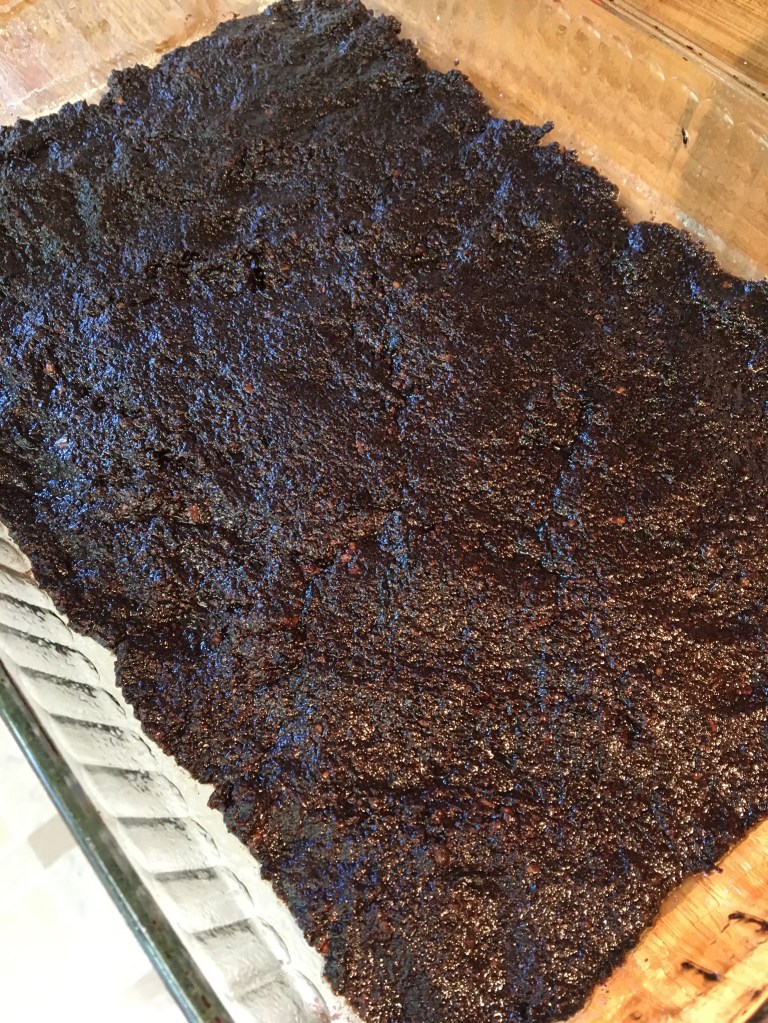
In a large saucepan over medium heat, melt butter and stir in baking cocoa. Stir over heat until mixture is smooth. Temper the egg yolk by whisking a little of the hot mixture into the egg yolk, continue whisking and add a bit more hot mixture. Then stir the egg yolk mix into the butter/cocoa in the saucepan. Continue stirring constantly over medium heat for 2-3 minutes until mixture thickens. Remove from heat and stir in graham cracker crumbs, powdered sugar, and vanilla. Stir until well mixed. Press into the prepared pan and refrigerate until the next layer is ready.

  • Second Layer
  • 1/2 cup melted butter
  • 1/3 cup Kahlua
  • 3 cups powdered sugar

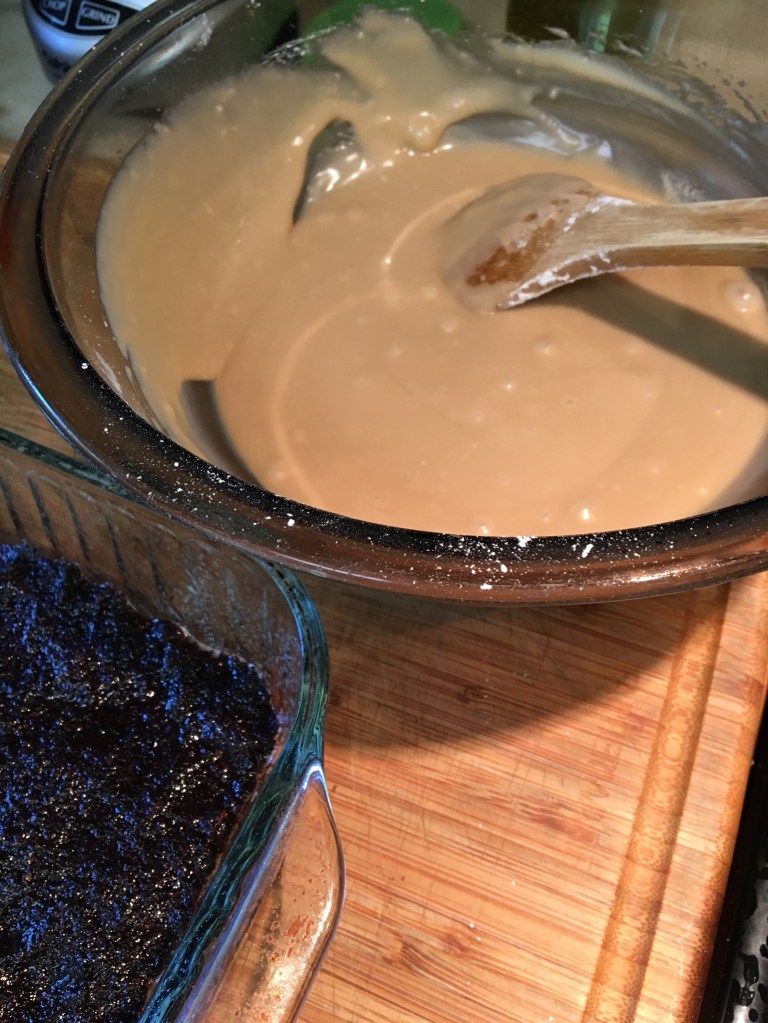
Stir Kahlua into melted butter until well mixed. Stir in powdered sugar. Spread over First Layer (it’s okay if it’s still warm). Refrigerate until set.

  • Third Layer
  • 1/4 cup butter, cubed
  • 3 oz. semi-sweet chocolate chips

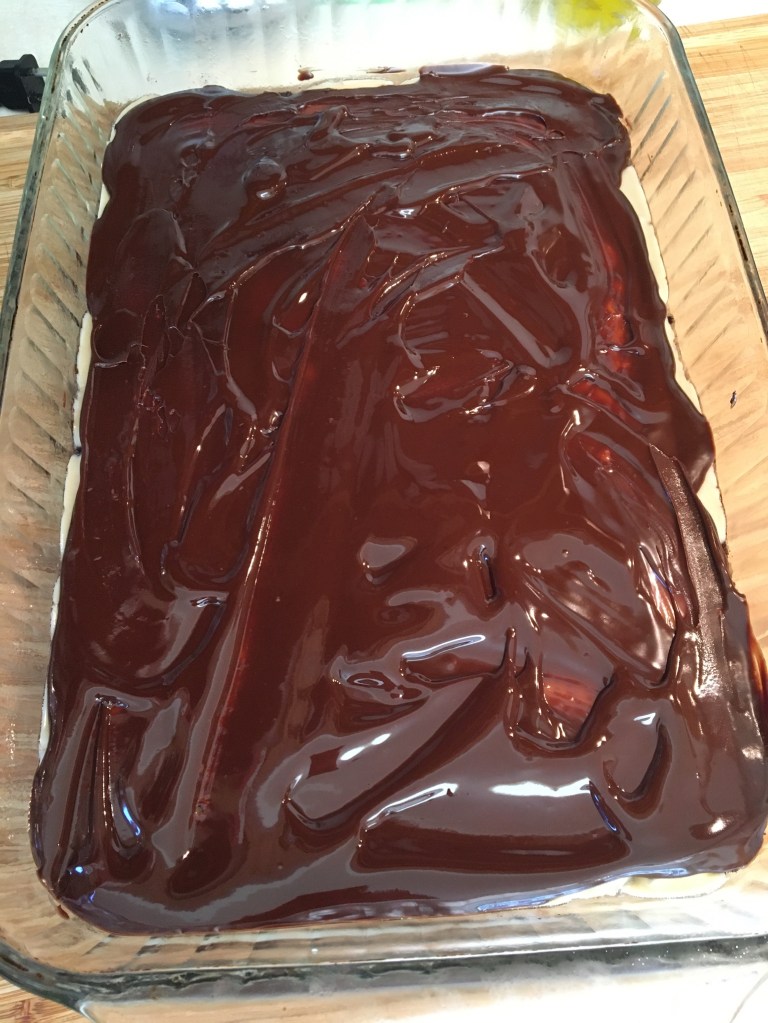
Melt together until smooth. Spread over top of the chilled and set Second Layer. Refrigerate until set.

Cut into serving pieces and serve!

Store in refrigerator.

I want to put this on the blog so I can remember what I did because these turned out awesome and are easy to make. It was my first time making them myself. I’ve eaten them many times. All in all, I approached this with a great deal of trepidation, but it turned out to be a lot easier than I thought and I’m well-pleased with the results. It’s something I should make again. I put a lot of notes at the end.

  • Ingredient List
  • 1-2 Tbsp. cooking oil
  • 1 lb. ground pork
  • 1/2 cup minced onion
  • 3 minced garlic cloves
  • 1/2 cup shredded carrot
  • 1/2 cup thinly sliced cabbage
  • 1/2 cup chopped green onion
  • Salt and pepper
  • 1 Tbsp. soy sauce
  • Lumpia wrappers (14-15 should do it), thawed
  • Cooking oil for frying
  • Sweet Chili Sauce

Coat the bottom of a skillet with cooking oil and fry the ground pork until no longer pink. Remove from skillet to bowl. Strain off, and discard, all but a couple tablespoons of fat. In the skillet, stir fry onion and garlic until onion is translucent. Stir in vegetables, cooked pork, salt and pepper, and soy sauce. Keep the skillet over heat just a little while to soften the vegetables slightly. They will continue cooking off the heat. Remove from heat and let cool to room temperature.

Set a lumpia wrapper in front of you and place about 3 Tbsp. of filling near the bottom of the wrapper sheet. Roll up a little way, then fold in the sides to make an envelope. Dap the remaining wrapper edge with water and continue rolling. Check to make sure the seam is sealed.

Set the roll onto a plate and go onto the next one. Once you’re finished with the rolls, heat about 1/2-1″ oil in a skillet medium-hot. Using tongs set lumpia into oil. Turn to another side once the first side is brown and continue this way until the roll is brown all over. Remove from skillet and set on paper towels to soak extra oil. Wait till they cool off a little before dipping in Sweet Chili Sauce and wolfing down.

  • NOTES
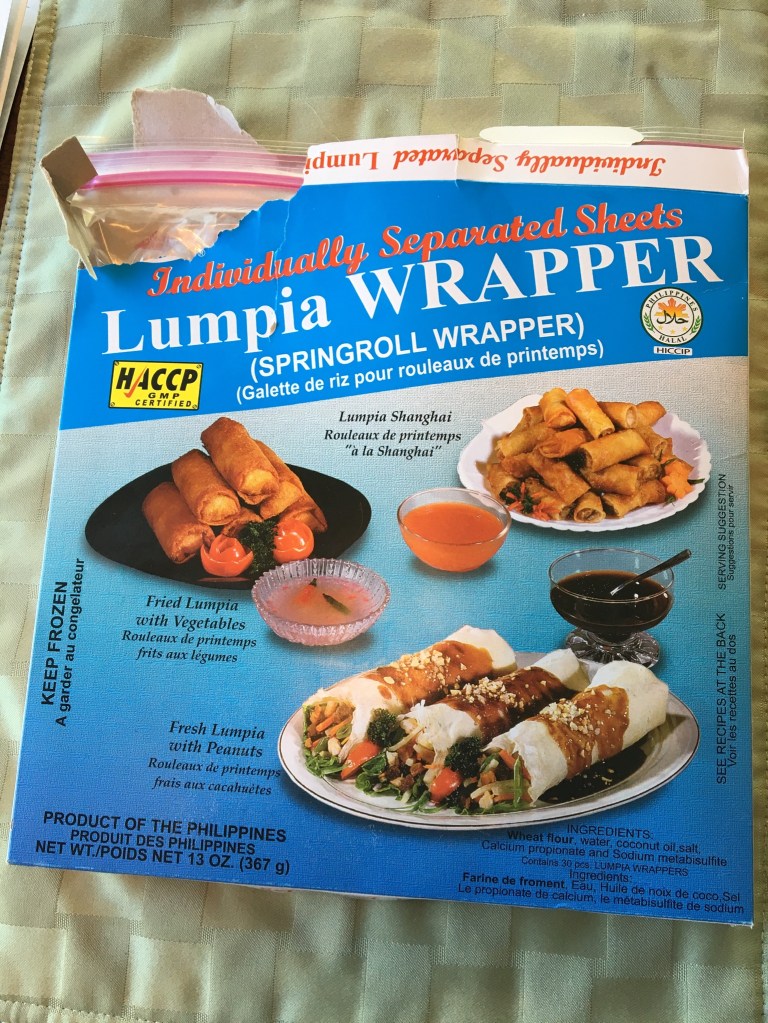
  • I use real lumpia wrappers. They are round, about 8″ diameter. They came in a box that was supposed to be frozen, but was thawed by the time it got into my house. I kept the box in the refrigerator for a couple days and they worked just fine. There was no indication of how many were in the box, but my estimate is more than 30. This recipe made 14 lumpia. Lumpia wrappers are incredibly thin. I watched a video of how they’re made and basically the dough is just smeared across the frying pan and then peeled off. Thank goodness the box of wrappers has plastic between each wrapper. The plastic sheet may be thicker than the lumpia wrapper itself.
  • Online I’ve seen that many people use egg-roll wrappers instead of lumpia wrappers. I cannot speak to that as I’ve never tried it.
  • The good reason for using cooked filling ingredients, rather than raw, is that you can fry the lumpia quickly and get that nice crispy outside texture without worry that the meat is cooked through on the inside. The frying part of this went very, very quickly on a fairly high oil temperature.
  • Once you dab water on the lumpia wrapper you need to finish rolling it immediately or the wrapper disintegrates. Just sayin’.
  • My friend who makes these a lot uses pork, carrots, cabbage, and french-cut green beans. The filling recipe is flexible and I think every family has their own way of doing it.
  • I read online someone said the filling is easier to work with if it’s been refrigerated. That sounds right. I think you’d end up with more uniform rolls and could make them larger.
  • Also, I read that you can very easily freeze the lumpia rolls before you fry them, just make sure to separate with wax paper or something like that so they won’t stick to each other. Don’t thaw first, but be careful of spatter while you’re frying frozen food. You might have to fry at a lower temperature, too, but I’m not sure as I have not tried this.
  • Lumpia was our dinner and two of us ate a dozen of them.

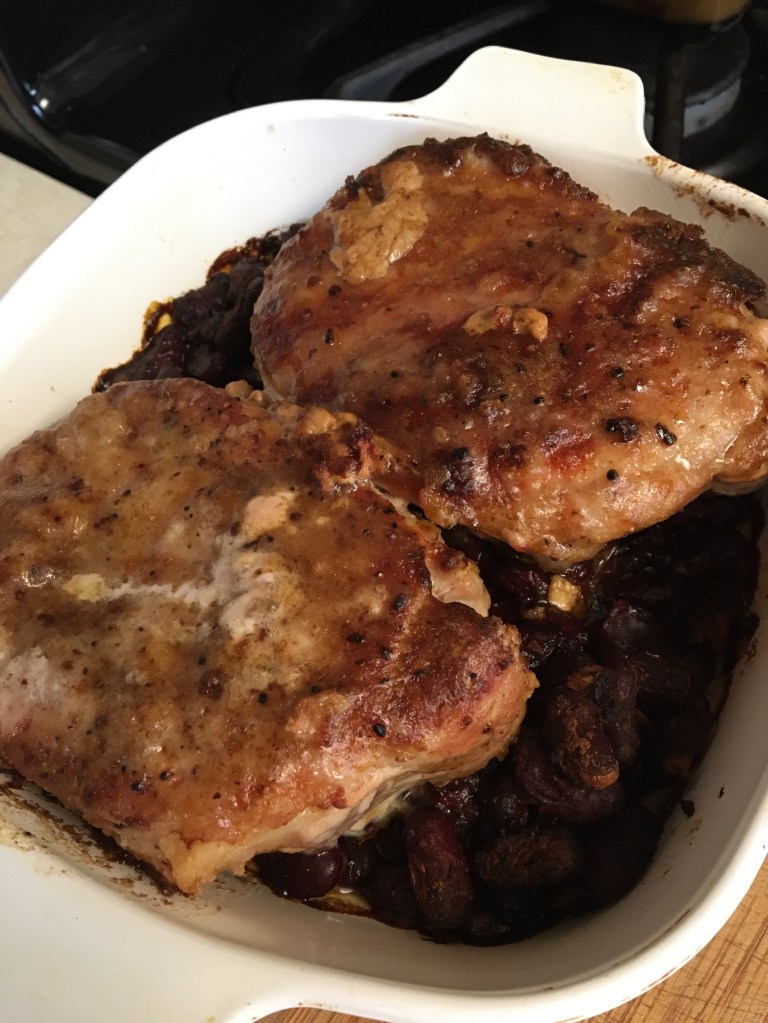
I don’t know what it is about this dish, but I really like it and make it frequently. I’m going to give you the recipe for two servings, so feel free to double or triple, etc. if you are feeding more . . . or a teenager.

  • Ingredients
  • Flour
  • Seasoning (at least salt and pepper, but whatever you like)
  • 2 pork chops (boneless or not, it doesn’t matter)
  • 1-2 Tbsp. cooking oil
  • 1 15 oz. can kidney beans
  • 2 Tbsp. minced onion
  • 2 tsp. chili powder (I use ancho chile powder if I have it)
  • Water

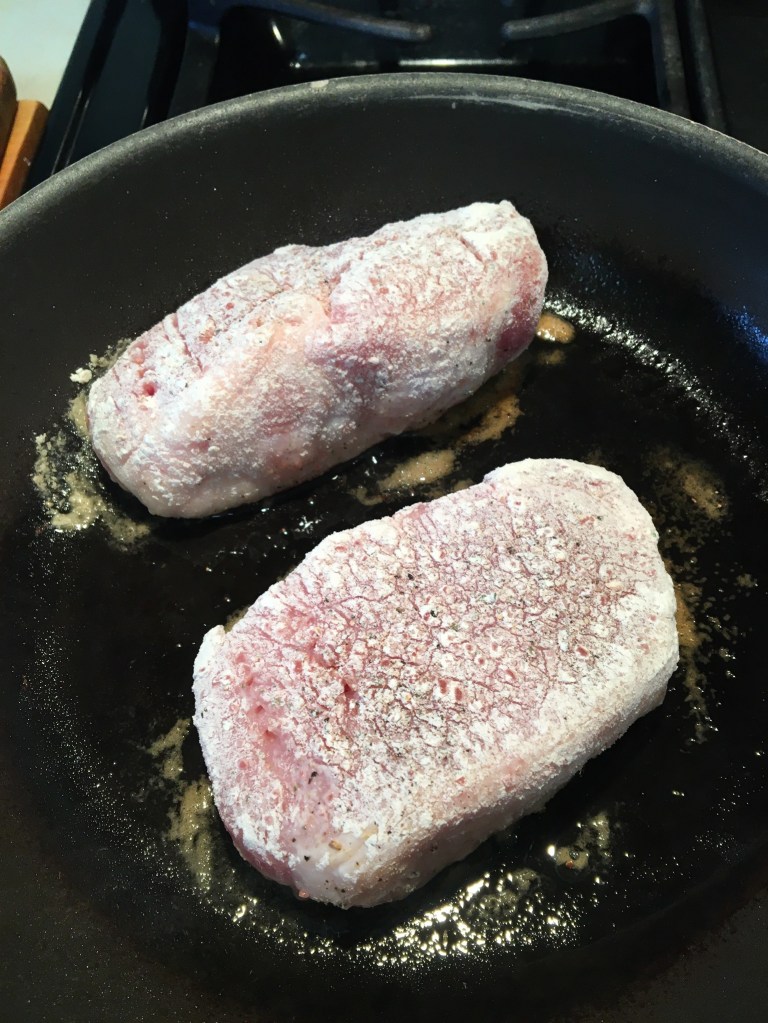
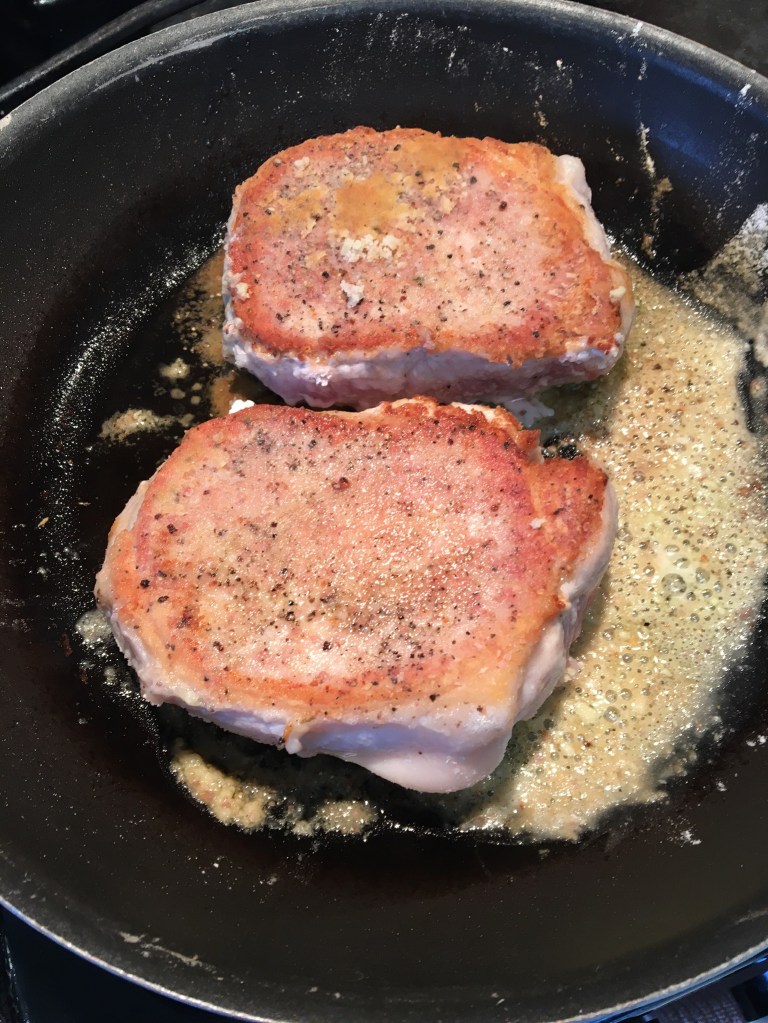
Flour and season the pork chops. Heat a small skillet and add the oil. Brown the pork chops in oil and cook a little while. They don’t need to be cooked all the way through yet.

While that is happening, open your beans and drain them in a colander. Rinse with water. Drain well and pour into a small bowl. Stir in onion and chile powder.

Preheat the oven to 375 degrees F.

If you are using an oven-proof skillet to brown your pork chops, then remove the chops and stir in splash of water, enough to swirl the pan around and stir up the browned bits. Stir in the spiced kidney beans and place the chops on top of the beans.

If you are using a different baking dish, spray it with non-stick spray. Spread the kidney beans evenly across the bottom of the dish. Remove the chops from the skillet and settle them atop the beans. Splash a bit of water in the skillet and stir up the browned bits. Pour the water over the chops and beans.

Place either the skillet or the baking dish into the oven, uncovered, at 375 degrees F for 20-30 minutes until the meat reaches a temperature of 145 degrees F. This doesn’t take long because you’ve done much of the cooking already. The beans turn a bit crispy along the edges and are so, so tasty!

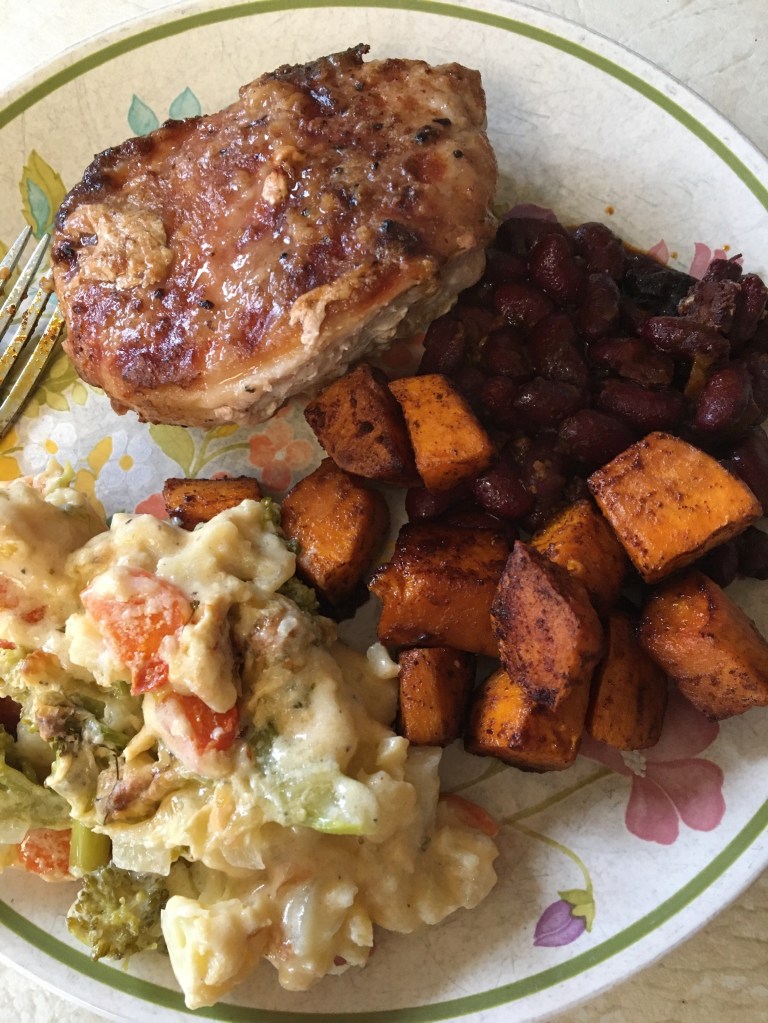
Dinner is served! Cheesy Vegetables, Pork Chops with Chili Beans, and Spicy Sweet Potatoes.

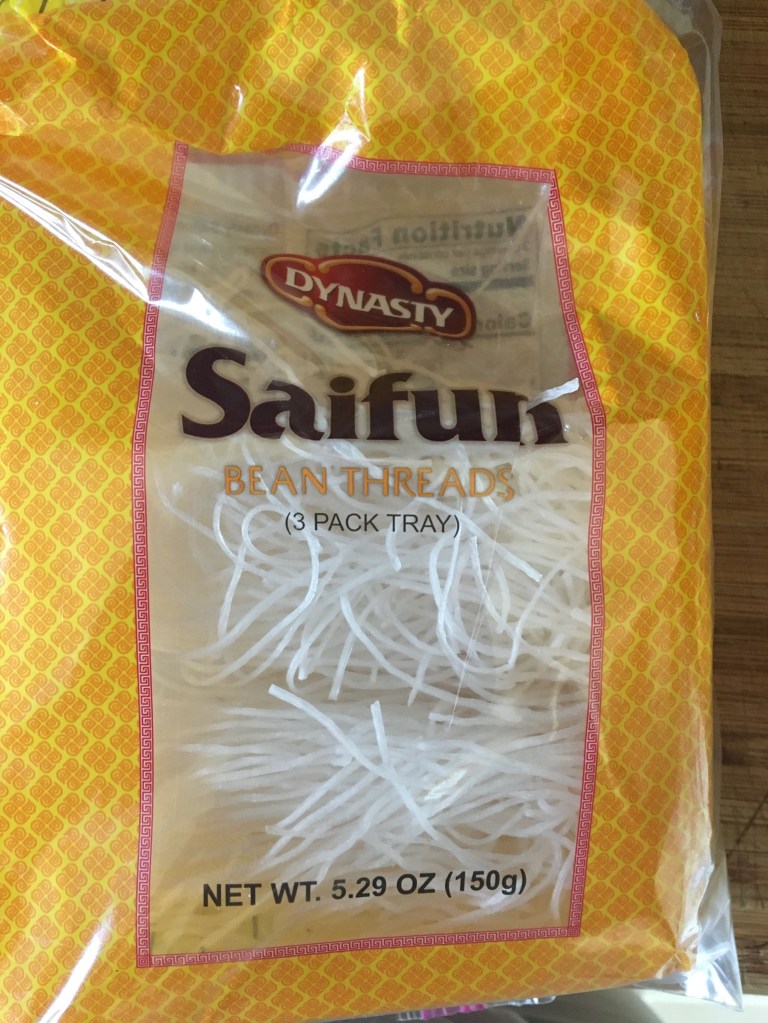
This is what happens when the grocery store pickup service makes a noodle substitution. And I’m very happy about it. These are mung bean noodles that go by various names: Saifun or bean threads or glass noodles or cellophane noodles. They are gluten-free. I received two packages and have made lunch three times so far. Please, no scoffing. I will be the first to acknowledge I have no idea what I’m doing. But I do know what I like and I like what I’ve done with these noodles. There are many recipes online for Ants Climbing a Tree and I started with the one at Saveur. The recipe then morphed because I couldn’t get the ingredients called for and that caused me to improvise.

  • Ingredients
  • 4 oz. (approximate) Chinese dried bean thread noodles*
  • Boiling water
  • 2 tsp. sesame oil
  • 3 Tbsp. canola oil
  • 1/4 lb. ground pork
  • 1 3-inch piece fresh ginger root, peeled and minced
  • 4 cloves garlic, minced
  • Pinch of red pepper flakes
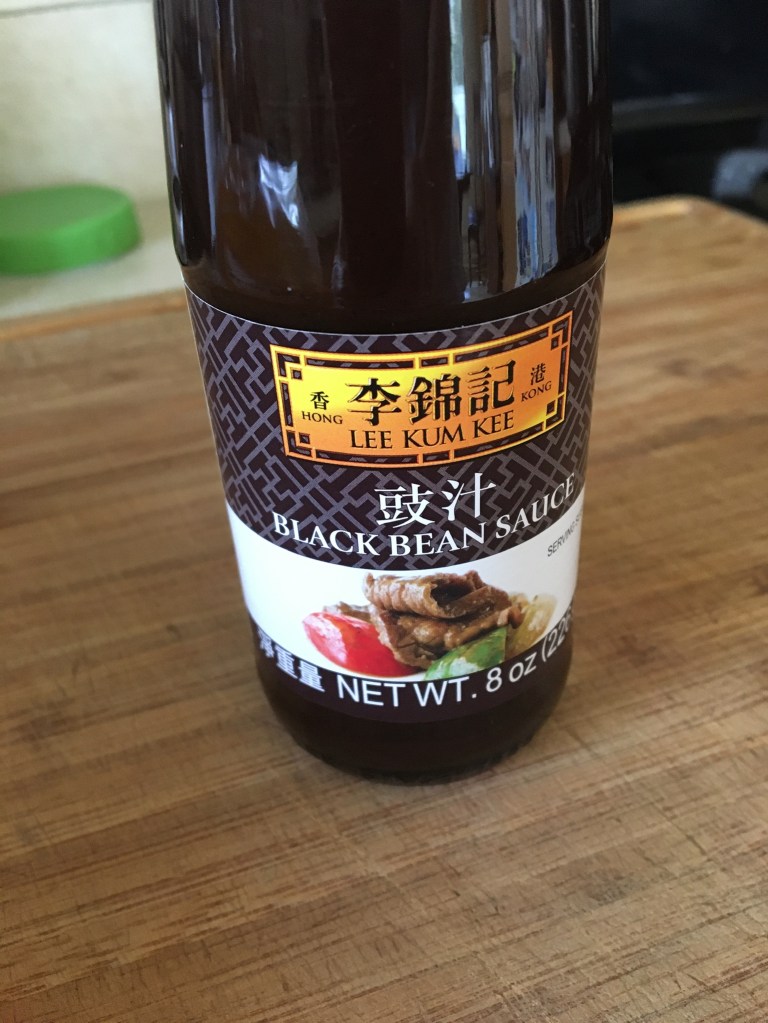
  • 3 Tbsp. Chinese bean sauce or oyster sauce**
  • 4 Tbsp. soy sauce, divided (I use the low-sodium version)
  • 1-1/2 cups chicken broth
  • 2 scallions, sliced

Cover noodles with boiling water and let stand for 4 minutes to soften. Drain and stir in sesame oil.

In a 12″ frying pan, heat canola oil and stir fry ground pork until cooked. Stir in ginger and garlic and continue to cook until fragrant, another minute or two.

Stir in red pepper flakes, bean or oyster sauce, 2 Tbsp. soy sauce, and chicken broth. Bring to a boil, then stir in noodles. Let simmer, stirring occasionally, until the liquid is reduced by half. Stir in 2 Tbsp. soy sauce and scallions. Serve warm.

Yield: 2 bowls

*I am seeing these sold in bundles and 4 oz. is 2 bundles. The packages I most recently purchased had three bundles, so I used two bundles each time I made this. What surprises me about these noodles is how well they stand up to the cooking process. They’re not mushy after all the softening and simmering. Amazing.

**The recipe calls for NO red pepper flakes and instead Chinese red chile bean paste. But I couldn’t find that. So the first couple times I made this using oyster sauce and red pepper flakes. Delicious. The next time I made this I had found Chinese bean sauce, but it’s not spicy. Oy! So, I kept using the red pepper flakes to spice things up a bit. Still Delicious! So there!

This is what I used as pictured. When I used oyster sauce, the color of the dish was much lighter, but still full of great flavor.

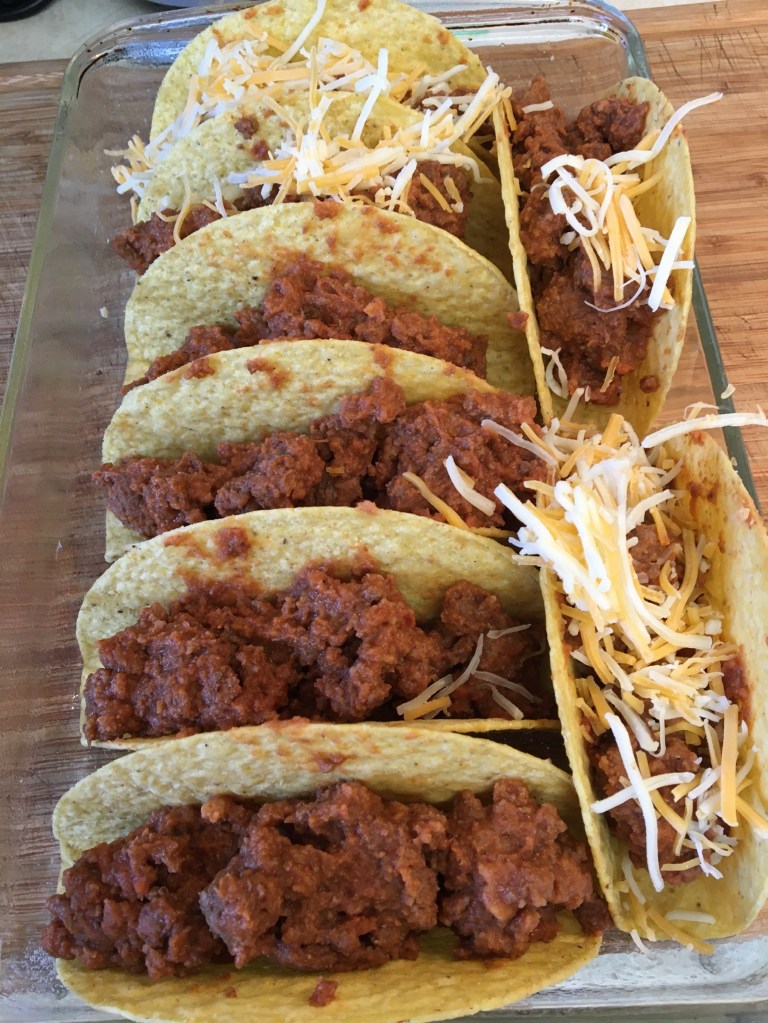
This is a super fast and delicious dish. The recipe started at OneGoodThingByJillee. Hers makes a ton, so I’ve cut it down and changed it slightly. I use Old El Paso brand Stand ‘n Stuff taco shells. There are ten shells in each box. In an 11×7″ baking dish you can fit 8 shells and that makes plenty for three people. They stand up beautifully, so there’s very little finagling. They are gluten-free. If you do not have access to these beauties, you’ll have to eyeball things to make it work. Jill has instructions on her site on how to make hard-shells from soft corn tortillas. I did try that one time, but I found it to be too tricky. The very best thing on Jill’s site is her recipe for taco seasoning and I make that ALL the time. I added a triple-recipe below.

  • Baked Taco Ingredients
  • 1 lb. ground beef
  • 3 Tbsp. taco seasoning (or one store-bought envelope)
  • 8 oz. can tomato sauce
  • 1 cup (1/2 of a 15oz. can) refried beans
  • 8 Stand ‘n Stuff taco shells
  • 1 cup shredded cheddar or Mexican mix cheese
  • Toppings of your choice (sour cream, salsa, jalapenos, etc.)

Prepare an 11×7″ baking dish by spraying with non-stick spray. Preheat oven to 400 degrees F.

In a frying pan, brown ground beef. Sprinkle with taco seasoning and then stir in tomato sauce and refried beans. Set the taco shells into the dish as pictured. Distribute the ground beef mixture evenly into all the taco shells. Sprinkle shredded cheese over all the shells. Bake at 400 degrees for ten minutes or until the cheese is melted. Top with your favorite toppings. Voila! Done! Inhale!

  • Triple-Batch Taco Seasoning Ingredients
  • 6 Tbsp. chili powder (I use ancho chili powder)
  • 1-1/2 tsp. garlic powder
  • 1-1/2 tsp. onion powder
  • 1-1/2 tsp. red pepper flakes
  • 1-1/2 tsp. dried oregano
  • 1 Tbsp. paprika
  • 3 Tbsp. ground cumin
  • 3 Tbsp. kosher salt
  • 2 Tbsp. pepper

Mix all together and use 2-3 Tbsp. for each pound of meat. For tacos, I sprinkle it over cooked ground beef, then stir in a little water and cook until the water evaporates. I also use this mix on beef or chicken fajita-makings and other types of meat. I sprinkle it on before or after cooking, it just depends. No rules! This batch should last you a good long while.

I’m craving a grilled cheese sandwich, but have no bread. So . . . this should do the trick. The recipe is out of Suzanne Nightengale’s Electric Bread (1994, Innovative Cooking Enterprises). I first made this bread in October of 1999, back when I had a bread maker. All the recipes in the cookbook are made for electric bread makers, but I no longer have one and therefore do this my own way.

  • Ingredients
  • 1-1/4 cup warm water
  • 1 package active dry yeast (3 tsp.)
  • 2 Tbsp. dry milk powder
  • 2 Tbsp. brown sugar
  • 1-1/2 tsp. salt
  • 2 Tbsp. softened butter
  • 1/2 cup dried onions (FINALLY a use for the Costco-size!)
  • 1/4 tsp. onion powder
  • 1 tsp. black pepper
  • 1 tsp. poppy seads
  • 3-1/4 cups bread flour

I use a stand mixer with a dough hook to make raised bread, but I will tell you both ways. Dissolve yeast in warm water. Stir in powdered milk, brown sugar, salt, butter, dried onions, onion powder, pepper, poppy seeds, and 2 cups flour. Once it all comes together, let it mix on low for five minutes. If you are not using a mixer, stir for a long time to build the gluten.

If you’re using the mixer, gradually add flour and mix on low until the dough is no longer tacky or sticky. Use as little flour as possible. If you are not using a mixer, turn the dough onto a floured counter or table and start kneading. Knead until the dough is no longer tacky or sticky.

Grease a bowl and place the dough into it, then turn the dough to grease the top. Cover with cling wrap and let rise until doubled in size.

Prepare a 9×5″ loaf pan by spraying with non-stick spray or greasing. Punch the risen dough down and then shape into a loaf. Place the dough into the prepared loaf pan. Let rise until the loaf top is even with the pan top. Preheat the oven to 350 degrees F. Bake at 350 degrees F for 30-40 minutes or until it is a golden color all over and sounds hollow sound when tapped. Remove from oven and let cool for ten minutes. Remove from pan onto a rack. YUM!

The recipe says this bread, when stale, can be turned into some awesome croutons.

Yield: one loaf

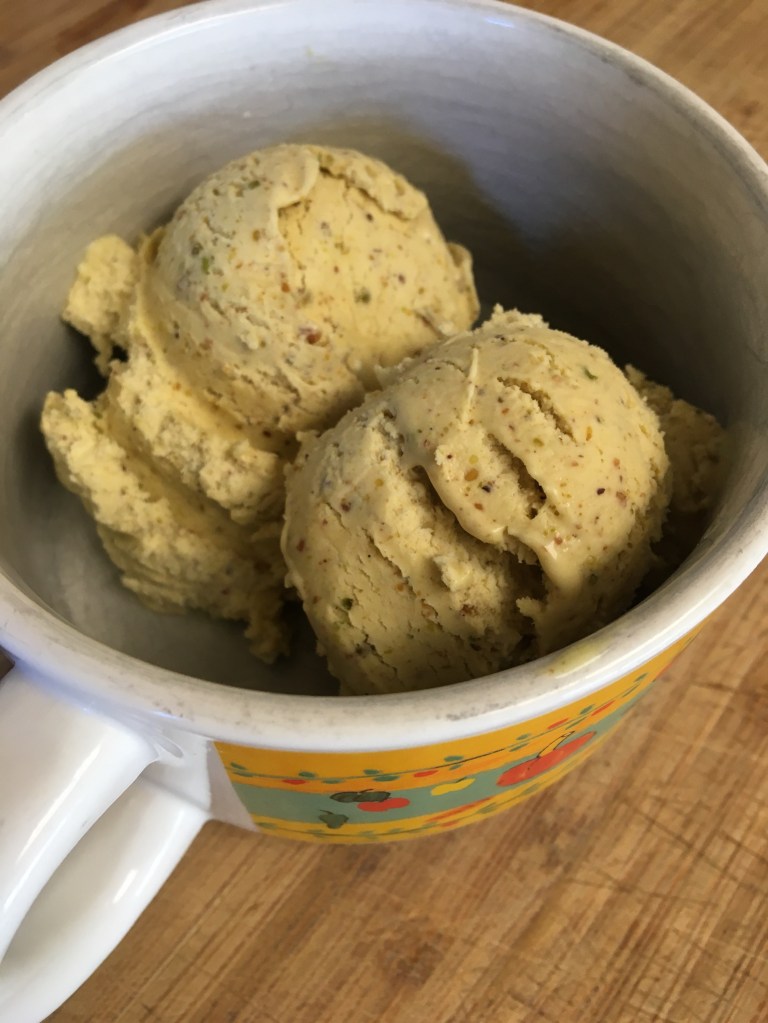
I am supposed to be onboard Celebrity Reflection in the middle of the Atlantic headed to Madeira and Ireland right now, but instead I’m at home under quarantine. Sigh. One of the highlights of cruising with Celebrity is the free scoops of gelato associated with our loyalty program. My favorite flavor is pistachio. In memory of this, I found an easy no-churn recipe for pistachio ice cream at Simply Scratch. The flavor is deeply rich and luxurious.

  • Ingredients
  • 1 cup lightly-salted shelled pistachio nuts
  • 1 14 oz. can sweetened condensed milk
  • 1 tsp. vanilla extract or paste
  • 2 cups heavy whipping cream
  • Chopped pistachio nuts (optional)

Using a food processor (I used my Cuisinart mini-prep), process pistachios into smooth butter. This takes time, be patient. I had to scrape my bowl many times. I stopped once I saw liquid (oil). It did not turn out as smooth as I would like, but it worked fine.

In a large bowl, mix pistachio butter with sweetened condensed milk and vanilla. Mix thoroughly.

In a separate large bowl, whip heavy whipping cream into stiff peaks. I used a stand mixer with a whisk attachment.

Carefully fold the whipped cream into the pistachio mixture until well blended. Remember to fold, not stir. Patience!

If you want pieces of pistachio in your ice cream, or on top of your ice cream, do that now. I like my ice cream smooth, so I didn’t add any extra nuts. Place into a container, cover, and freeze for at least 4 hours. When you’re ready to serve, you may have to let it set out for a bit. Mine was easy to scoop out, I didn’t have to let it sit.

This is SO yummy!

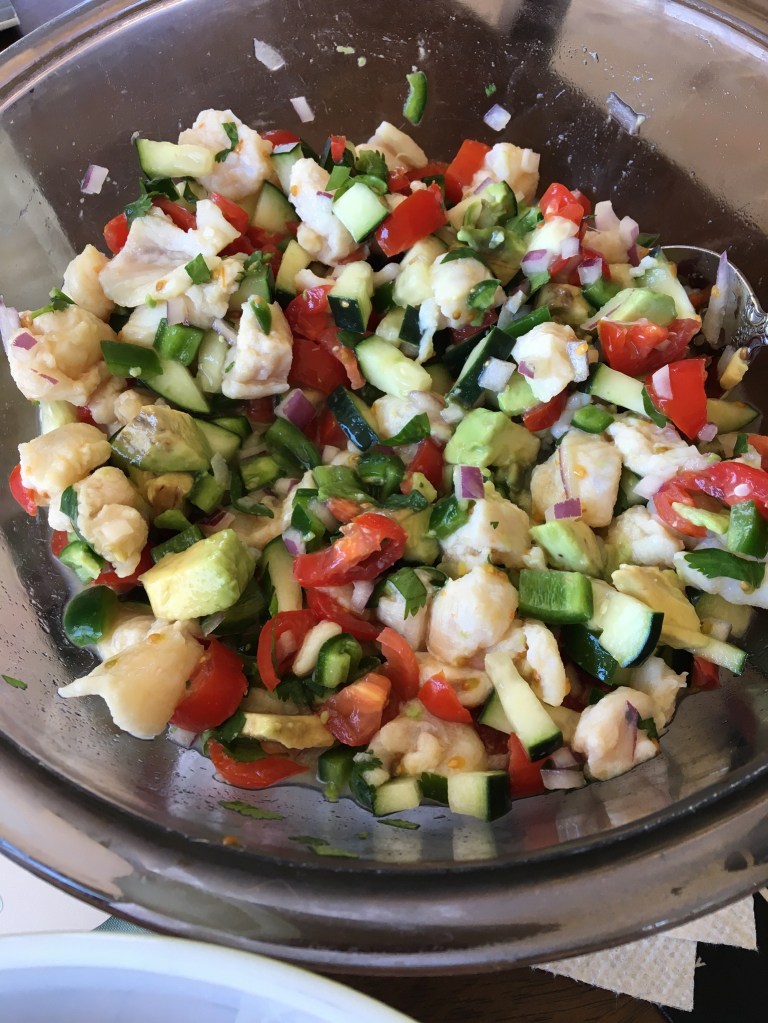
I ate half of this all by myself. Burp. The recipe from my cousin Pam calls for 6 Swai fillets and yields about 10-12 servings as a snack. I cut the recipe and used two fillets. It still makes enough to feed four, or three if one of them eats half of it. Just sayin’. I’m going to list the ingredients, but the amounts are really up to you.

  • Ingredients
  • Swai fillets (I have used other whitefish at different times, still quite tasty)
  • Lime juice
  • Salt
  • Tomatoes, diced
  • Cucumbers, diced
  • Jalapenos or serranos (pictured here are jalapenos), diced
  • Red onion, diced
  • Cilantro, chopped
  • Avocado, diced
  • Tortilla chips

Slice the fish into tidbits, about 1/2″ pieces. Place into a large bowl and cover with lime juice. This time I used bottled lime juice, but I’ve also squeezed fresh — takes a lot of limes! Make sure there is enough lime juice to cover the fish. Sprinkle generously with salt (for 2 Swai fillets I used about 1/2 Tbsp. salt). Cover the bowl and let stand refrigerated for an hour (longer is fine).

Chop remaining ingredients, except avocado and chips, and stir into the fish mix. Taste for salt and add more if needed. Cover and let stand refrigerated for an hour (longer is fine).

Just before serving, stir in the avocado. Serve with tortilla chips.

What kind?