
You are currently browsing the monthly archive for September 2018.

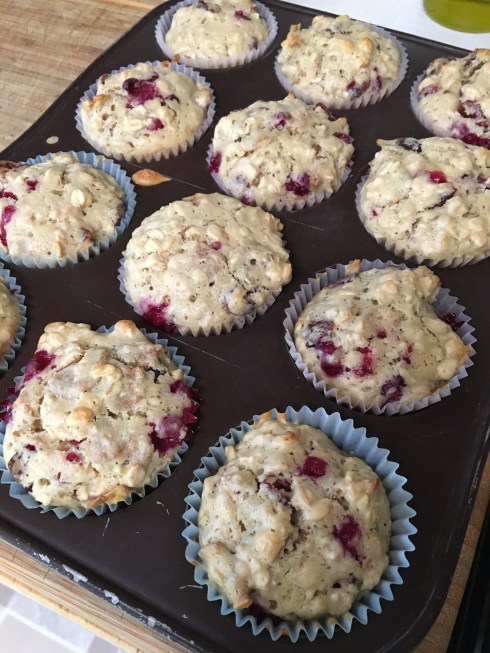
I’ve made these for years and years. I don’t remember where the recipe came from. They are super simple to make and take no time at all. Many times I combine the dry ingredients in a bowl the night before, prepare the muffin pan with papers, and set my oven to come on at 375 degrees fifteen minutes before my morning wake-up alarm goes off. Then in the morning I add the three wet ingredients, distribute the batter into the prepared pan, pop them into the oven to bake while I shower, and have a tasty breakfast all ready for the day.
I’ve probably used every kind of dried fruit imaginable in these, and quite a few different frozen fruits, too. Today’s batch I threw in a handful of dried cranberries and a handful of frozen lingonberries. Yum!
Ingredients:
1-1/2 cups flour
1 cup bran cereal FLAKES (NOT All-Bran)
1 cup rolled oats
1/2 cup brown sugar, firmly packed
1-1/2 tsp. baking soda
1-1/4 cups buttermilk
1 large egg
1/4 cup butter, melted
Optional: handfuls of dried, frozen or fresh fruit
Preheat oven to 375 degrees. Prepare a muffin tin by greasing or using paper liners. I use liners for easy clean-up. In a large bowl, stir together the dry ingredients. In a small bowl stir together the buttermilk, egg, and melted butter. Make a well in the center of your dry ingredients and pour the wet ingredients in. Stir until just combined. Batter will be thick and lumpy. Fold in optional fruit. Spoon batter evenly into prepared muffin pan. Bake at 375 degrees F for 20-23 minutes, until they spring back when lightly touched. Makes 12. These freeze very well.

This recipe comes from PeaceLoveandLowCarb.com. I have been making this lately when I know that time is short or I just don’t feel like making anything complicated. It is really yummy and filling and warms you up without being sloppy.
Ingredients:
2 Tbsp. sesame oil
3 cloves garlic, minced
1/2 cup onion, diced
5 scallions, sliced, divided between green and white parts
1 lb. ground pork (I assume other ground meats would work fine)
1/2 tsp. ground ginger
Salt and pepper to taste
1 Tbsp. Sriracha
14 oz. bag of coleslaw mix
3 Tbsp. soy sauce
1 Tbsp. rice vinegar
2 Tbsp. sesame seeds
Heat sesame oil in skillet, add garlic, onion, and white part of scallions. Saute until onions are translucent. Add pork, ginger, salt & pepper, and Sriracha. Stir while sauteeing until the pork is cooked through. Add the coleslaw mix, soy sauce, and rice vinegar. Saute while gently stirring until the coleslaw is tender. Sprinkle with the reserved green parts of the scallions and the sesame seeds. Serve hot. Spice it up with a little more Sriracha if you like.


This is extremely simple, but really yummy. The lemon juice and tomatoes are a nice tart contrast to the earthy bean flavor. You will need small white beans, grape tomatoes, green onions (scallions), lemon juice, olive oil, salt and pepper. There are no set measurements, just use your eyes and your taste buds.
I start with one can of small white beans, drained. Rinse and drain again. While it’s draining, cut grape tomatoes in half. Slice green onions. Stir the beans, tomatoes, and green onion together gently. Sprinkle with lemon juice, olive oil, salt and pepper, then stir gently again. Boom! Done. If not serving right away, keep it refrigerated and then give it a stir when you’re ready to serve.
 So, I made this deliciousness last night for dinner. And I mean DELICIOUS! I had to search Pecorino Romano vs Parmigiano Reggiano in order to find out what the difference is. Apparently, it’s an important difference in this instance. Yes, of course, you can use parmesan, but I tell you this was flat out tasty and I think the Pecorino Romano was the reason. The recipe is found at Ciao Chow Bambina. I changed the recipe by using gluten-free flour (Namaste Perfect Blend) and was VERY pleased with the result. The recipe is a bit complicated, but I learned some things along the way and I can say I’ll be making this again.
Ingredients:
1 medium cauliflower, broken into florets (NOT mashed)
1 tsp. salt
1 medium red onion
Olive oil
1/2 tsp. chopped fresh rosemary (I used dried)
2-3 Tbsp. melted butter
1 Tbsp. white sesame seeds
1 Tbsp. black sesame seeds
6 eggs
1/2 cup basil leaves, chopped
1 cup gluten-free flour (I used Namaste Perfect Flour Blend)
1-1/2 tsp. baking powder
1-1/2 cups grated Pecorino Romano cheese
Salt and pepper
Place the cauliflower florets and 1 tsp. salt into a saucepan with an inch or so of water in the bottom. Cover and bring to a boil. Let simmer, checking the florets every few minutes, until they are quite soft. Drain and set aside in a colander.
Cut 3 round slices, each 1/4-inch thick, off one end of the red onion and set aside. Chop the rest of the onion and place in a small pan with a little olive oil and the rosemary. Saute until the onion is tender, stirring frequently. Set aside to cool. Preheat oven to 400 degrees F.
Line the base and the sides of a 8-1/2 inch springform cake pan with parchment paper. I found how to do this on YouTube. Place your pan on top of parchment paper and draw a circle around the outside. Cut out the circle — that’s the bottom piece. Roll your cake pan on its side to measure out how long/wide a piece of parchment paper you need for the sides. Cut it. Butter the bottom and sides of the cake pan and place the parchment paper onto it. It sticks! Voila! Then brush the sides only with melted butter. Mix the sesame seeds together and sprinkle them onto the sides. I rolled the pan slowly while sprinkling. Voila again! They stick. It worked really well.
Place your sautéed and cooled onions into a large mixing bowl. Add eggs and chopped basil. Mix well. Add flour, baking powder, 1-1/4 cups Pecorino Romano, 1 tsp. salt and pepper to taste. Mix until smooth. Add the cauliflower florets and stir gently until well combined.


Carefully spoon the thick batter into the prepared springform pan, spreading evenly and smoothing the top. Arrange the reserved onion rings on top. I pressed mine into the batter a little bit. Place into the preheated 400 degree oven for 45 minutes, or until golden brown and set. It took mine about 55 minutes. Remove from oven and let rest for 15 minutes. Unlock the pan and remove the parchment paper. Serve warm with Pecorino Romano sprinkled over the top. Heavenly.


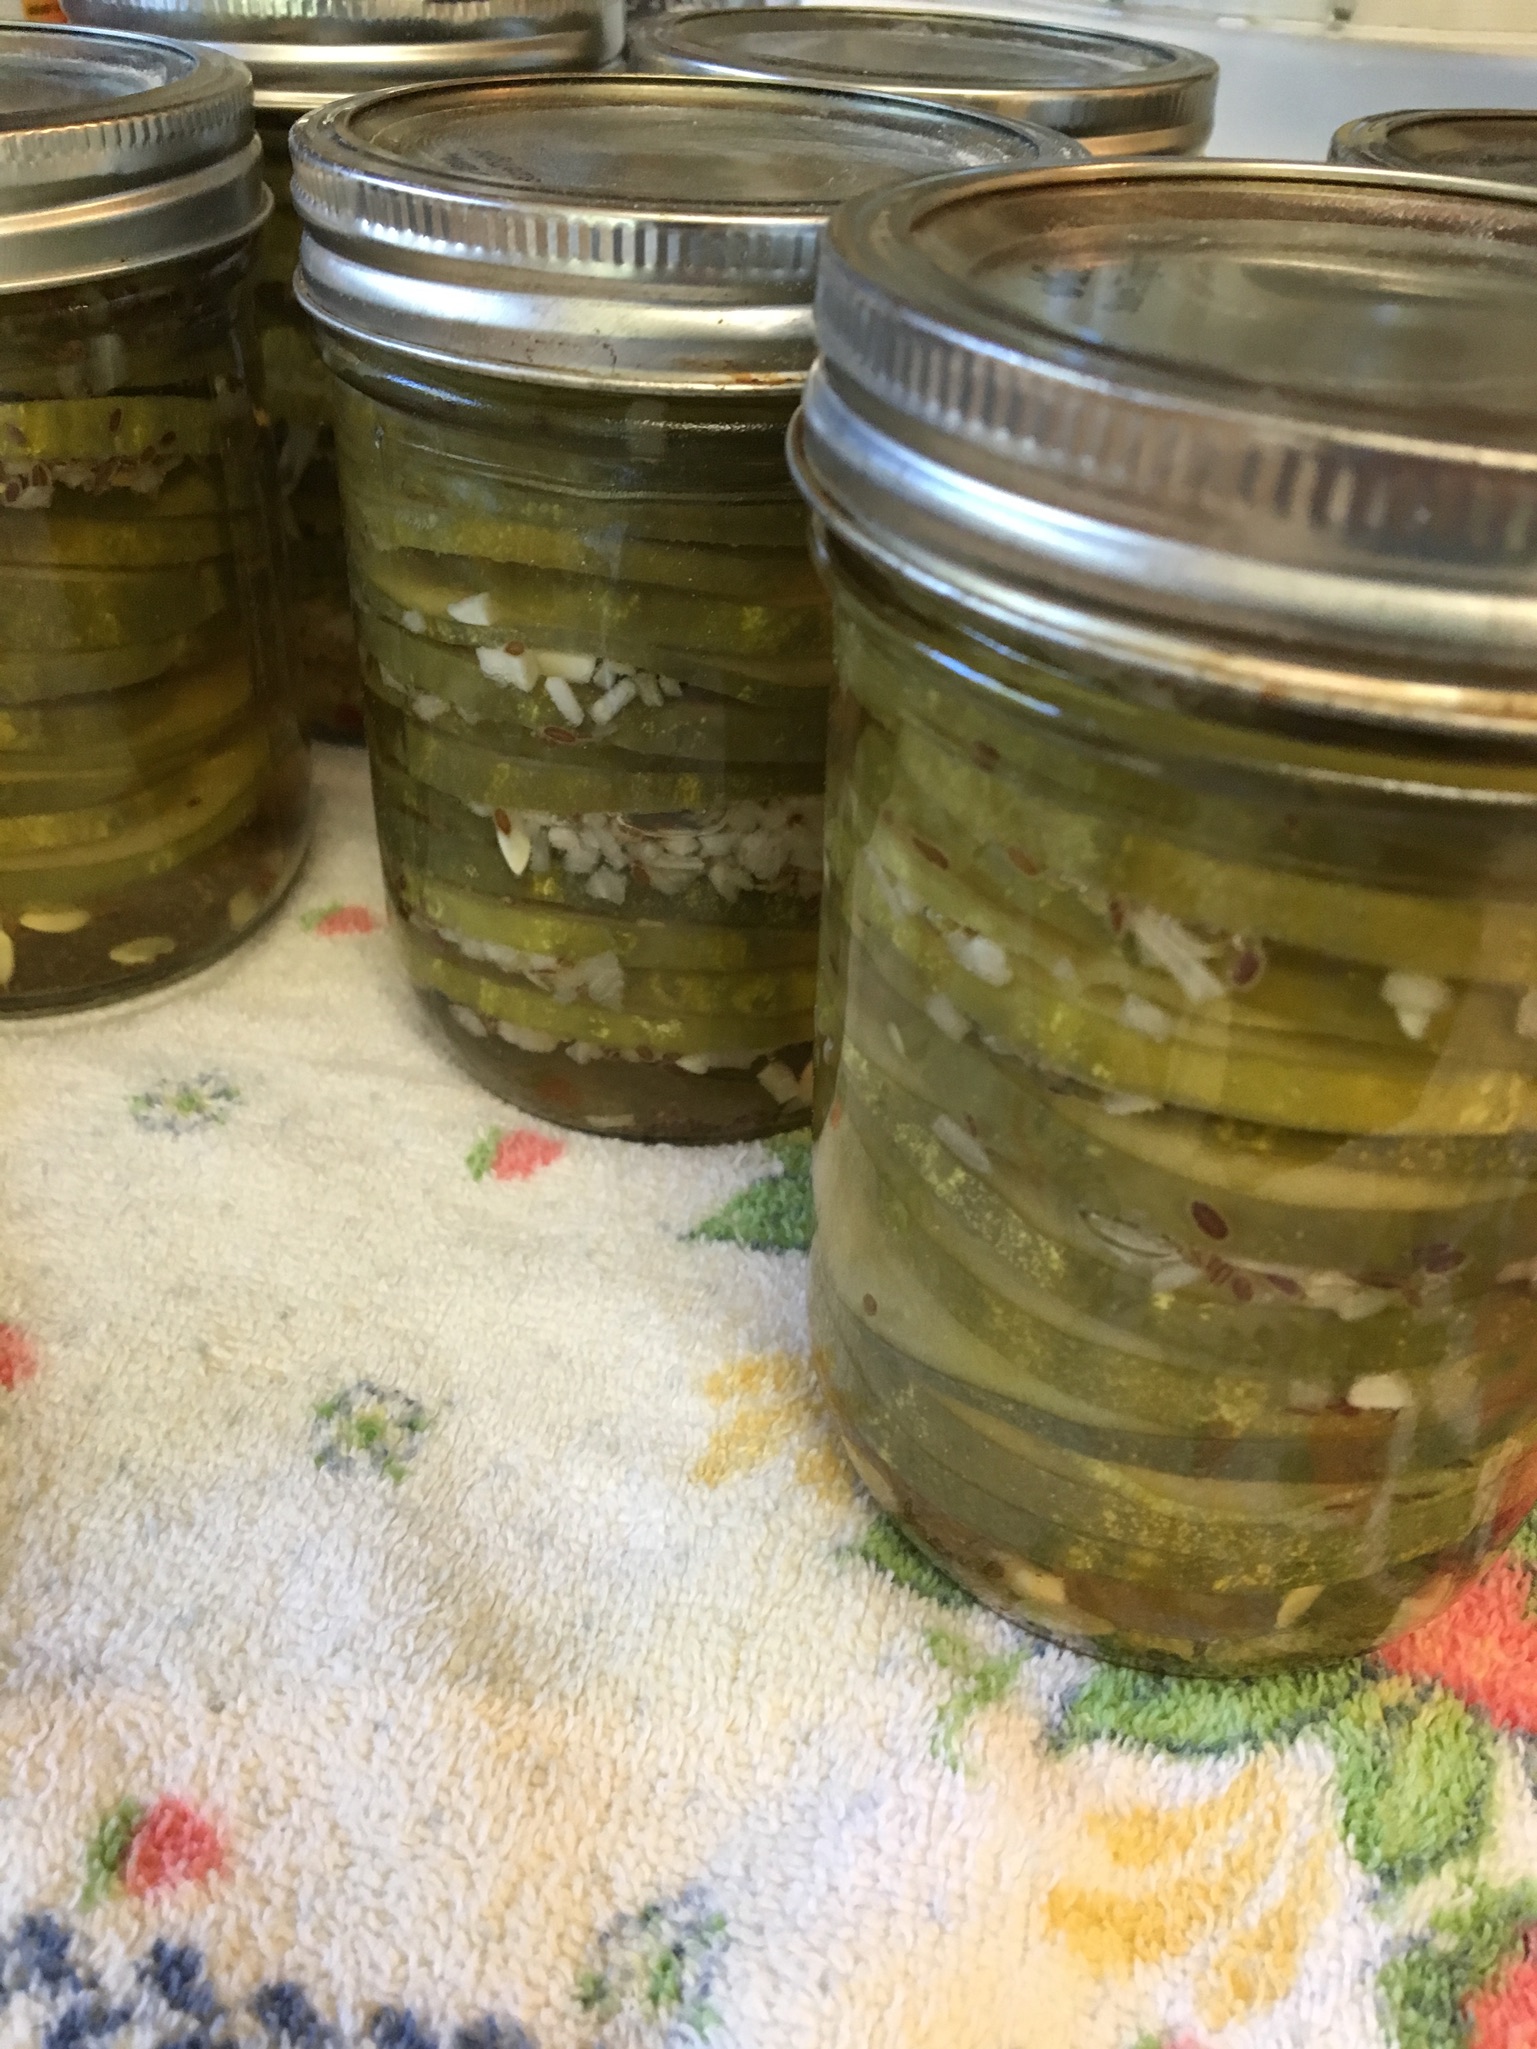
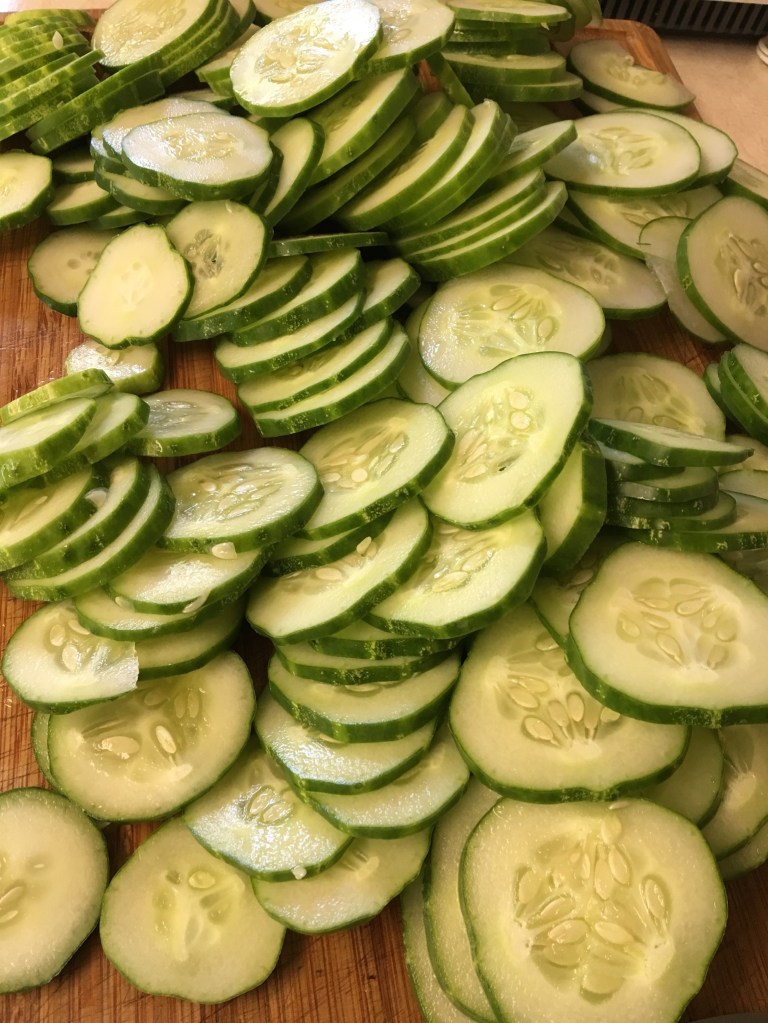
My cucumbers are humongously fat so I thought it would be nice to make these dill chips layered carefully into pint jars (makes 6 pints). They are pretty. The recipe is based upon one found at CookingBride.com. She says it will take about 3 weeks before they’re ready to eat. Maybe I can wait. Maybe.
- TO BEGIN
- 2 Tbsp. canning salt
- 3 cups water
- 4 lbs. cucumbers, sliced into 1/4″ slices, crosswise
In a very large non-corrosive bowl, mix together salt and water until salt has dissolved. I used my 32-cup Tupperware bowl. Add the cucumbers and stir around gently with your hands until all has been coated with salt water. Let stand 2-3 hours.
Drain cucumbers and rinse with fresh, cold water. I rinsed my big bowl, added cold water and put the cucumbers into it for a few minutes, then drained it again. Let stand until called for.
- TO CONTINUE
- 2 cups cider vinegar
- 1 cup white vinegar
- 3 cups water
- 2 Tbsp. sugar
- 2 Tbsp. canning salt
- 6 tsp. dill seed
- 6 tsp. minced garlic
- 6 tsp. DRIED minced onion
- 2 tsp. dried chili flakes
In a large saucepan add vinegars, water, sugar, and salt. Bring to a boil. In the meantime, add 1tsp. dill seed, 1 tsp. minced garlic, 1 tsp. dried minced onion, and a pinch of dried chili flakes to each of 6 sterile pint jars.
Ladle a bit of hot brine into each jar. Start layering the cucumber slices into the jars, adding brine once in awhile so the slices do not stick together. Once all the cucumbers are used up, distribute the remaining brine. Run a knife around gently and tap the jars so as to get the bubbles out and use up as much brine as possible. Make sure to leave 1/2″ head space at the top of the jars. Screw hot lids onto the jars. I shook the jars around to get the spices distributed.
Place the jars in a boiling water bath for about 20 minutes of processing.

20 August 2019 update: This turned out to be a favorite over the winter. It’s really, really tasty. We used on burgers and sandwiches.
 Too many cucumbers! This one looked good, not sure it’s going to withstand the canning process, but . . . too many cucumbers!
I started with a recipe from Many Grandmas. My cucumbers were so big it was difficult to slice them into strips as indicated in her recipe, but I went for it anyway. Here is how I did the recipe.
2 very large cucumbers
1 very large carrot
1/2 tsp. salt
1 cup rice vinegar
1 cup water
1/2 cup sugar
4 Tbsp. sweet chili sauce
2 cloves garlic, minced
Cut the cucumbers in half lengthwise and then lay the cut side down on the cutting board. Using a vegetable peeler, peel the cucumber down into very thin slices.
Peel the carrots and then use a lemon zester to score the length of the carrots several times. Slice the carrots cross-wise. The scoring will make them into a pretty flower shape.
Put the cucumbers and carrots into a bowl and sprinkle with salt. Mix gently, but well. Let stand for 30 minutes or so. Drain. Rinse with cold water and drain again. Let stand.
In a saucepan mix vinegar, water, sugar, and sweet chili sauce. Heat to boiling.
Sprinkle the minced garlic into two pint jars. Divide the vegetables into the jars and pour hot brine over all, leaving 1/2″ headspace. Screw lids onto the tops of the jars and process in boiling water bath for 5 minutes. Remove.
In case you don’t know what sweet chili sauce is . . .

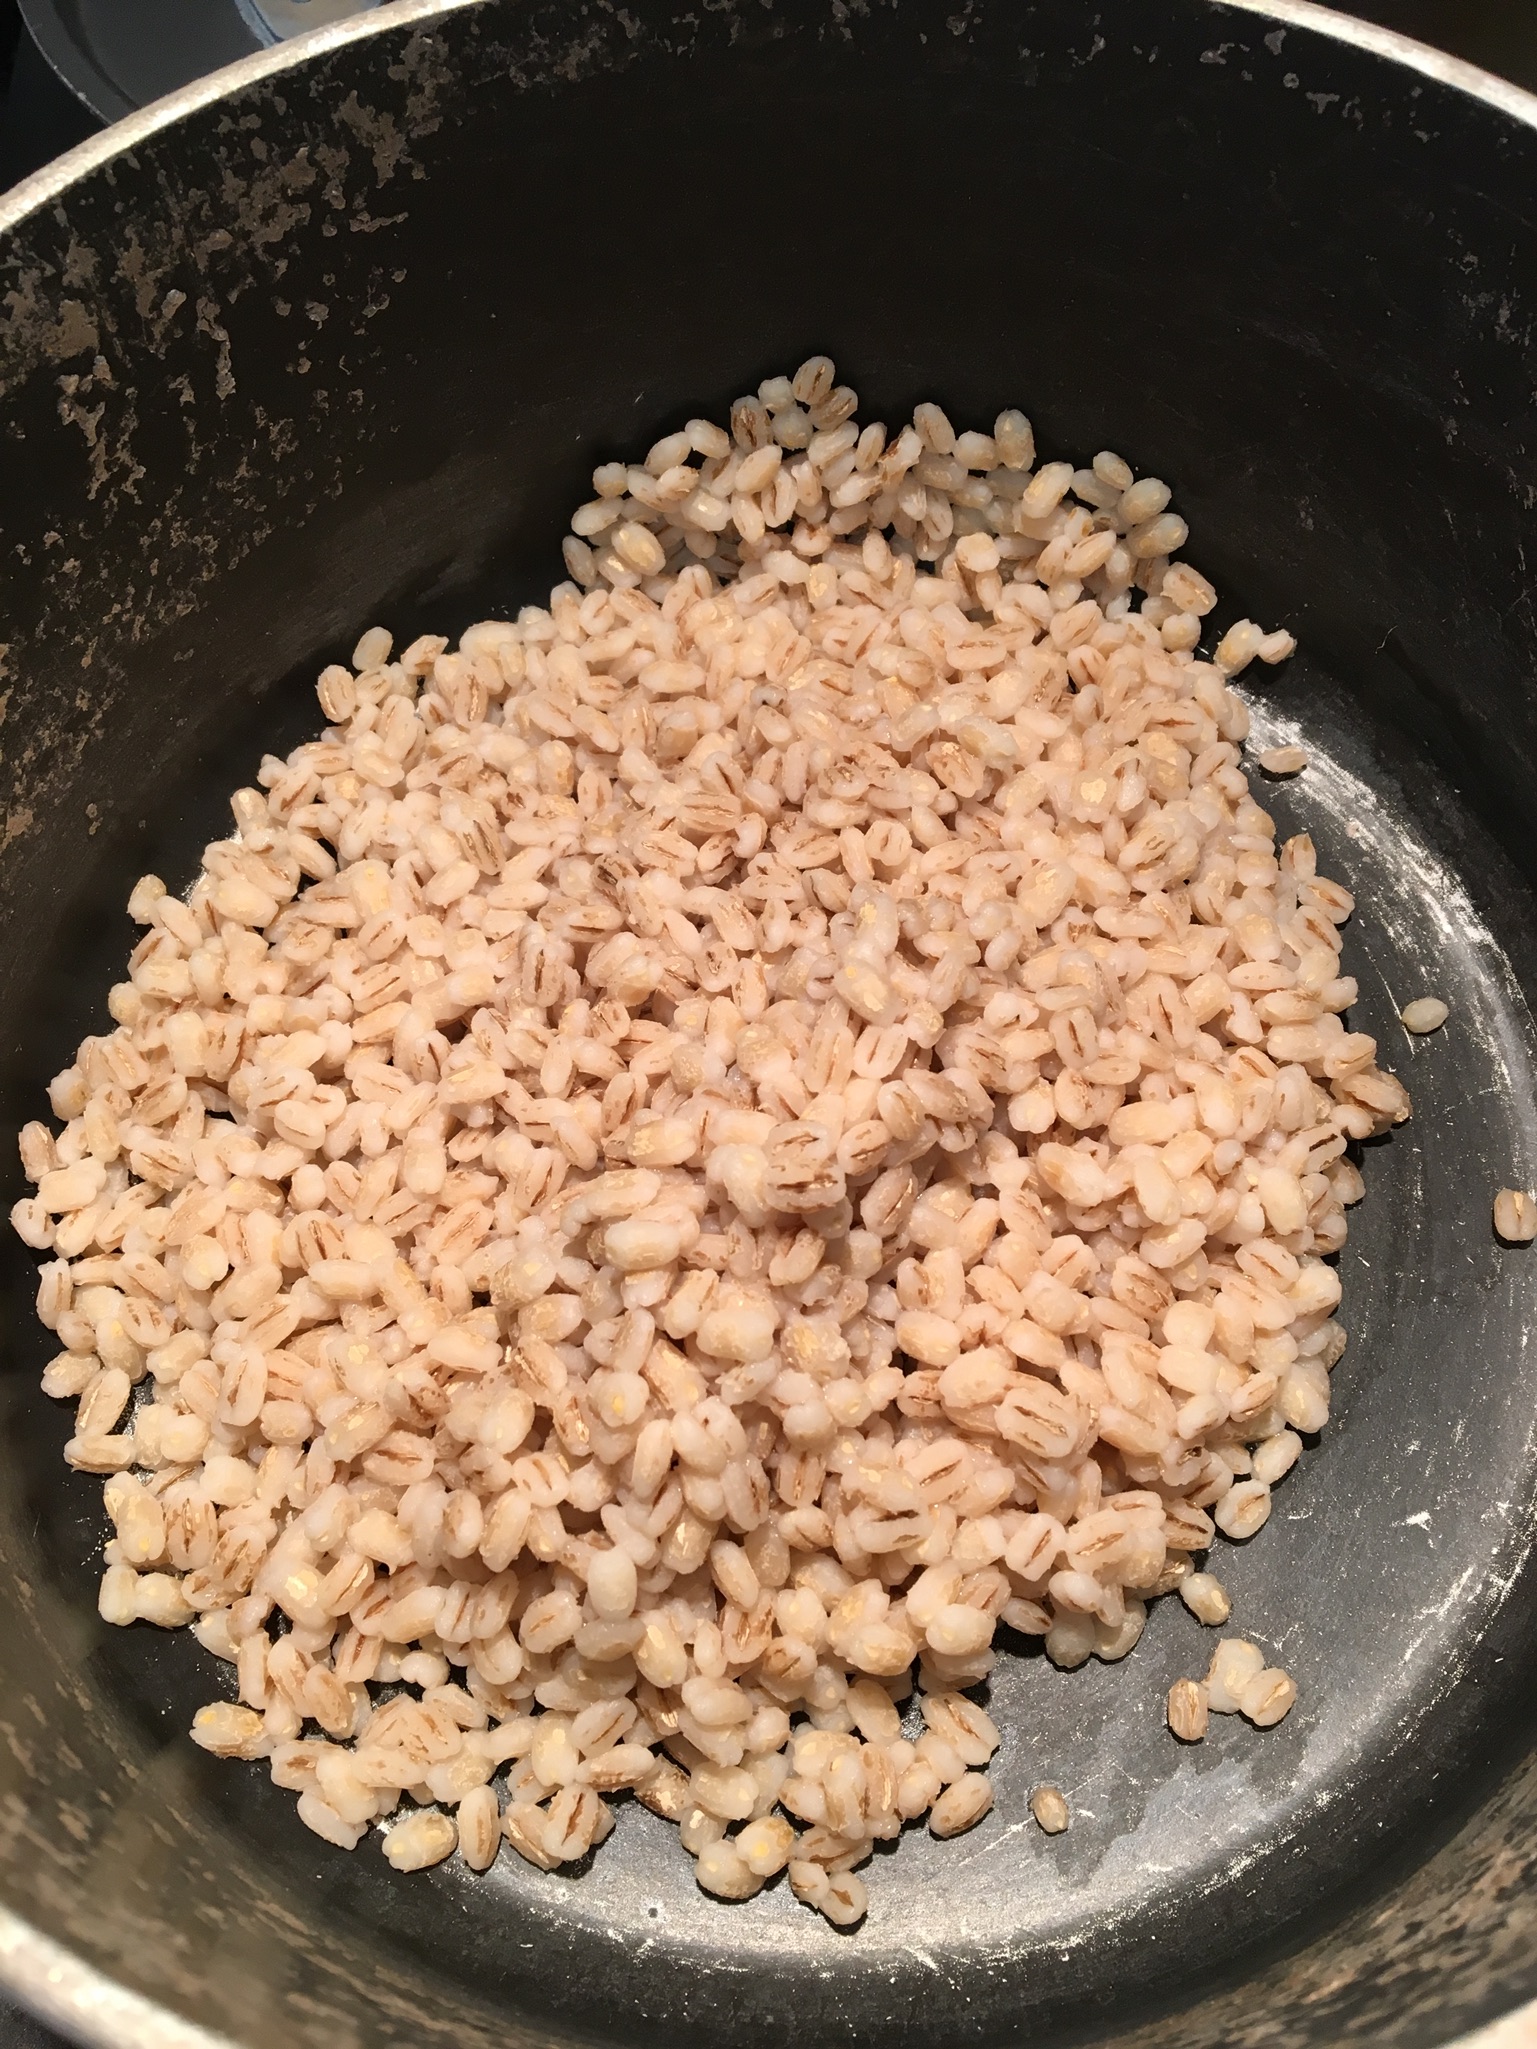
This is a riff on a recipe I clipped back in the 1980s or 1990s, probably from Sunset Magazine. I really like it for the use of barley, which I really enjoy instead of the usual rice. The original recipe used veal or dark turkey meat and called for a layer of yeast bread over the top. I did try it that way once, but it was too doughy, just too much bread. I usually use chicken breast, but have also used pork. It’s a very forgiving recipe, so just do it that way you want to. Warning that the preparation is time consuming.
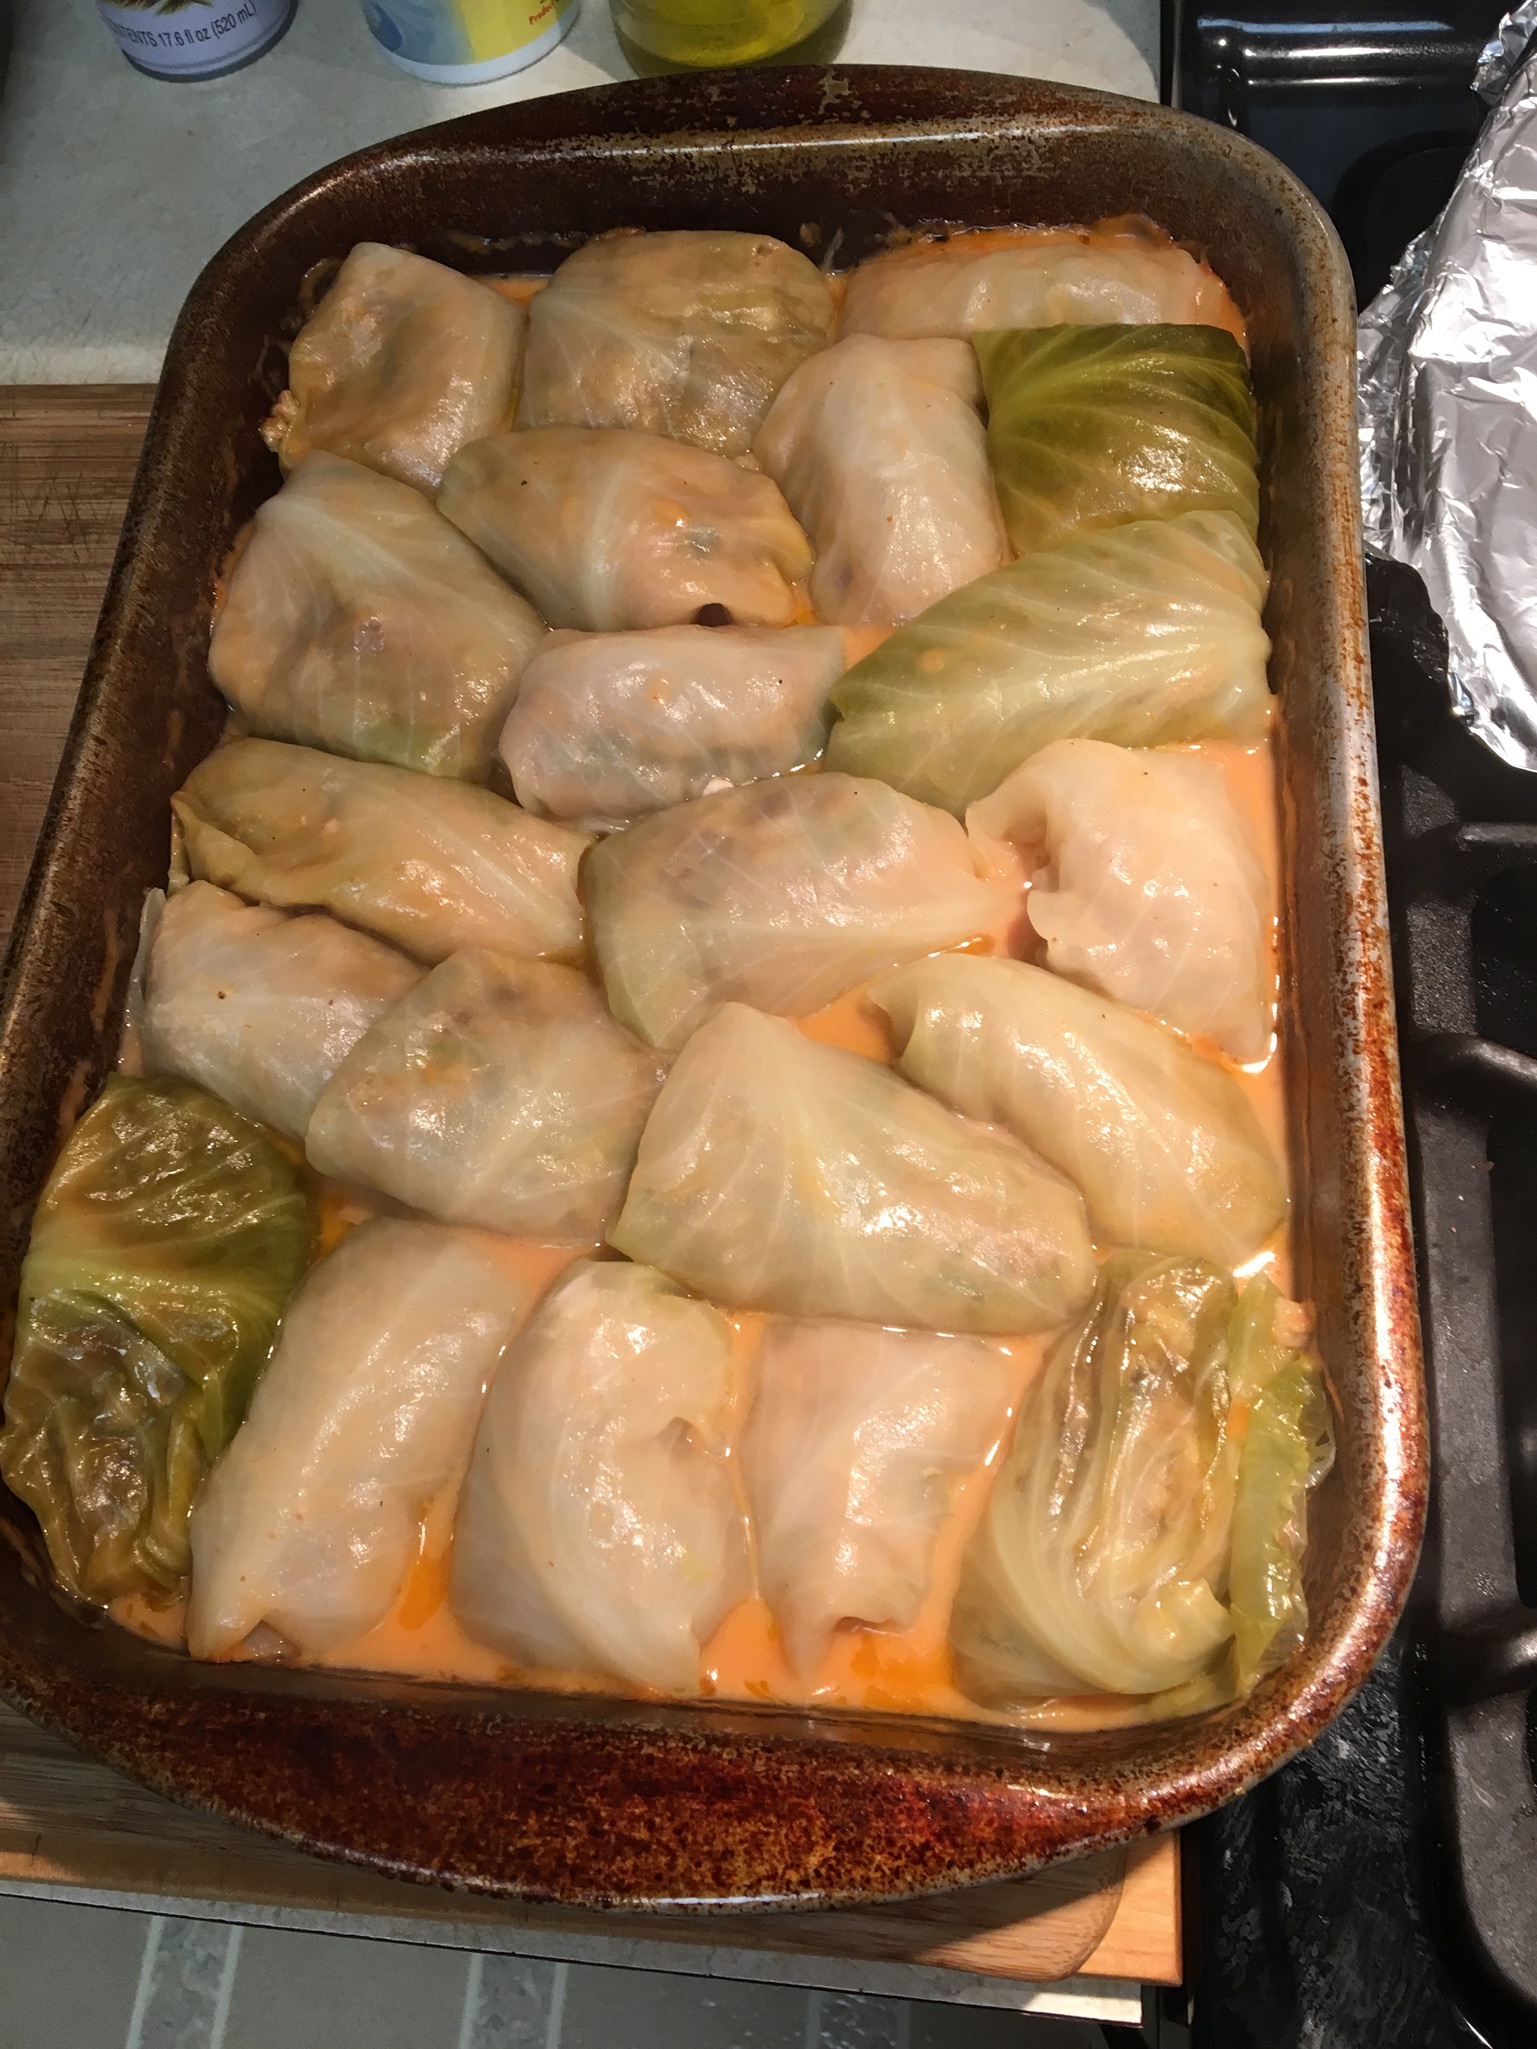
Ingredients:

1/2 cup pearl barley
1 large head cabbage
1 lb. boneless, skinless chicken breast
Flour for dredging
1 Tbsp. butter
1 Tbsp. olive oil
1 small red bell pepper, stemmed, seeded, and slivered
1/4 cup sour cream
2/3 cup chicken broth
2/3 cup dill pickles, slivered
Salt & pepper to taste
Smetana Sauce (recipe below)
Combine barley with 2 cups water in a 1 to 1-1/2 quart pan. Bring to a boil, cover, and simmer until barley is tender to bite, about 30 minutes. Drain, set aside.
Bring 4 to 5 quarts water to boil in a very large pot over high heat. Core cabbage and, with a spoon, submerge head in water for 20 seconds or so. Lift out cabbage; when cool enough to touch, gently pull off as many outer leaves as you can. Repeat until you have about 12 to 14 large leaves.

Return the leaves to the boiling water, about 4 at a time, and cook until each one is pliable, 2 to 4 minutes; drain well. I lay out a tea towel for them to sit on. Cut the thick section of the stem from the back of each leaf.


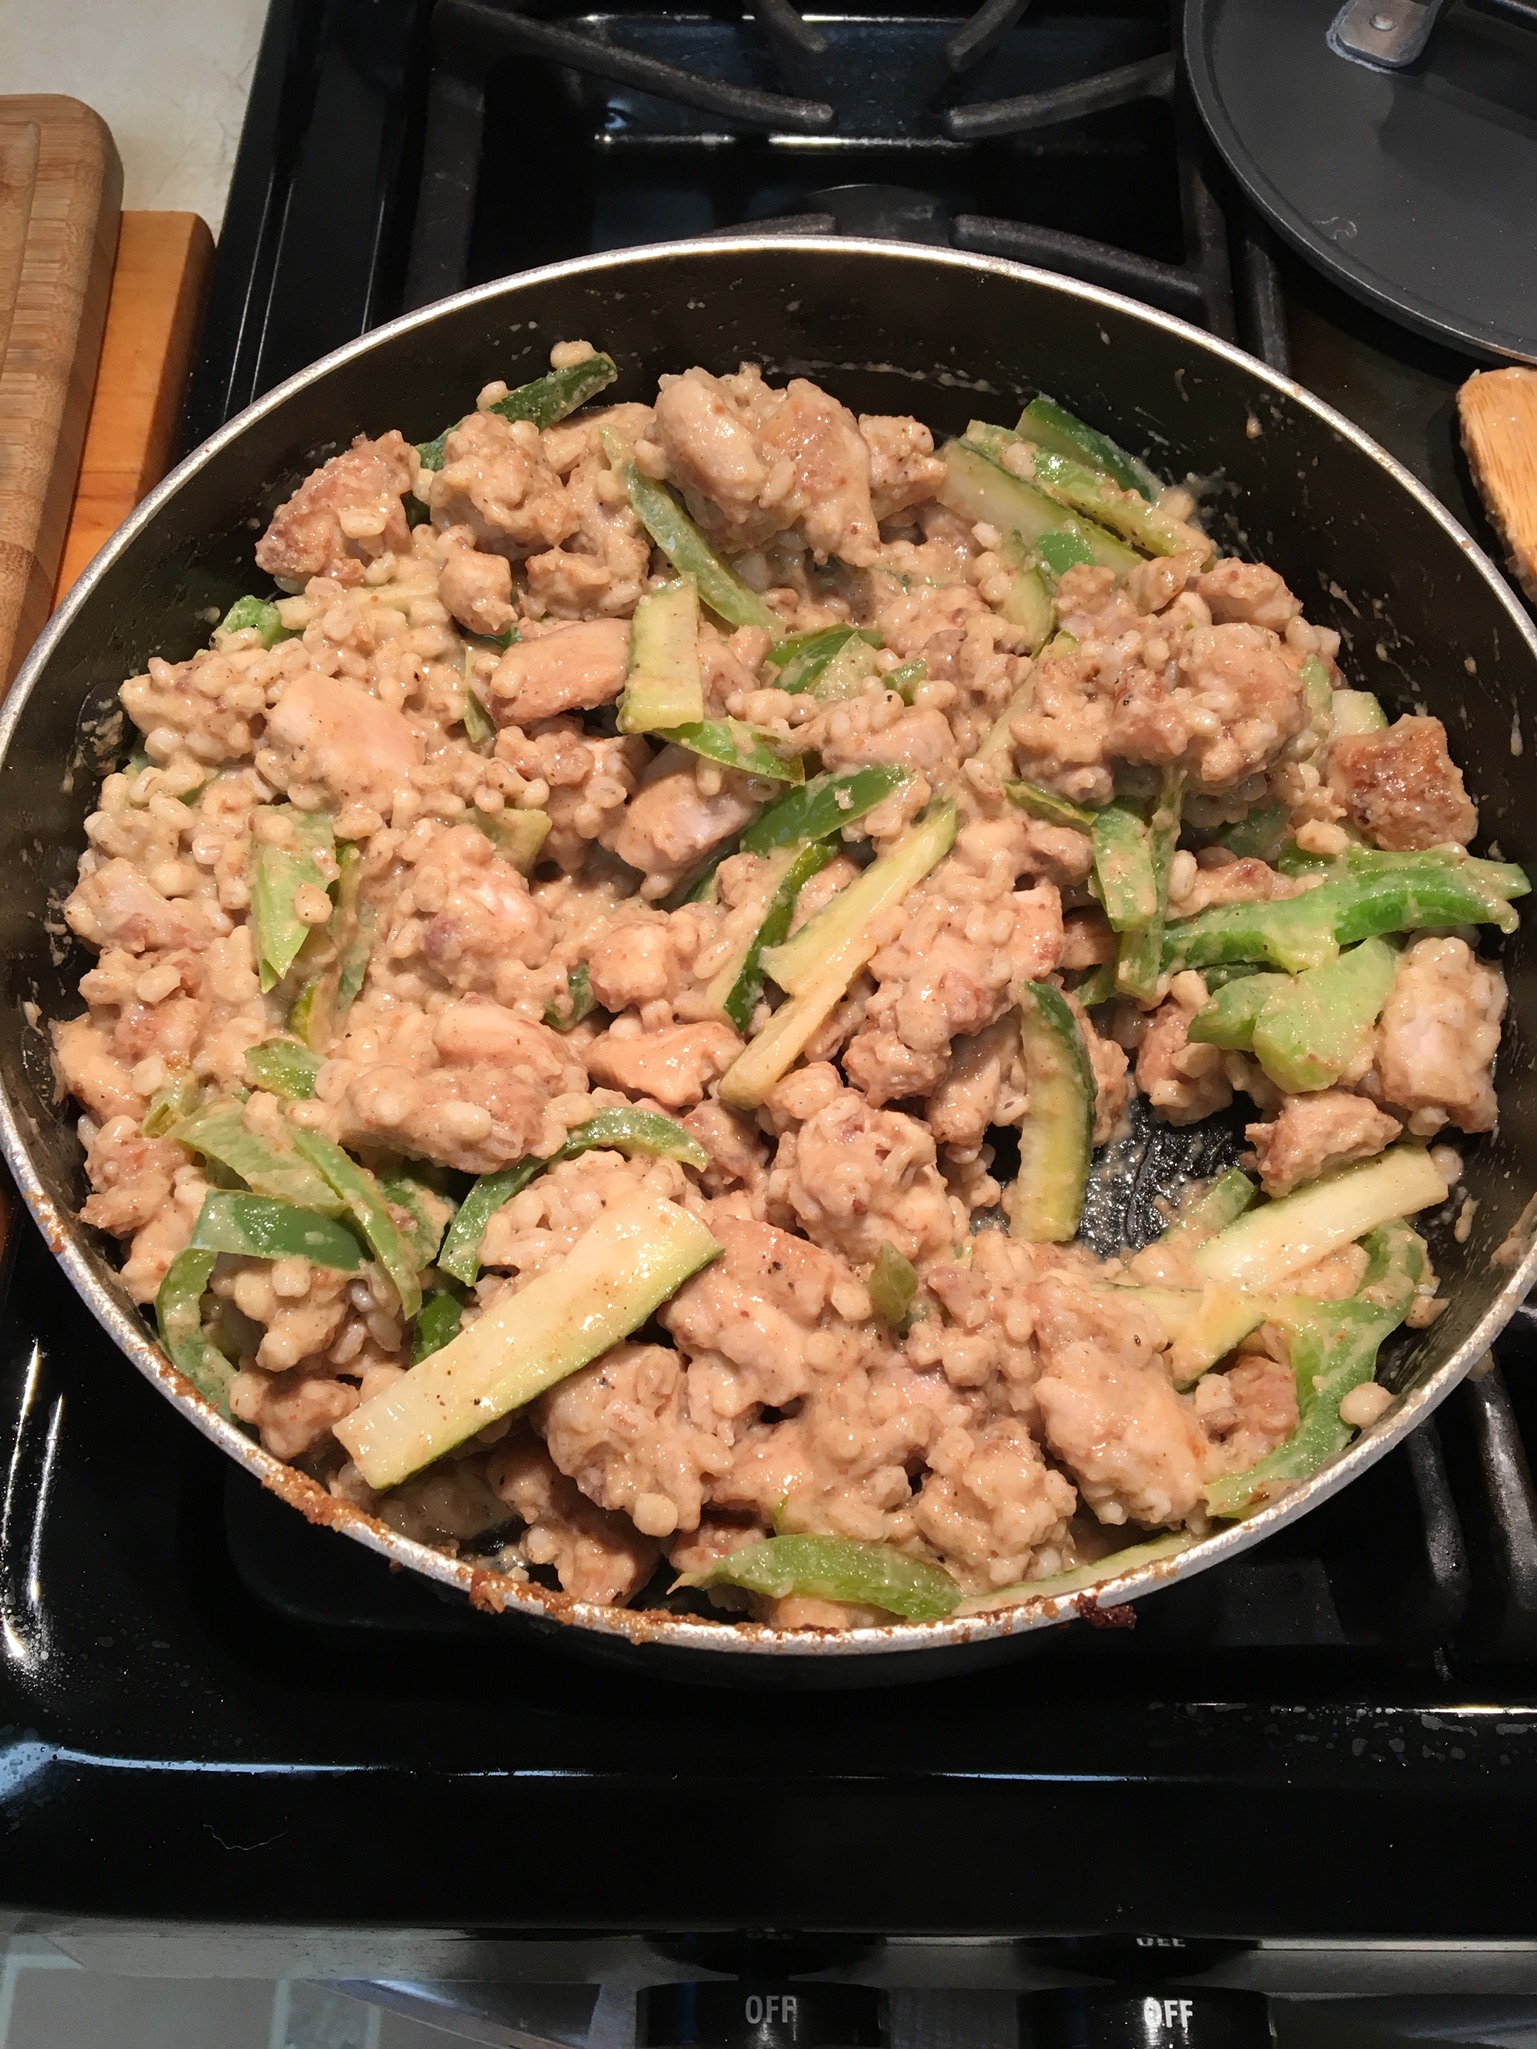
Cut meat into 1/4-inch strips. Coat strips with flour. Put butter and oil into a 10 to 12 inch frying pan over medium-high heat. Once hot, add half the meat at a time and cook, stirring often, until lightly browned, 5 to 7 minutes; transfer to bowl. Add more butter and oil if necessary.
Cook the bell pepper in the same pan, until limp, about 5 minutes, stirring often. Remove pan from heat and mix in sour cream, broth, pickles, barley, meat, salt and pepper.
Prepare a baking dish approximately 10 X 15 inches by spraying with non-stick spray or by greasing the dish.
Eyeball your filling to your cabbage leaves and judge how much filling to put into each leaf. Fill the leaves, folding each leaf over the filling and placing the rolls into the prepared dish, seam down.


Prepare the Smetana Sauce. Preheat oven to 350 degrees.
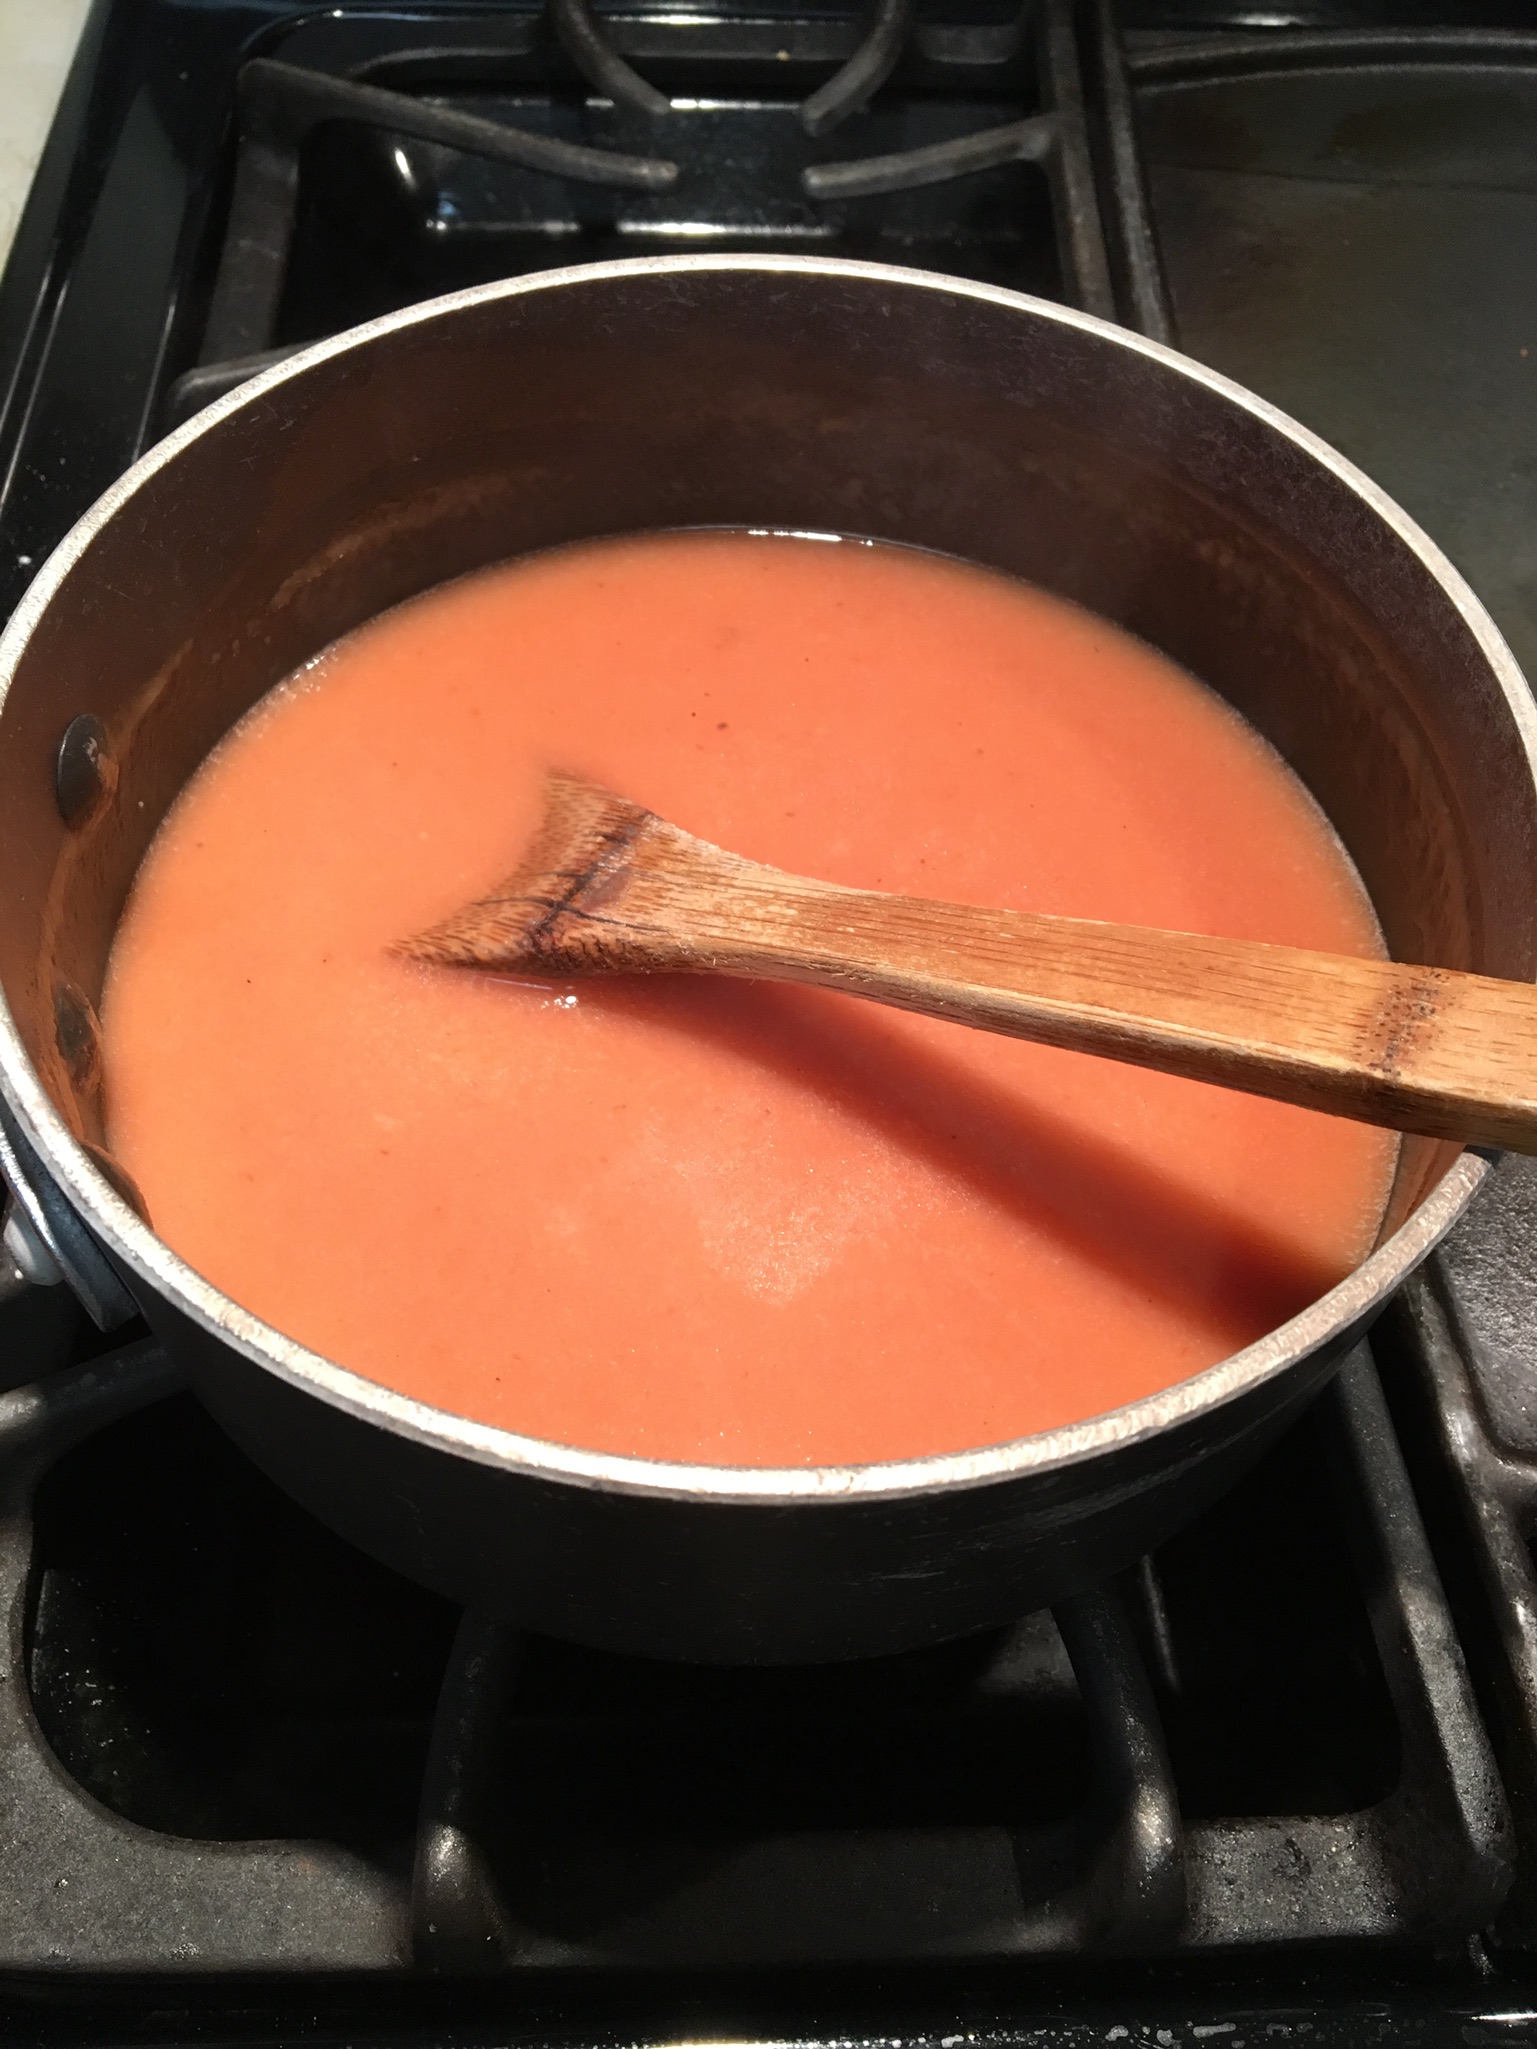
Smetana Sauce Ingredients:

3 Tbsp. butter
3 Tbsp. flour
2-1/4 cups chicken broth
1-1/2 Tbsp. tomato paste
1/2 cup sour cream
Pepper to taste
Melt butter in saucepan over medium heat, stir in flour until mixture is smooth and bubbly. Stir in broth and tomato paste. Stir until sauce boils. Remove from heat, stir in sour cream. Add pepper. Use the sauce while it’s still hot.
Pour hot Smetana Sauce over the cabbage rolls. Cover the baking dish and bake for 40 to 45 minutes, until heated through.

Serves 6.
