You are currently browsing the monthly archive for June 2021.

I really like these. We have access to very large green tomatoes locally from Bell’s Nursery during the summer months. In the fall, sometimes we harvest our own green tomatoes, but they’re usually too small for frying. The reason I like this method of preparation is that the slices hold up well, so you can easily eat them by hand.
- Ingredients
- Green tomatoes
- Salt and pepper
- Milk
- Flour
- Beaten egg
- Bread crumbs
- Oil for frying
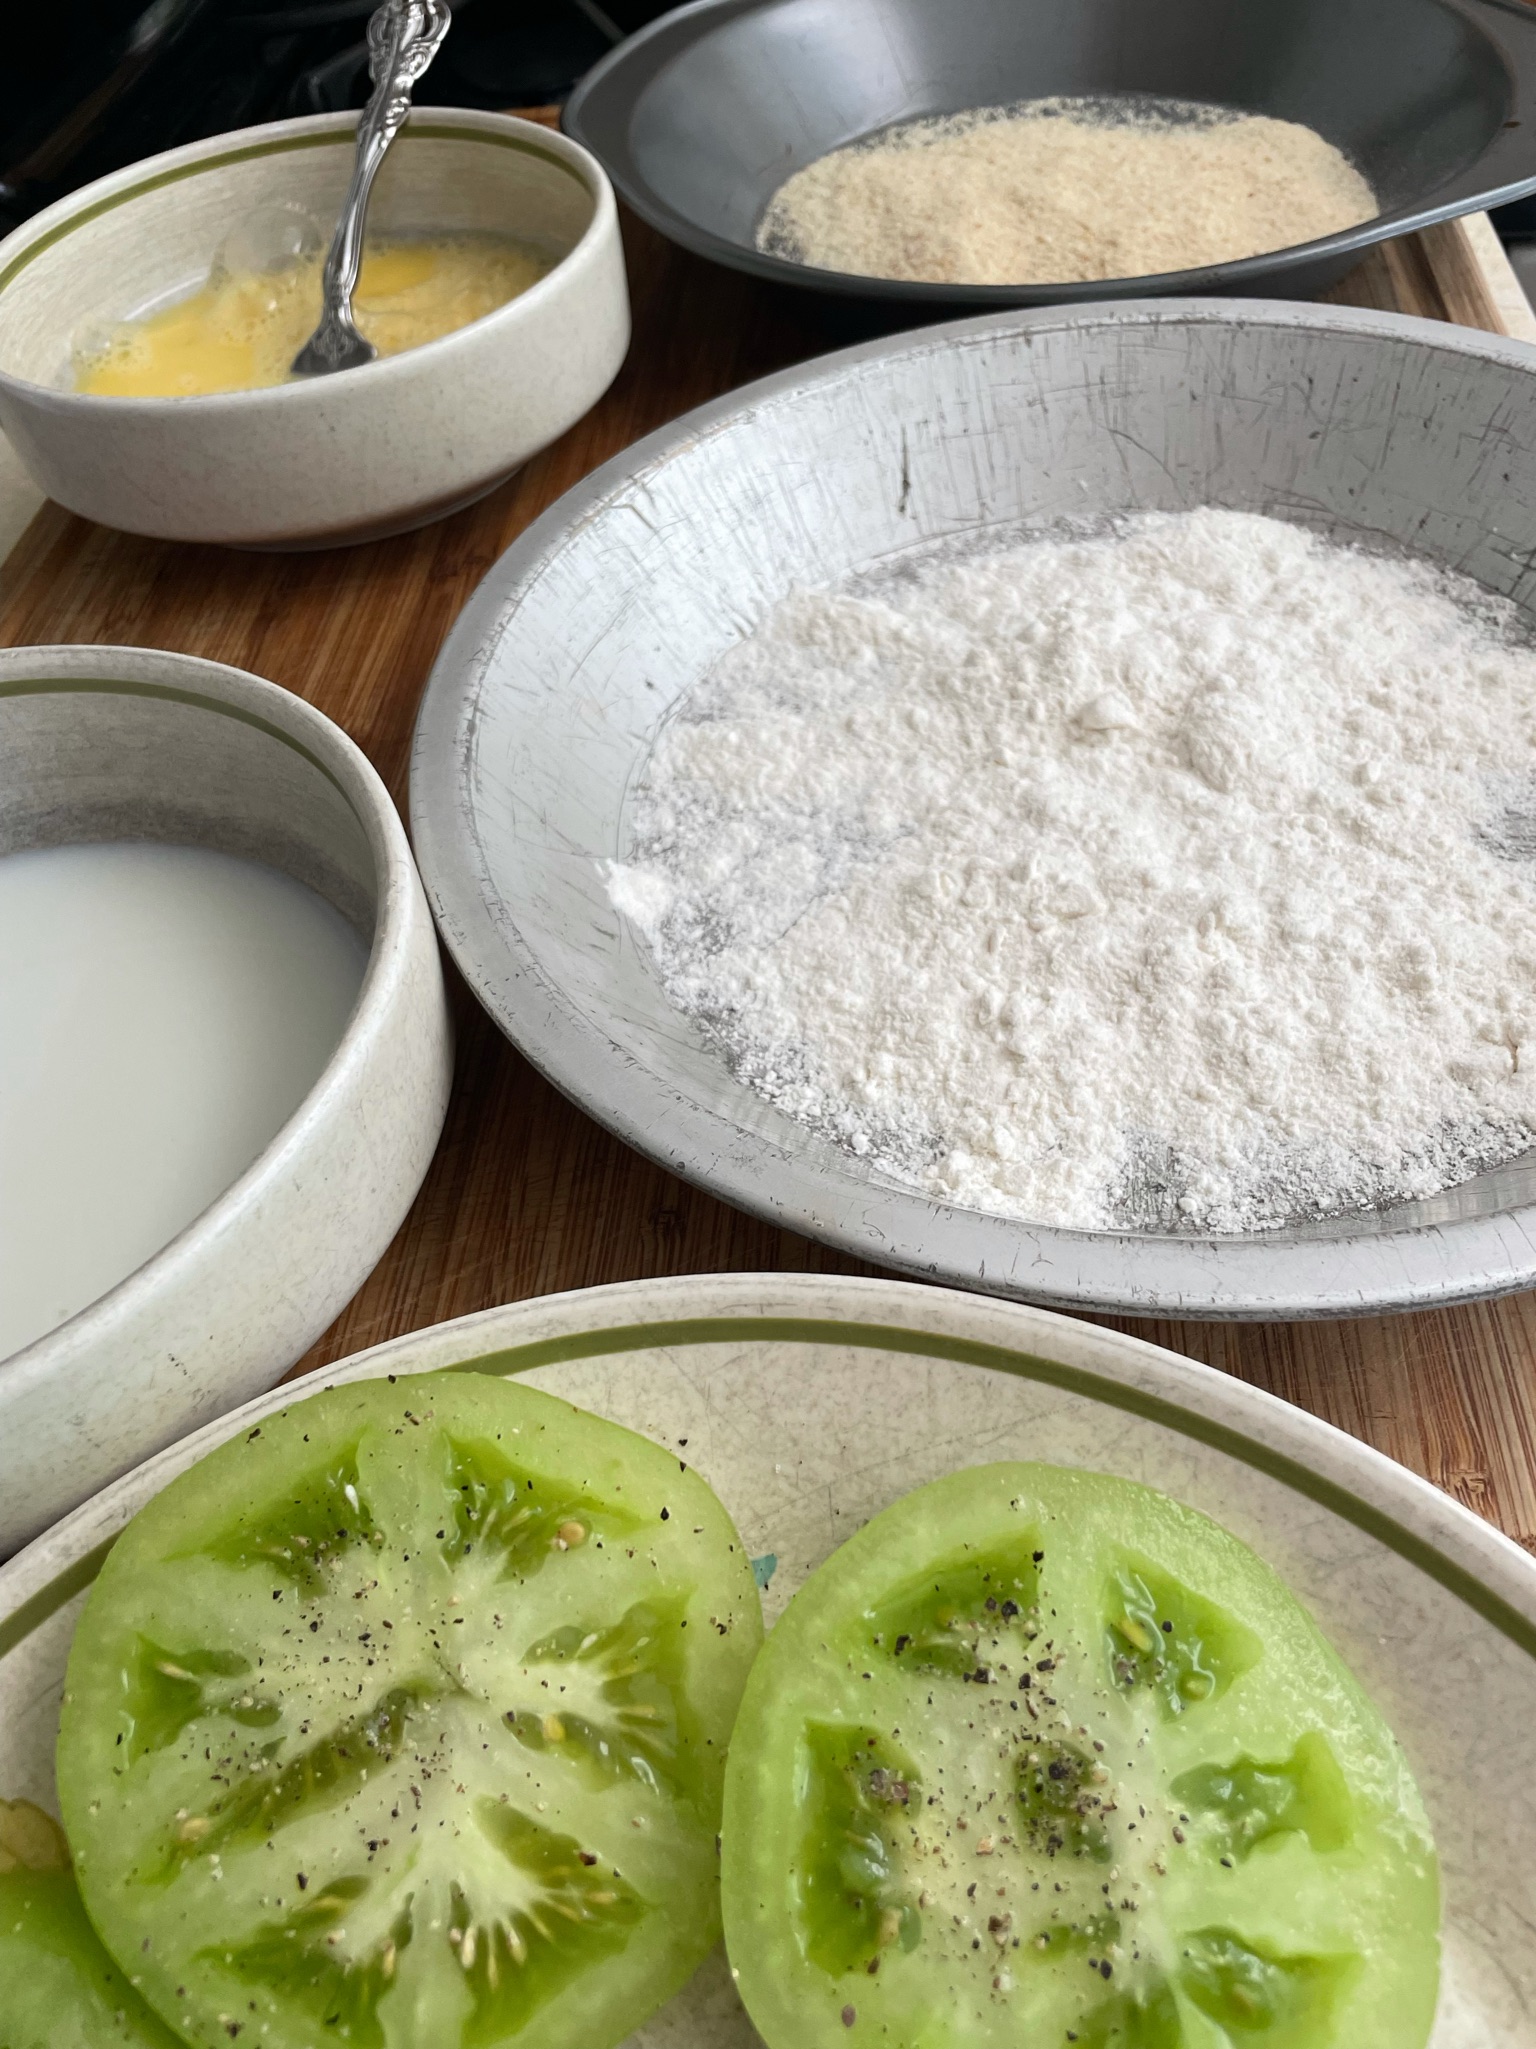
Slice the green tomatoes about a half inch thick. Salt and pepper the slices and let them stand for fifteen minutes or so. Heat about 1/2″ oil over medium heat in a skillet. Dip each slice into the milk, then dredge through the flour, dip into the beaten egg, and finally dredge through the bread crumbs. Gently lay slices in the skillet. Do not crowd them, keep good separation. Fry over medium heat until the bottom is browned, then flip over. It can be tricky to get a good sear on the outside, yet an edible center. Don’t undercook or overcook. Sorry, you just have to watch. I turn mine over frequently until I see bubbles from the center.
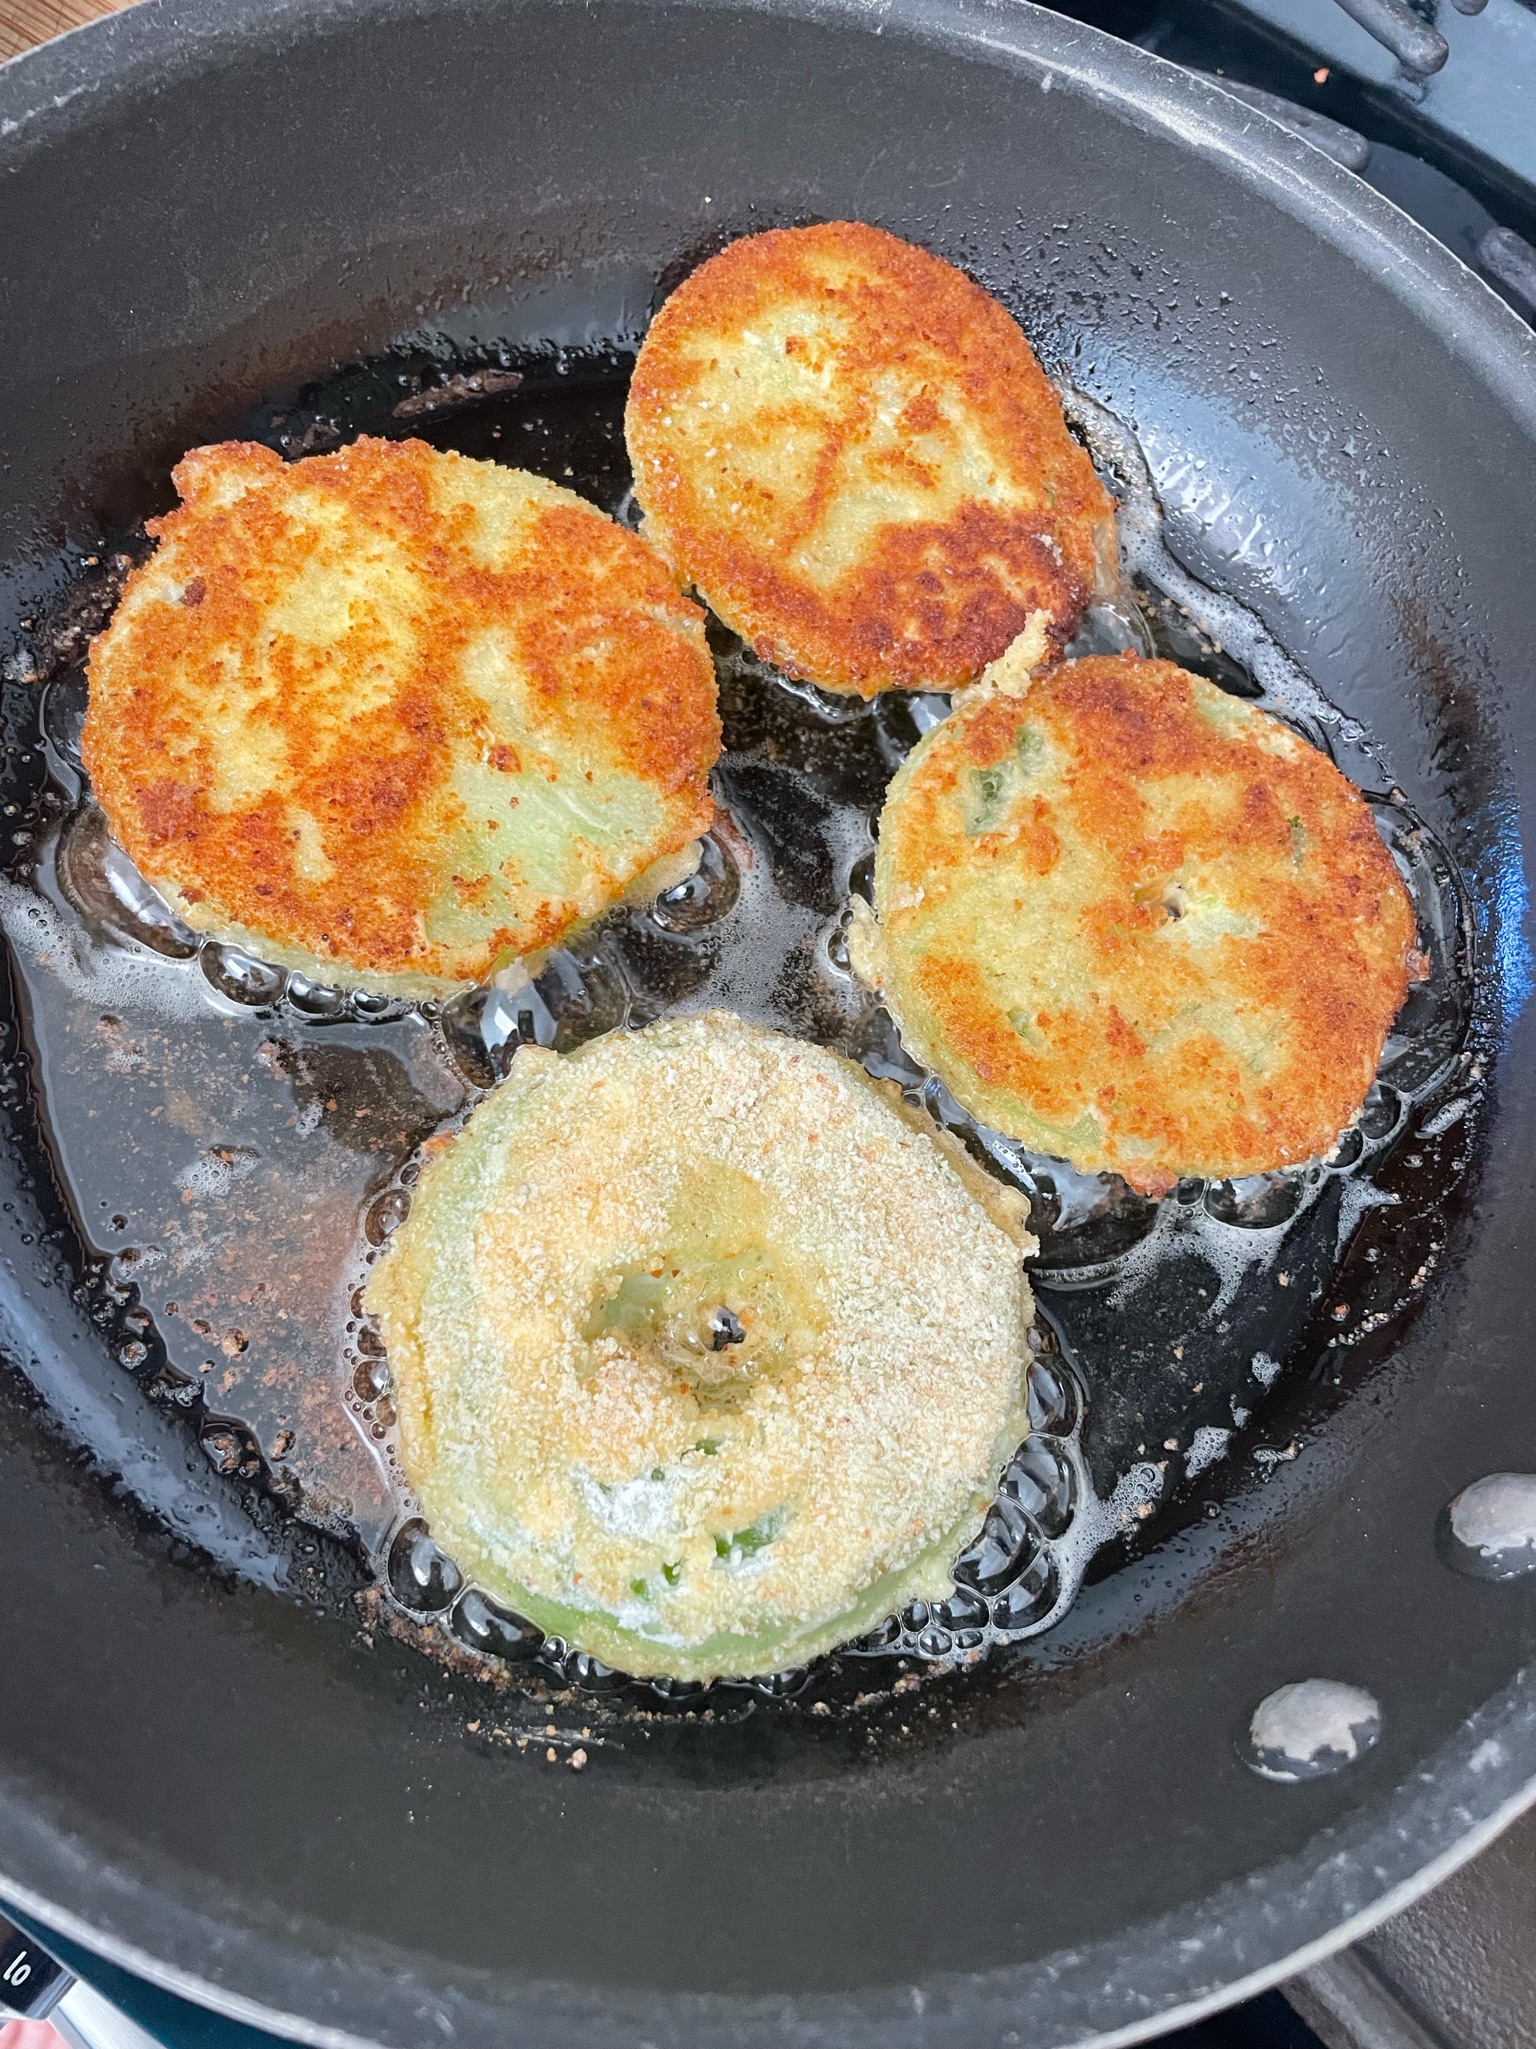
NOTES: I use olive oil, but I think a good cooking oil would be better. Olive oil has a low burn temperature and it browns the food too quickly. There are things about this recipe that deserve tweaking because it takes FOUR pans just to get them into the skillet. Why so much finagling? I don’t make these often enough to do the tweaking. I really, really like the way these stand up to the cooking, so it’s worth the four pans a couple times per year.
In what you see pictured here I used two tomatoes, each sliced into four slices. I used a small amount of milk, about two extra-large eggs (could have used only one), about 2/3 cup four, and about 1 cup of bread crumbs. I just sprinkled bread crumbs whenever I needed more. Of course, this will all depend upon how many people are being served.
I’ve been trying to learn how to do this forever. My all-time favorite food may just be sea scallops. The James Beard cookbook says to dredge them through flour first, but that has never worked for me. A couple weeks ago I bought scallops and tried using the method below. Perfection!
- Ingredients
- Fresh scallops
- Salt and pepper
- 1 Tbsp. olive oil
- 1 Tbsp. butter
- Lemon juice, optional
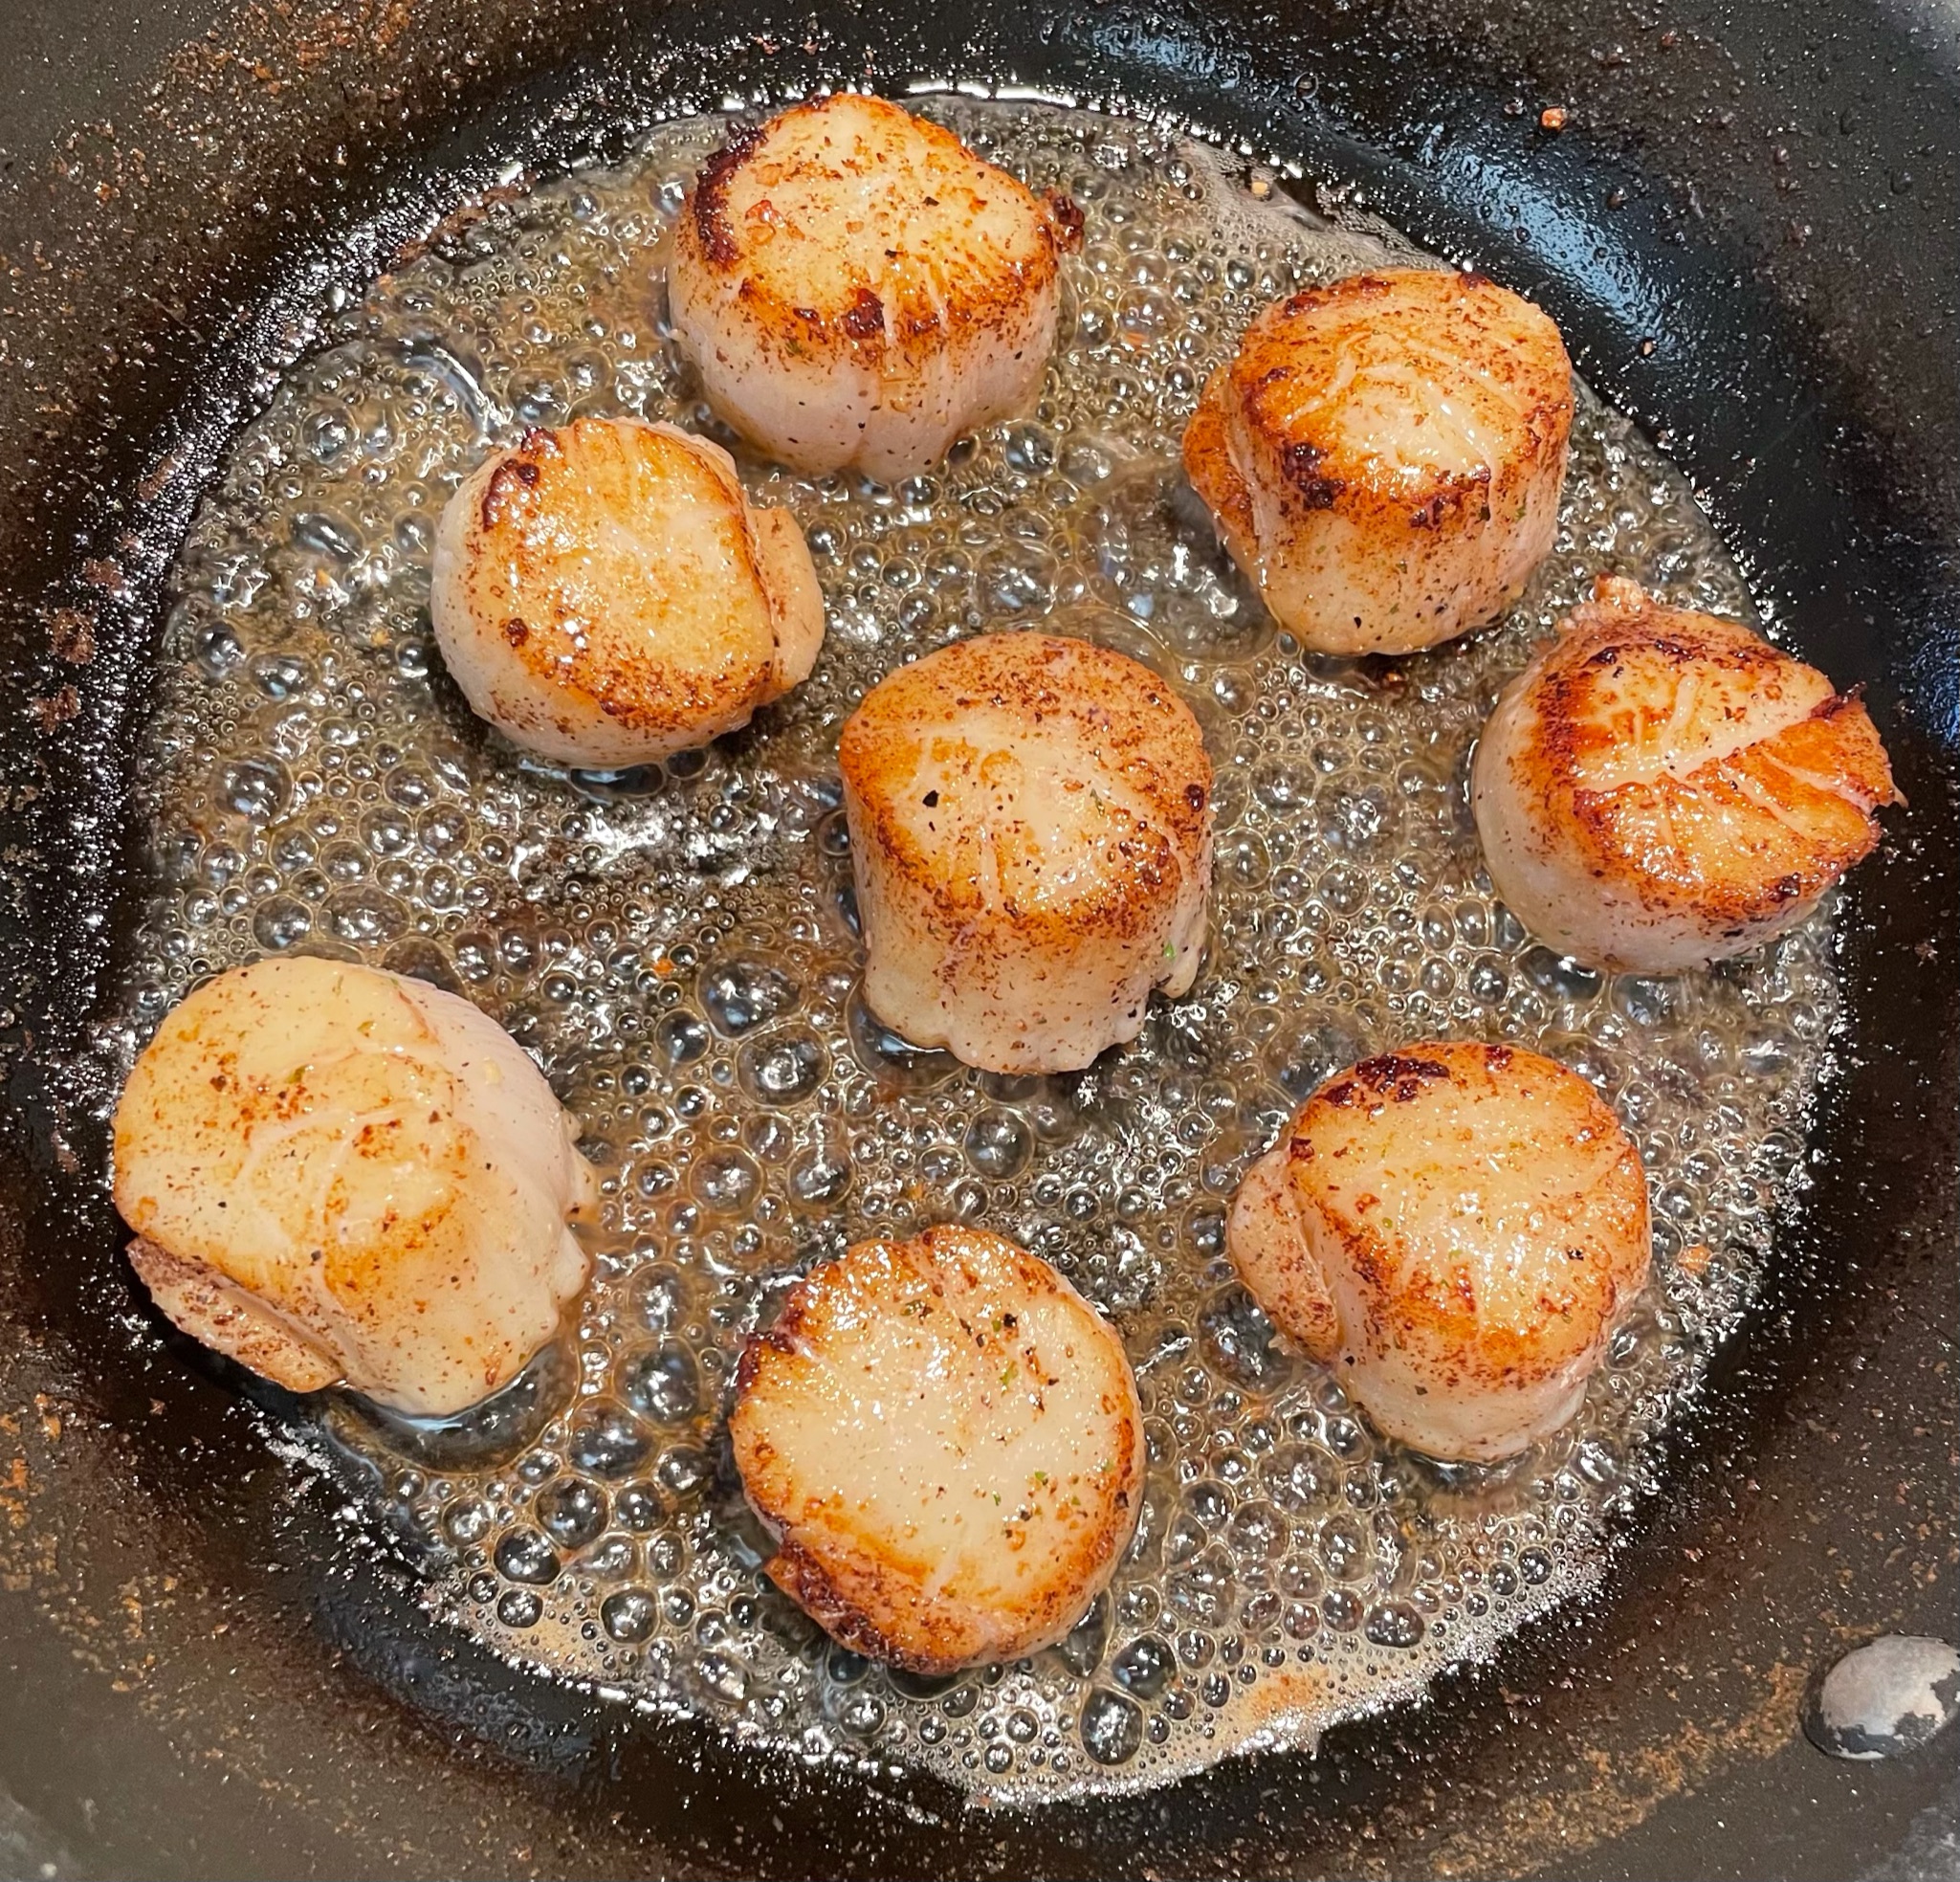
Rinse the scallops and lay them out on half of a cloth towel in a single layer. Fold the other half of the towel over the top of the scallops and press lightly. Let them sit like that for awhile to remove as much moisture as possible. Sprinkle with salt and pepper. Heat oil and butter in a skillet over high heat until just at the smoking point. Gently lay the scallops in the skillet. Make sure they are not touching each other, maintain good separation. Sear for one and a half minutes. Gently turn over and sear the other side for one and a half minutes. Remove from skillet. Squeeze lemon juice over all, if desired. Serve right away. YUMMY!
Notes: You may need to add more oil and butter between batches if you’re cooking a lot of scallops. I used my garlic sea salt grind instead of regular salt.


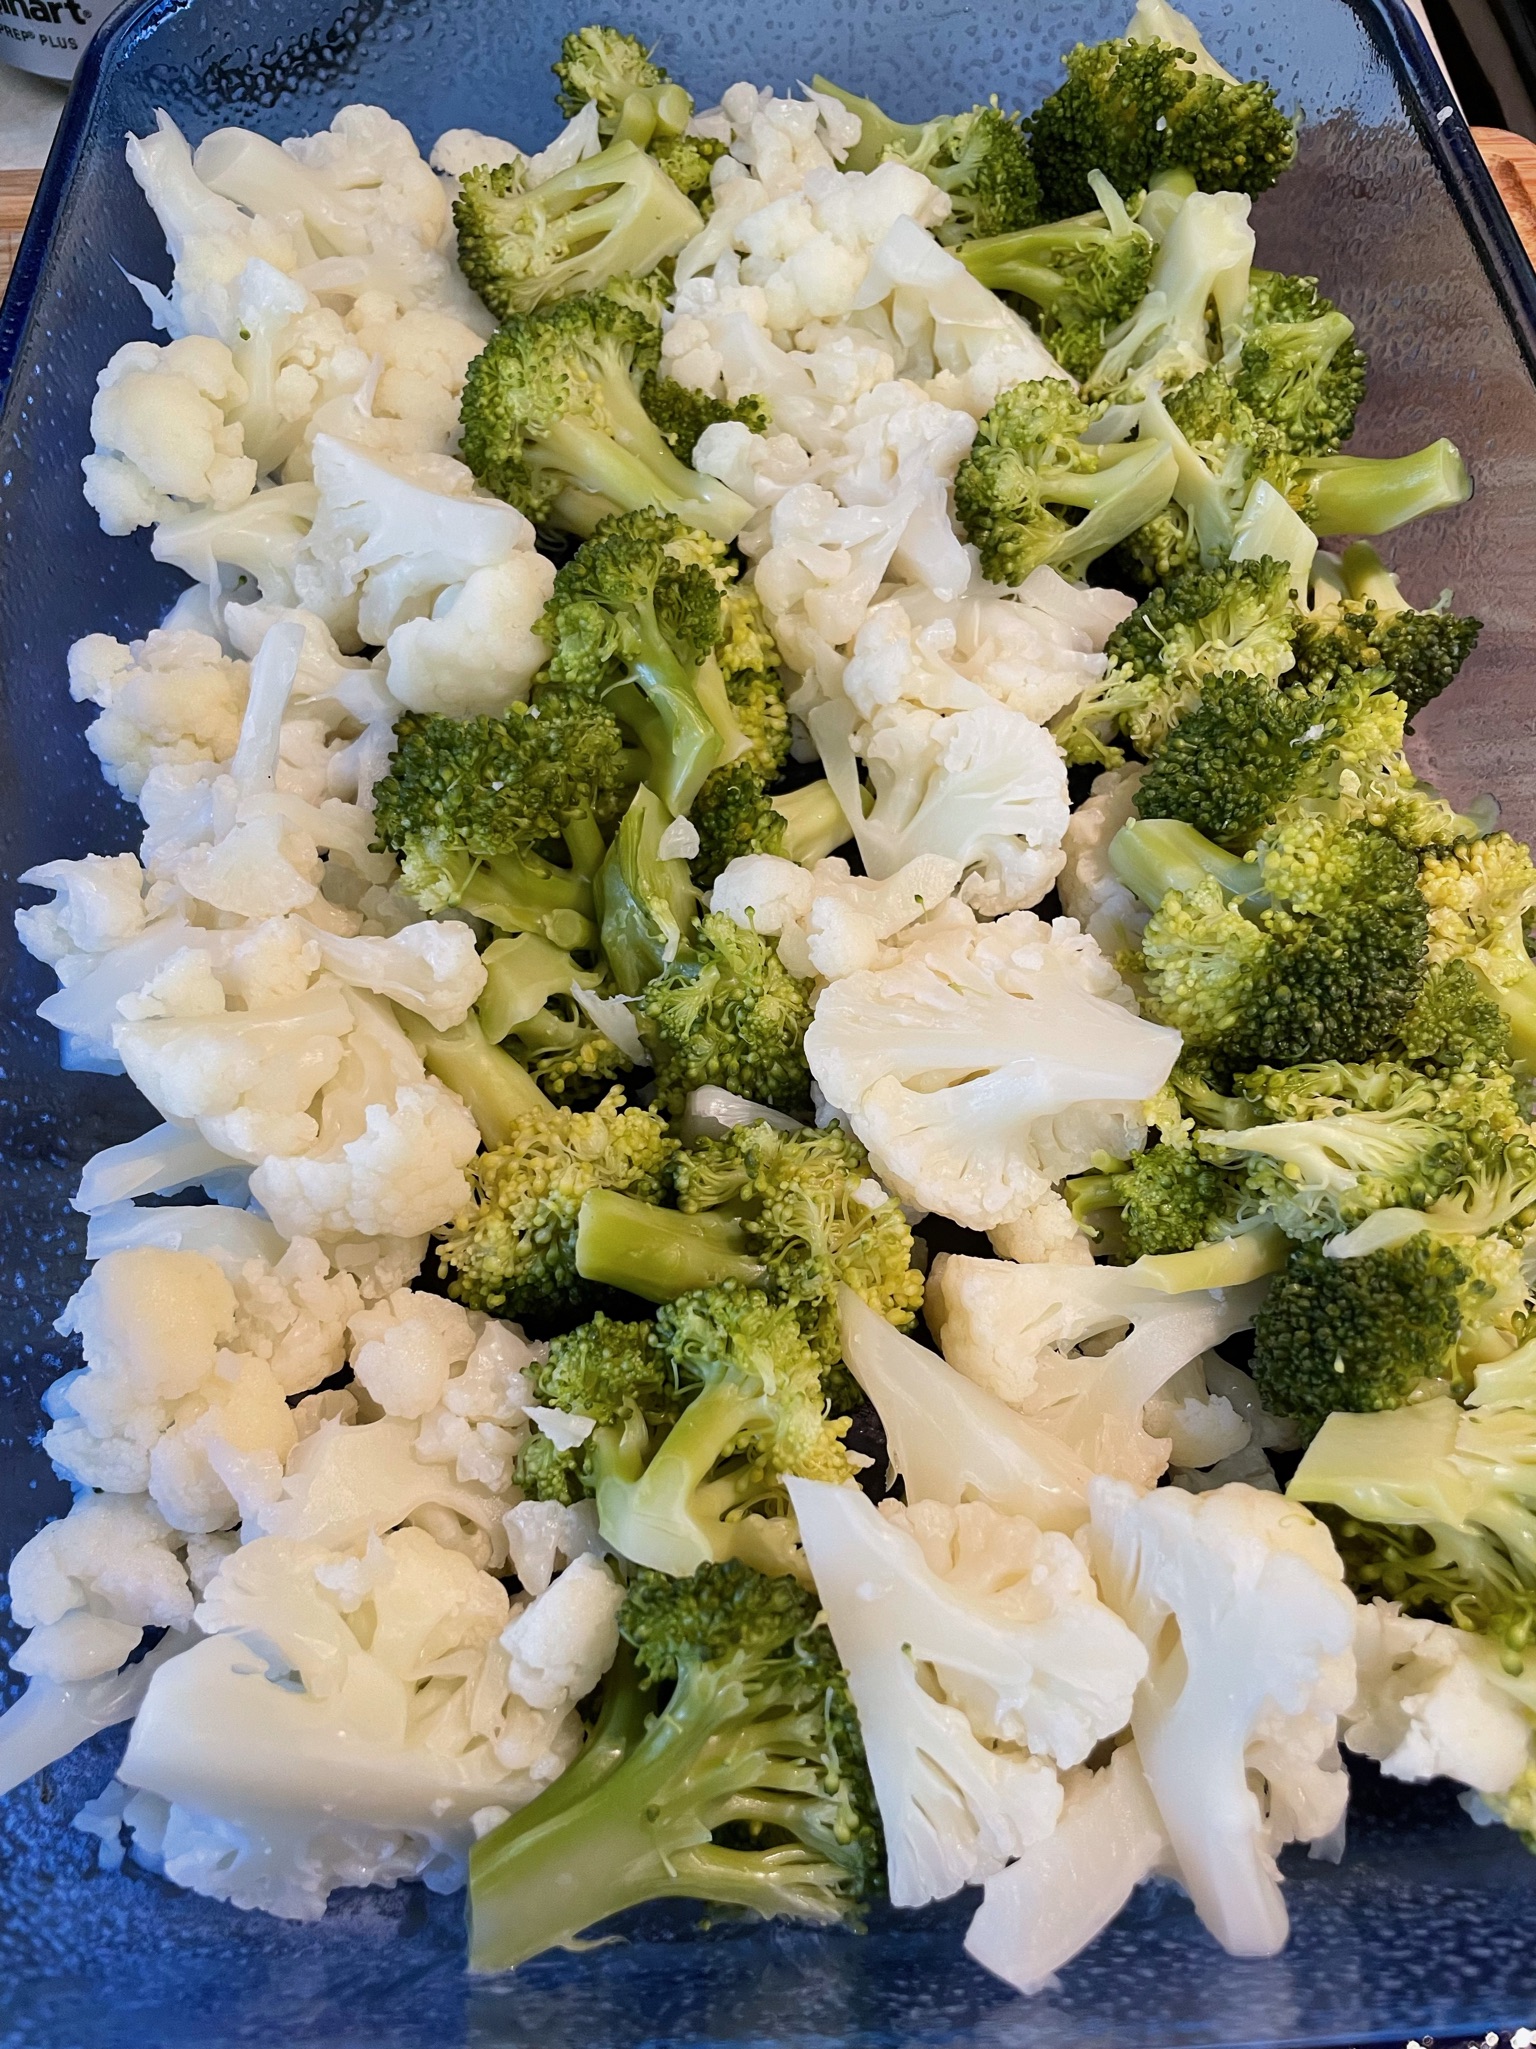
This is a recipe that started at Taste of Home magazine. I’ve made it many, many times. It’s a good Thanksgiving Day side dish because it can be prepared ahead of time and then popped into the oven to warm. This is the recipe for a 9×13″ pan, serving 12, but you could halve it to serve fewer people.
- Ingredients
- 1 large head cauliflower, broken into florets (4 cups)
- 1 medium bunch broccoli, cut into florets (4 cups)
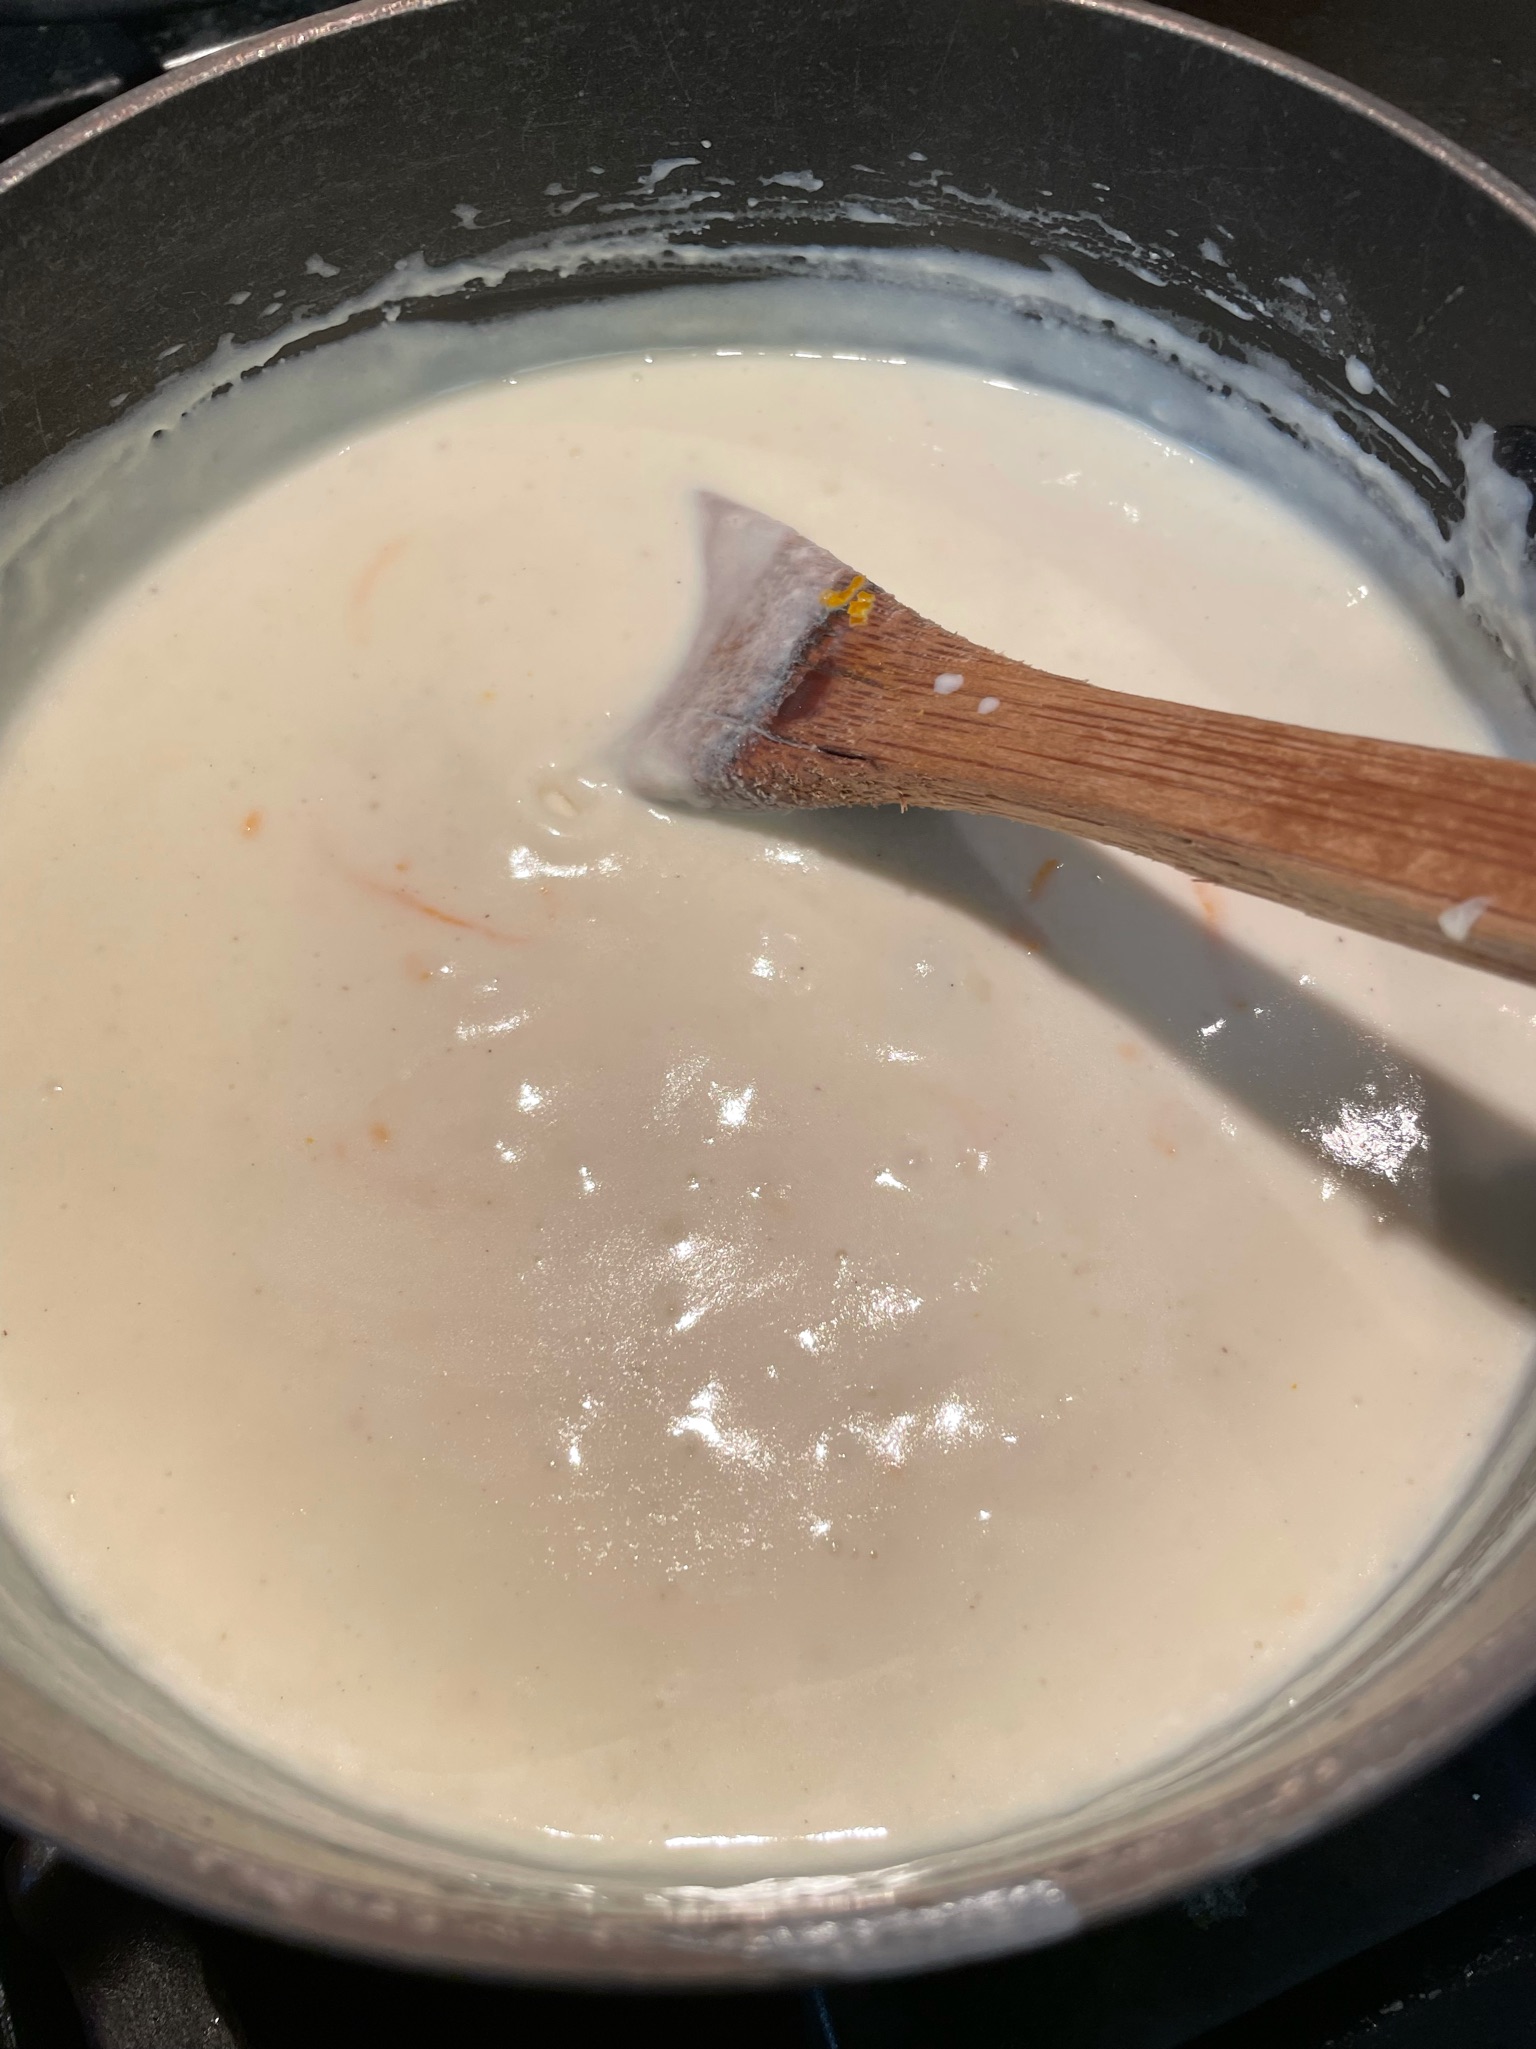
- 1/4 cup butter
- 1/4 cup flour
- 2 cups Half-n-Half (1/2 cream + 1/2 milk)
- 2 Tbsp. orange zest
- 1/2 tsp. salt
- 1/4 tsp. white pepper
- 1/4 tsp. ground nutmeg
- 1/2 cup shredded sharp cheddar cheese
Cook the vegetables until tender. Set aside.
In a medium saucepan, melt butter. Stir in the flour until smooth. Gradually add half-n-half. Bring to a boil. Stir in orange zest, salt, pepper, and nutmeg. Cook and stir for 2 minutes or until the sauce thickens.
Preheat oven to 325 degrees F. Prepare a 13 x 9″ baking dish with non-stick spray. Arrange the vegetables in alternating rows. Spoon the sauce evenly over the top of the vegetables. Sprinkle cheese over all.

Bake, uncovered, at 325 degrees F for 20-25 minutes. Serves 12.
NOTES: If you’ve prepared this ahead of time and then chilled it, it’s going to take longer to bake. I really don’t care for nutmeg and so I seldom use it in this dish. But I really like white pepper, so that I do use. The original recipe says to cook the vegetables ahead of time to crisp-tender and then rinse with cold water — I’ve never done that. I just cook the vegetables by boiling or steaming and then arrange them in the baking dish.
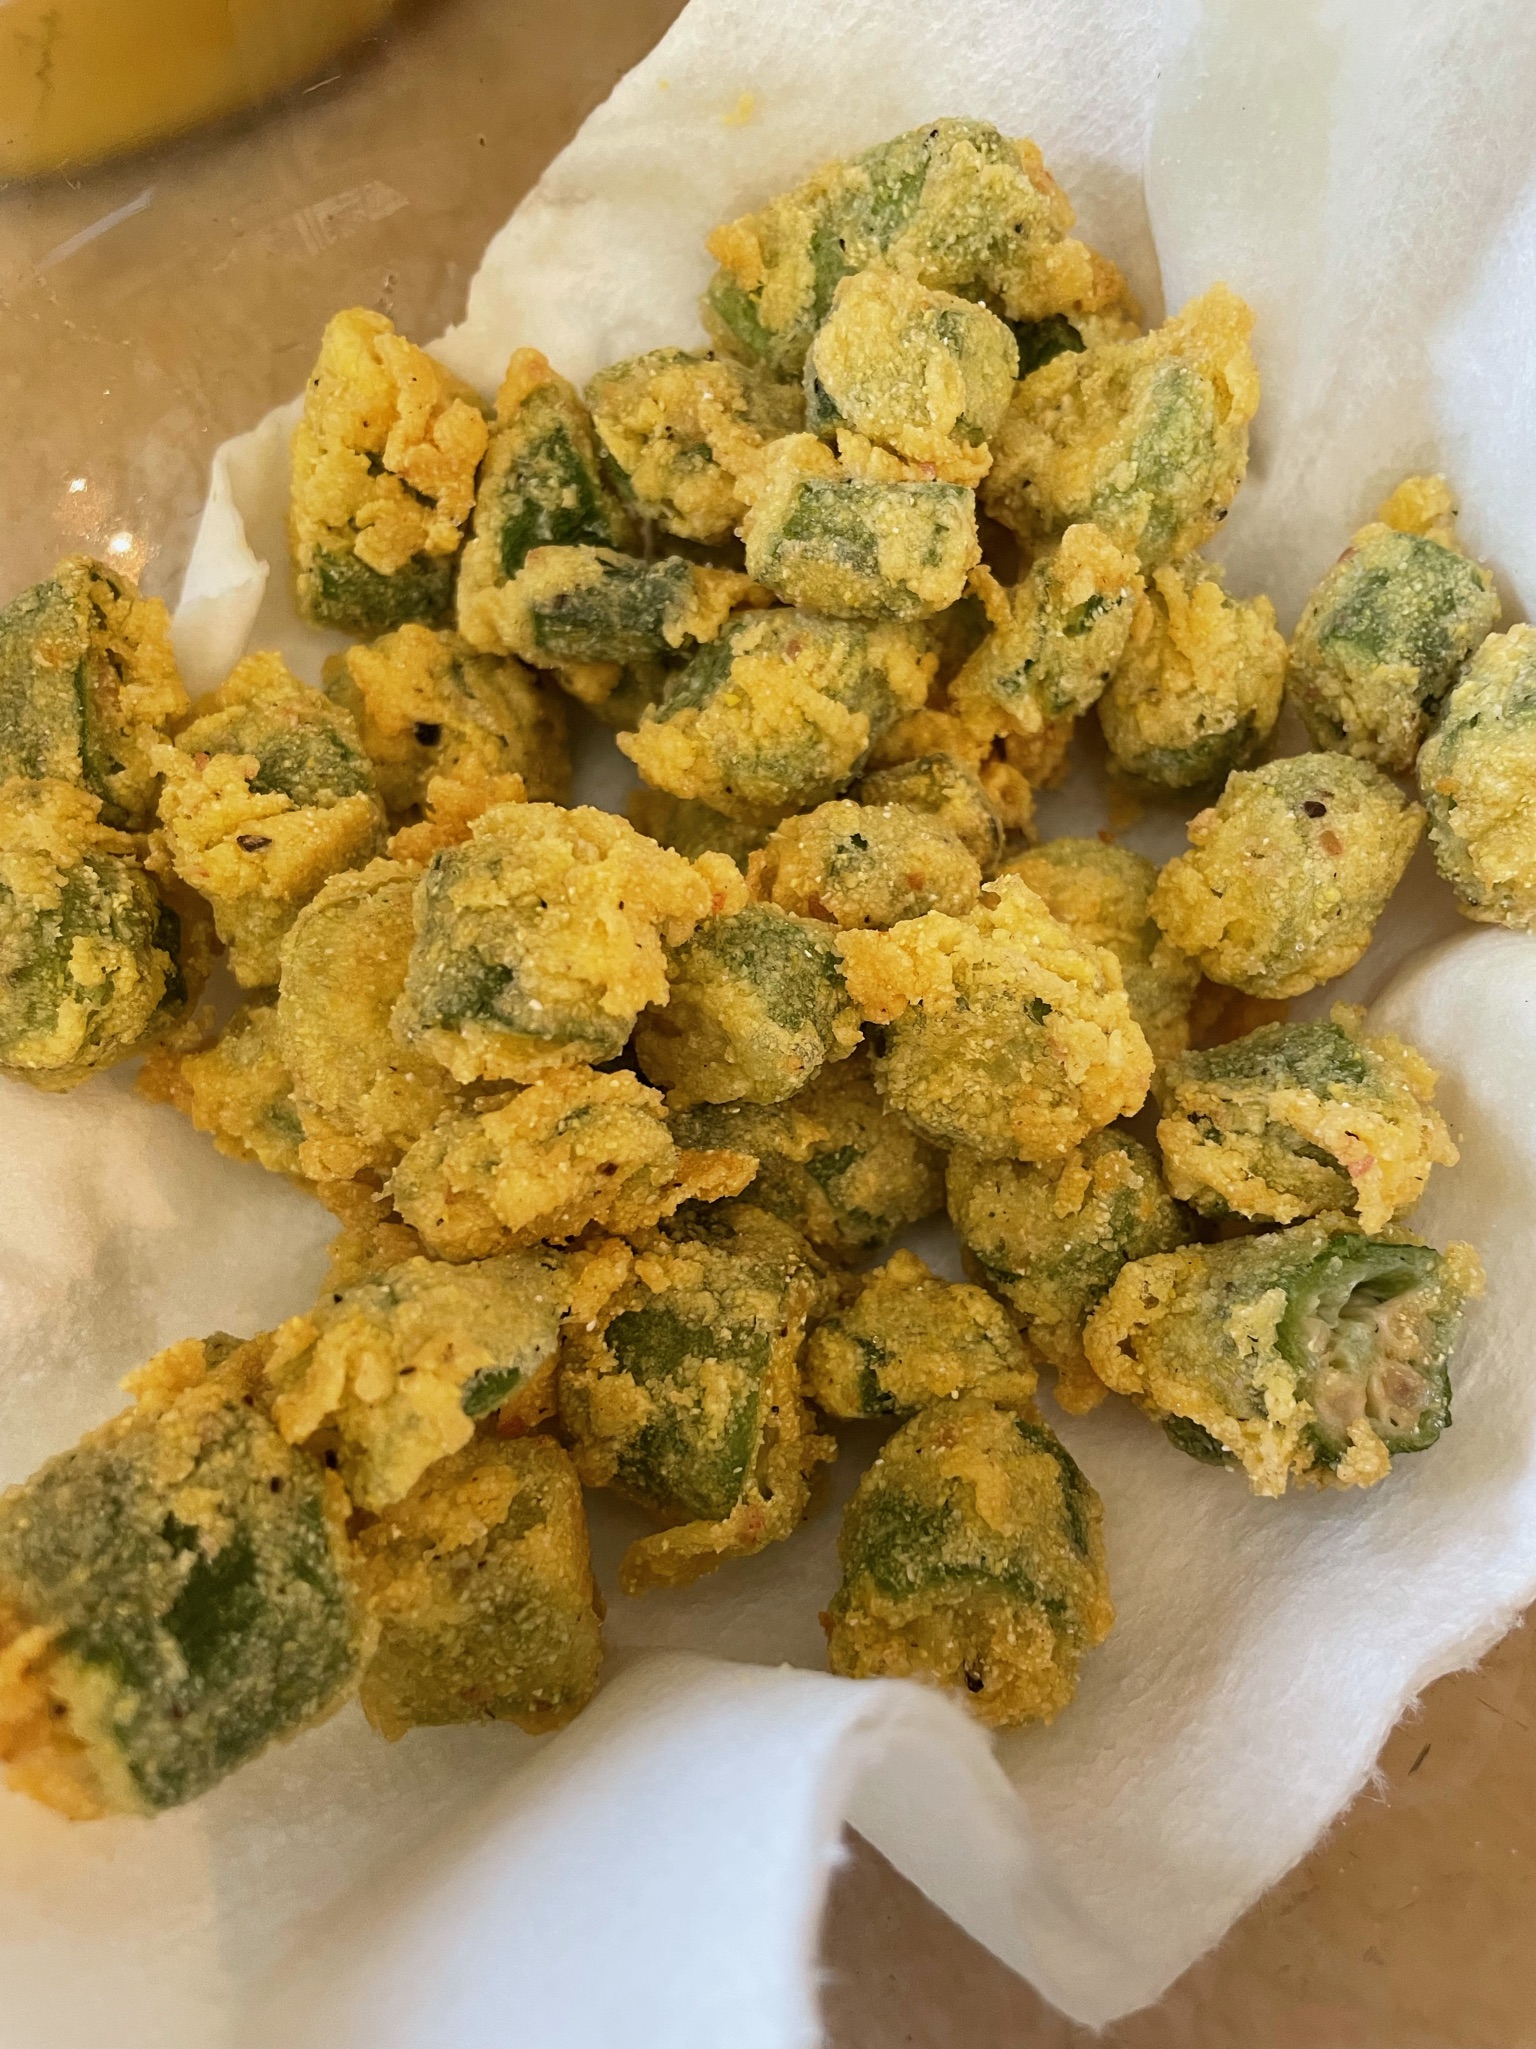
This may be an acquired taste, I couldn’t say. My dad grew up in Texas and eating okra is not strange to me. I’ve only been to Texas two or three times in my life and we did not have fried okra a lot while I was growing up. On one of the occasions we did visit Texas I remember being with Grandma and stopping by to visit my father’s cousin, Doris Marie. She was in the kitchen frying okra. I will never forget the smell, the look, the taste. Oh, my, it was mouth-watering. But I like mine better! Ha!
- Ingredients (quantities are approximate)
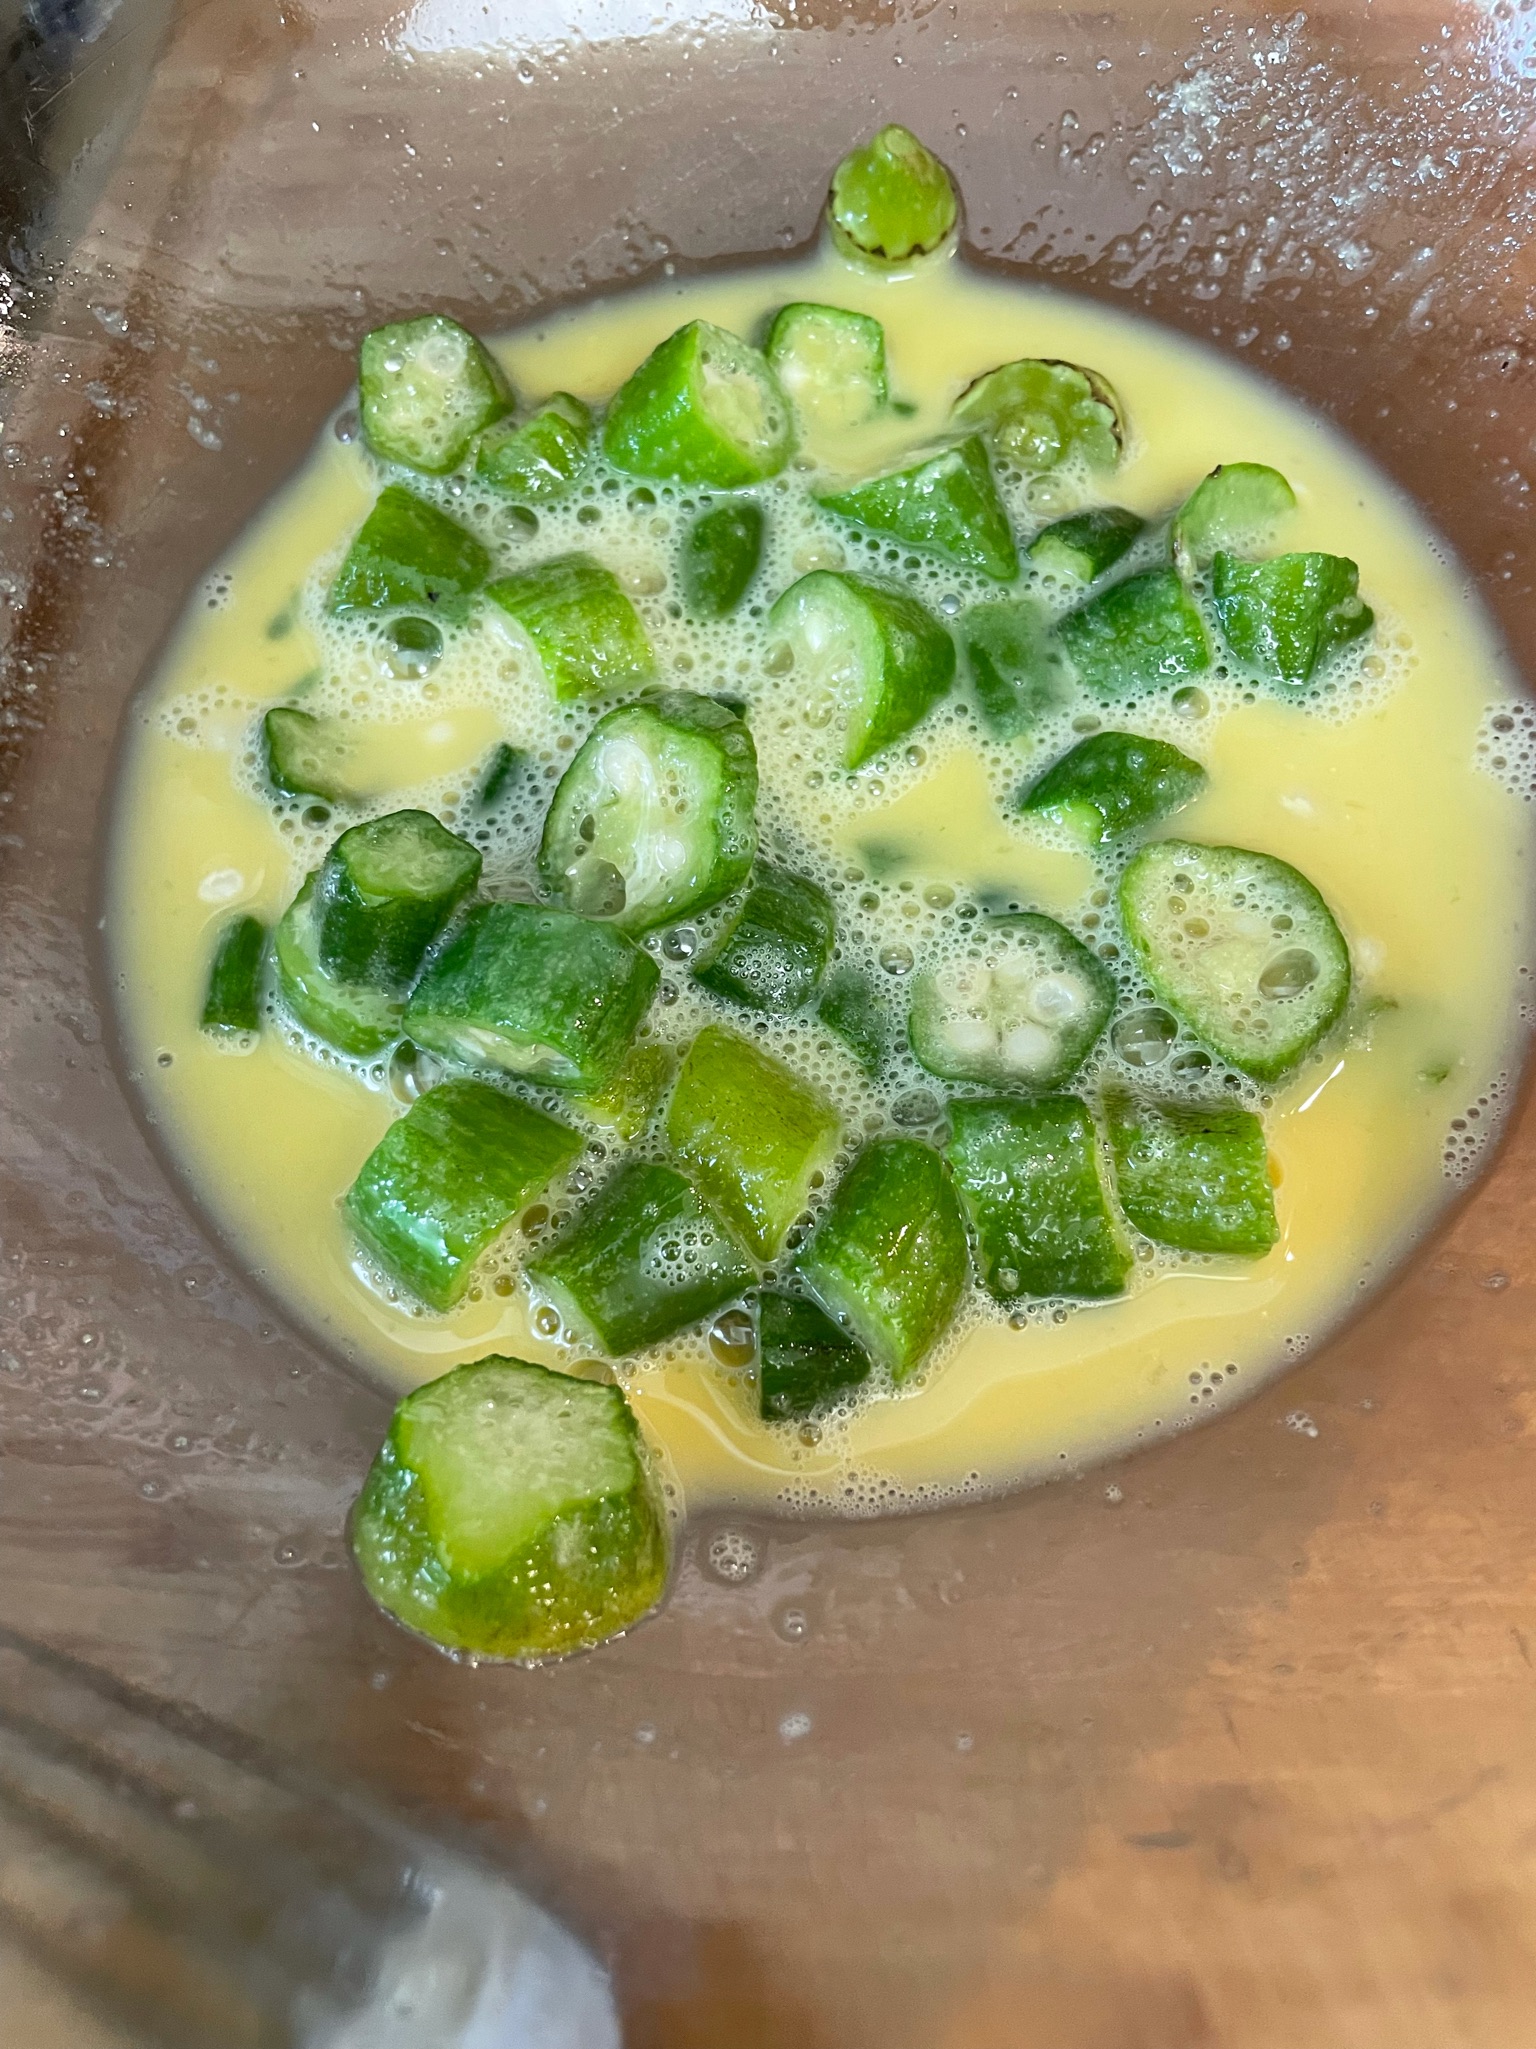
- 12 oz. package frozen sliced okra
- 2 extra-large eggs
- 3/4 cup corn meal
- 1/2 cup flour
- LIBERAL amounts of salt and pepper
- Oil for frying
Thaw the okra until it’s no longer frozen, but not quite all the way thawed. Sometimes I let it sit in a colander for a few hours, shaking it every once in awhile.
Heat about 1/2″ of oil in a large skillet. I’m not sure of the temp, 350 degrees? I just wait until it bubbles when I drop a pinch of corn meal into it.
In a medium bowl, beat the eggs. Stir in the mostly-thawed okra.
In a flat dish (I use a pie plate), stir together the corn meal and flour and salt and pepper.
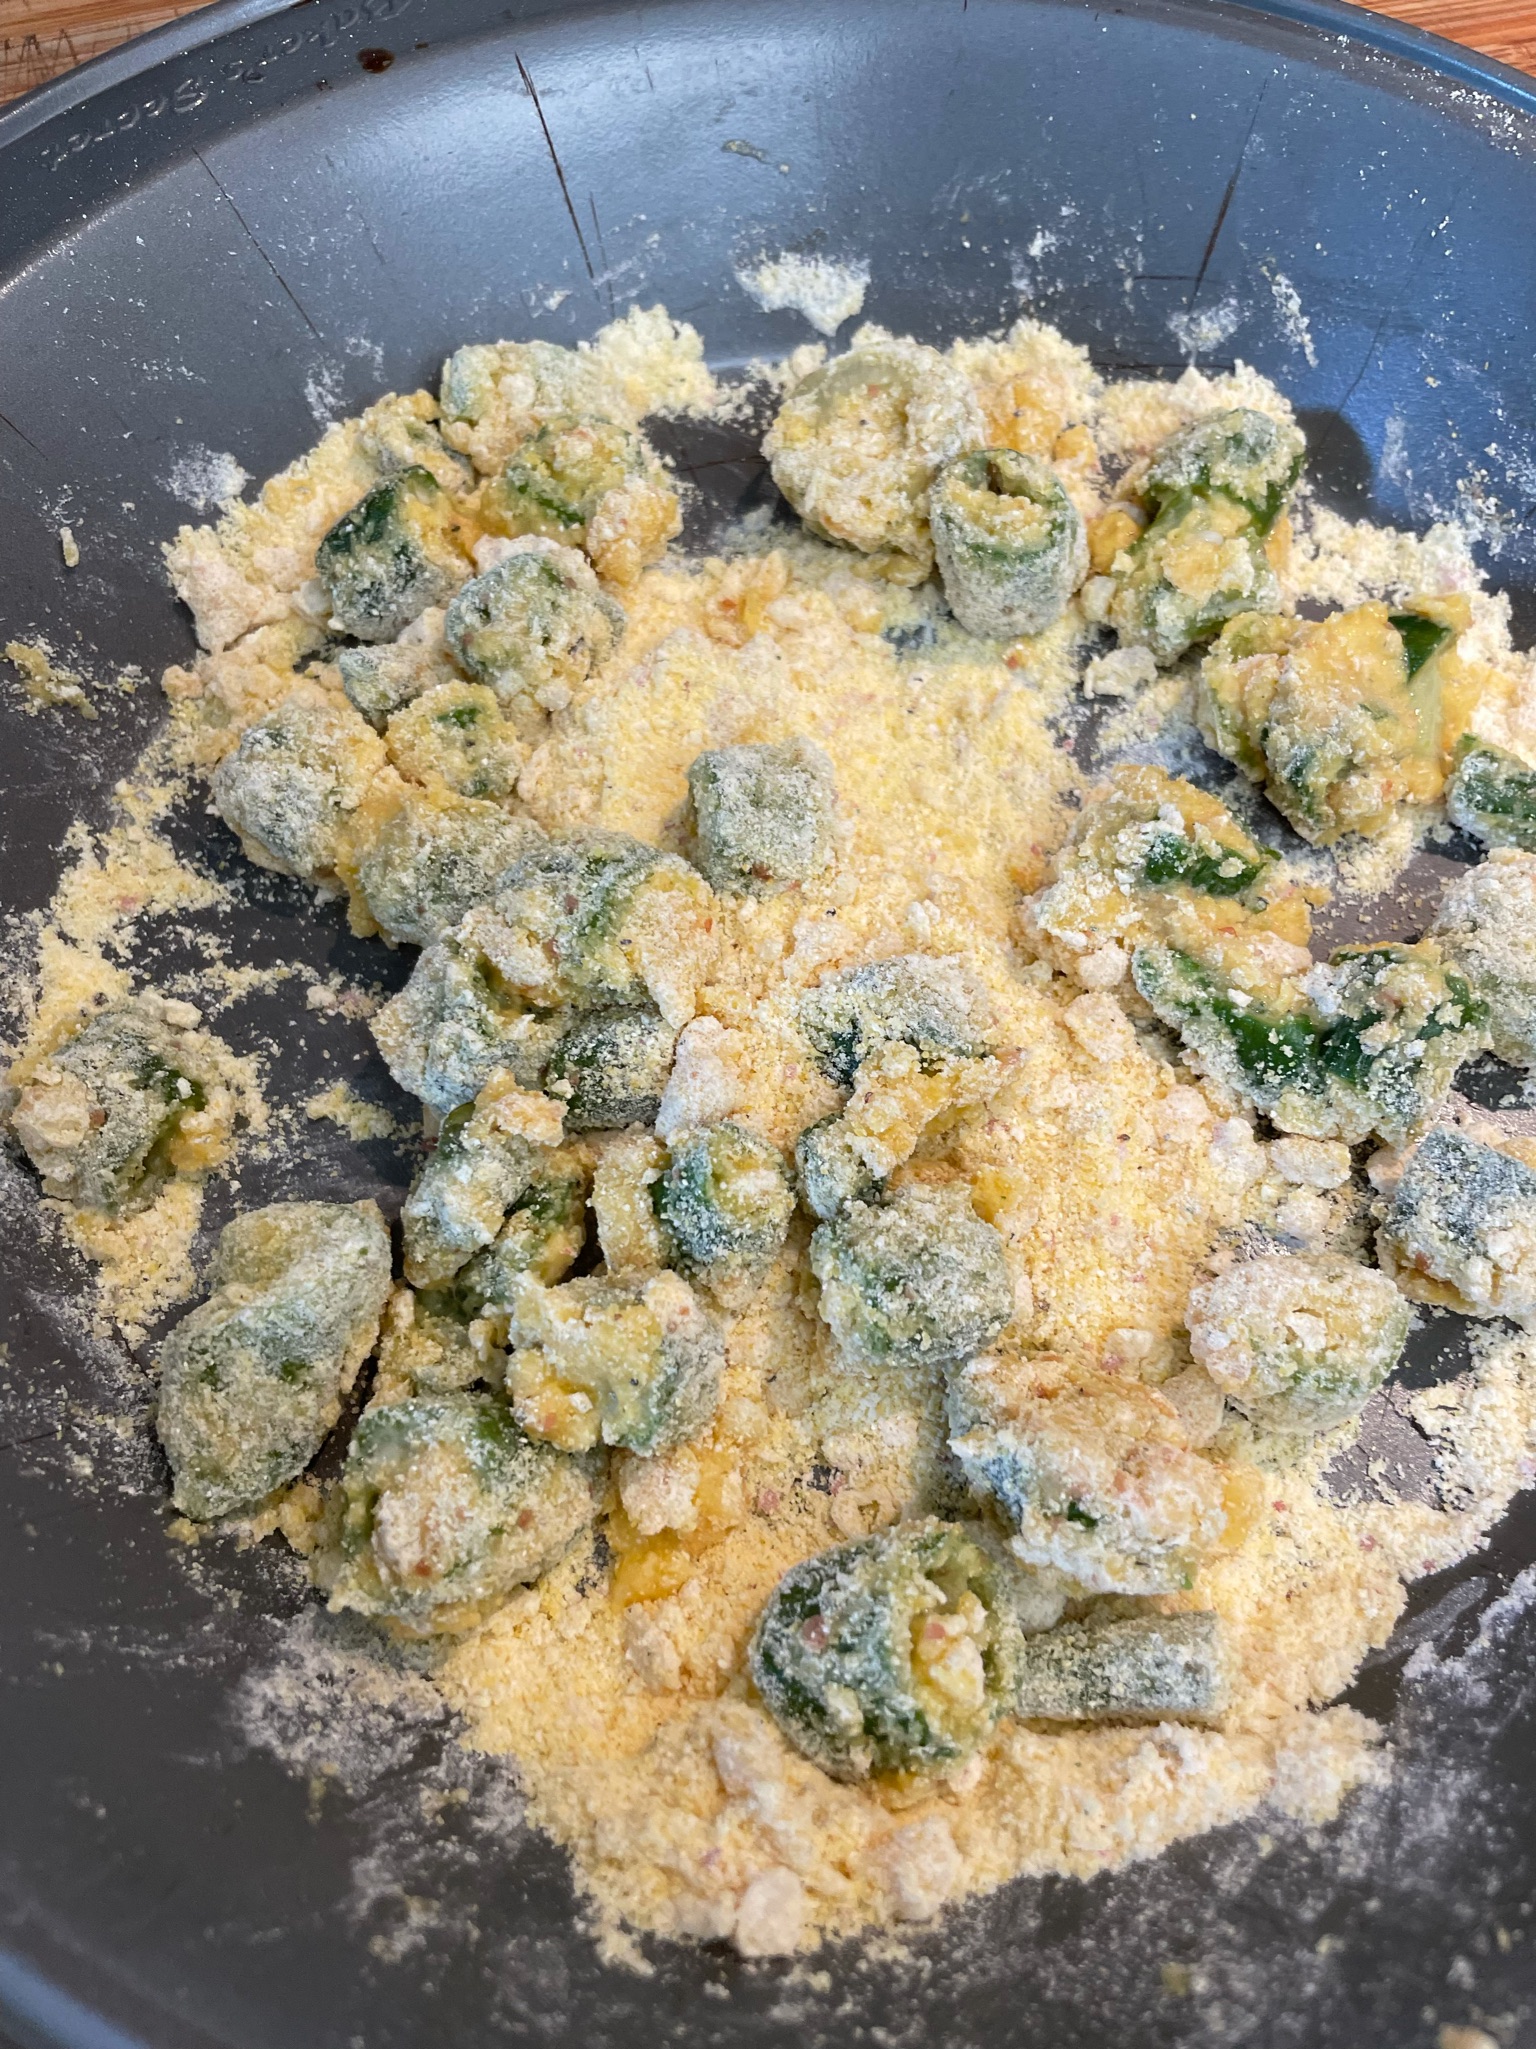
Lift a big handful of sliced okra from the bowl of egg and okra and place it into the corn meal mixture. Dredge the okra so that all the pieces are coated. Using your hands as a sieve, lift out the okra, and gently drop into the hot oil. Let it fry for a couple minutes. Using a slotted spoon, give it a stir. Stir every once in awhile until all the pieces are golden brown.
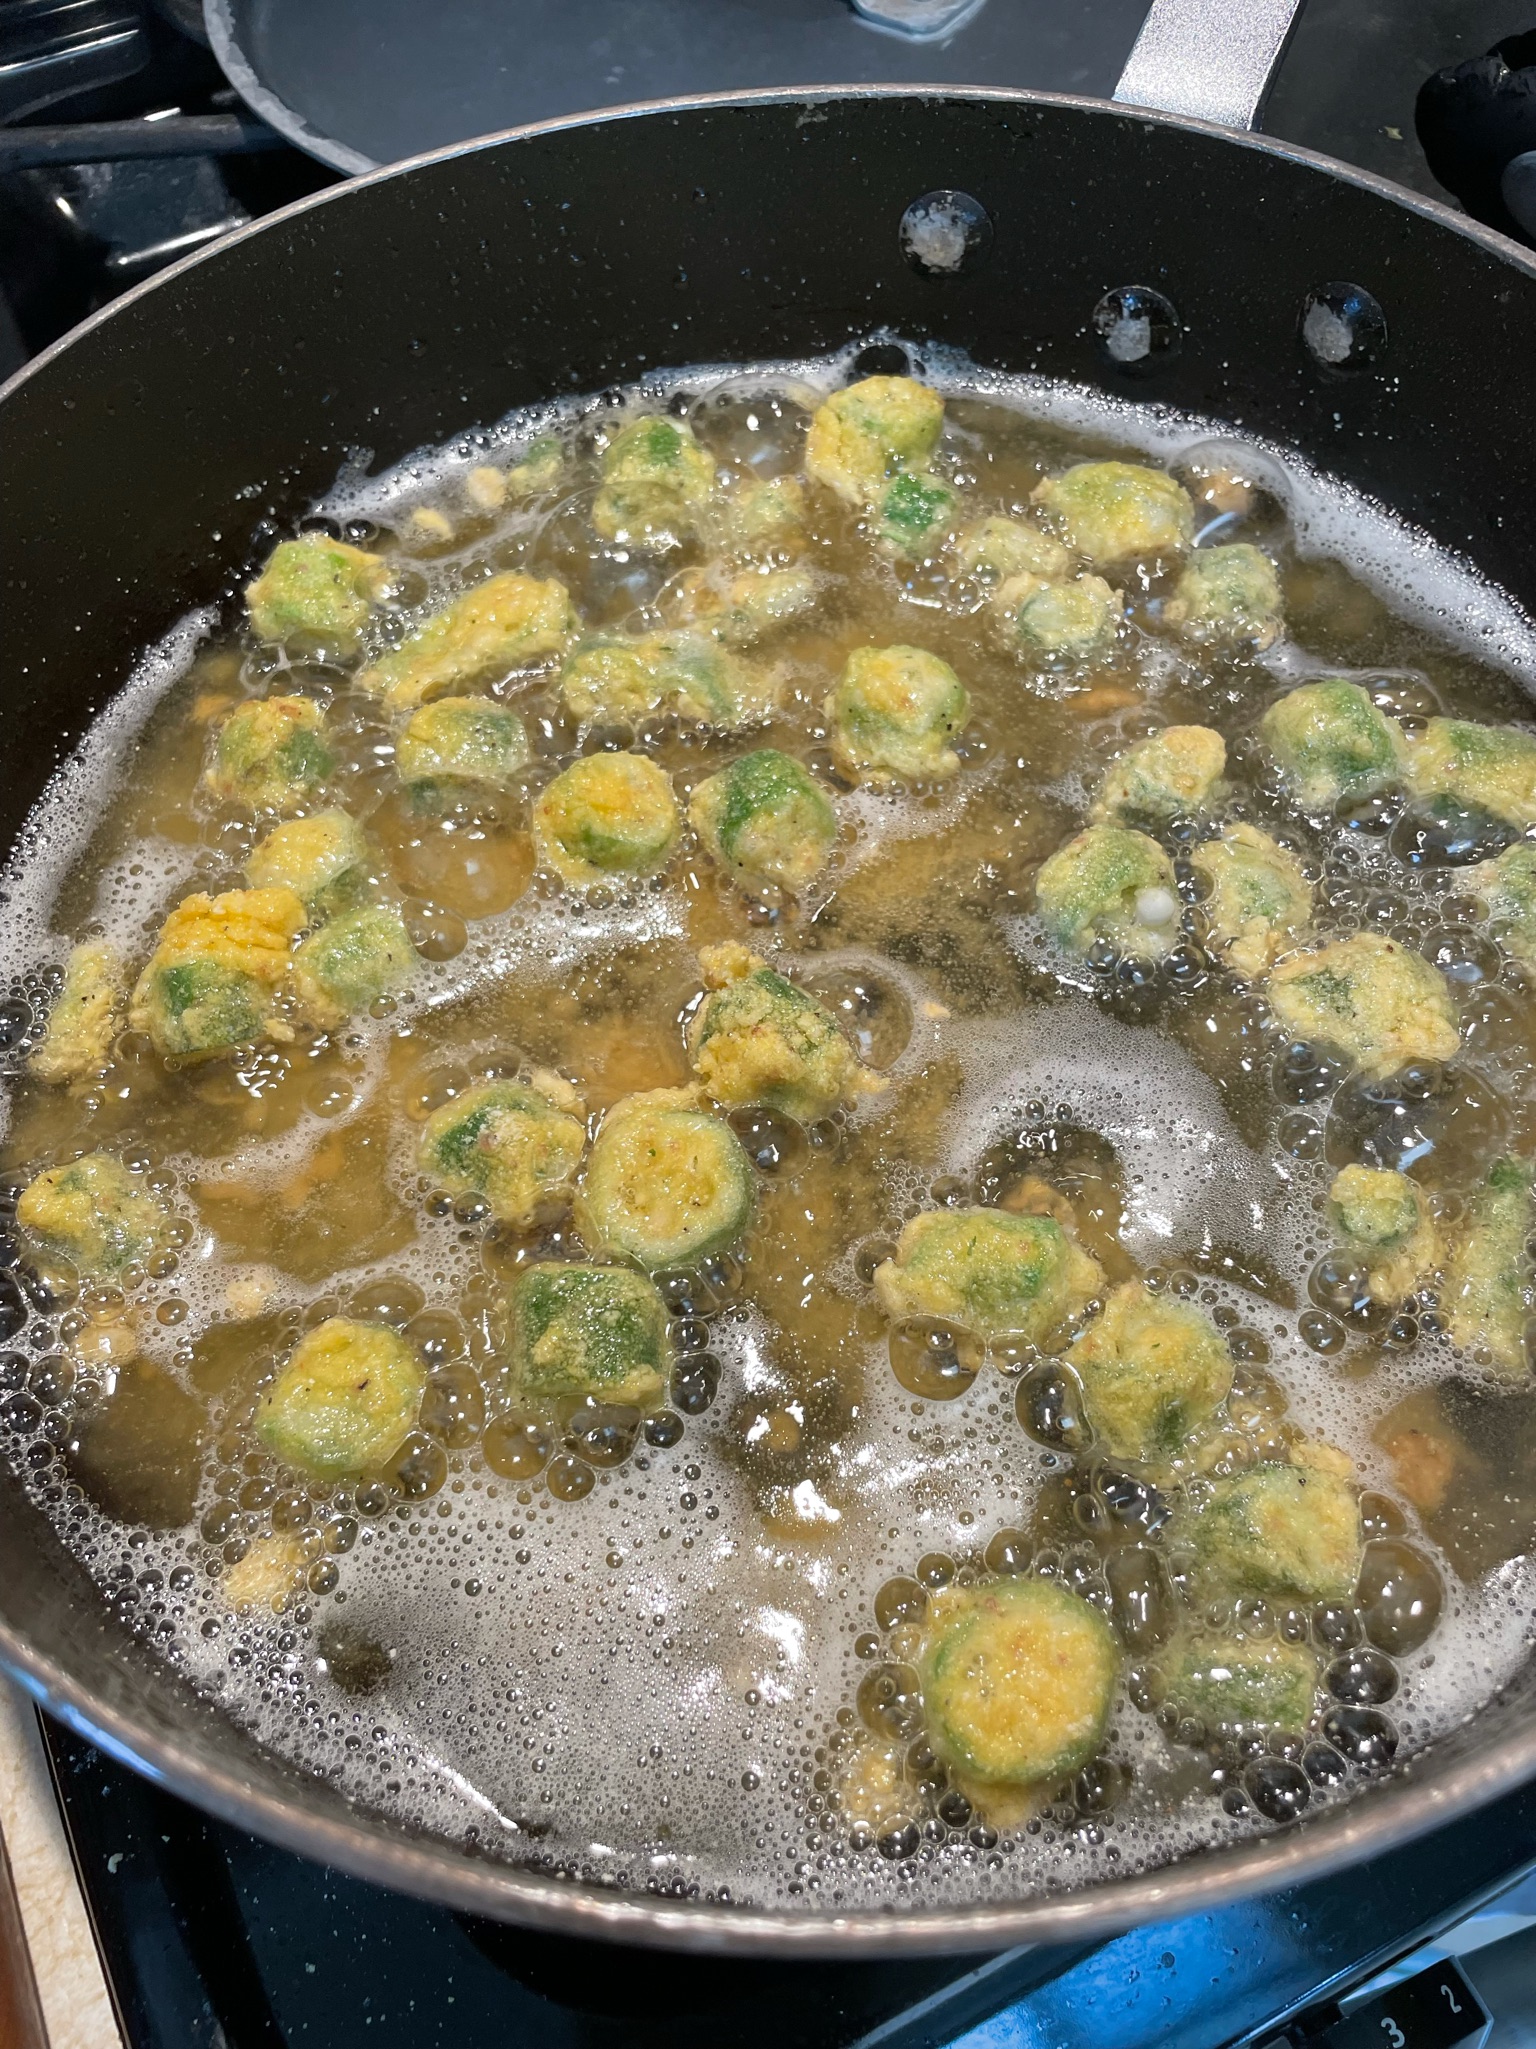
Once golden and crispy looking, remove from skillet into a paper-lined bowl using a slotted spoon. Sprinkle with salt. Repeat the procedure until all the okra is done. You may have to add more oil to the pan. For me, this is four batches. Do not overcrowd the okra or it won’t get crispy. Make sure to salt every batch.
NOTES: I don’t care for garlic salt on this. Just sayin’. Regular salt or seasoned salt will do. This kinda falls into the salty snack category if you have a hankerin’. This has a Cousin Pam thumbs-up rating even though she should not be eating fried foods, but who can resist . . .
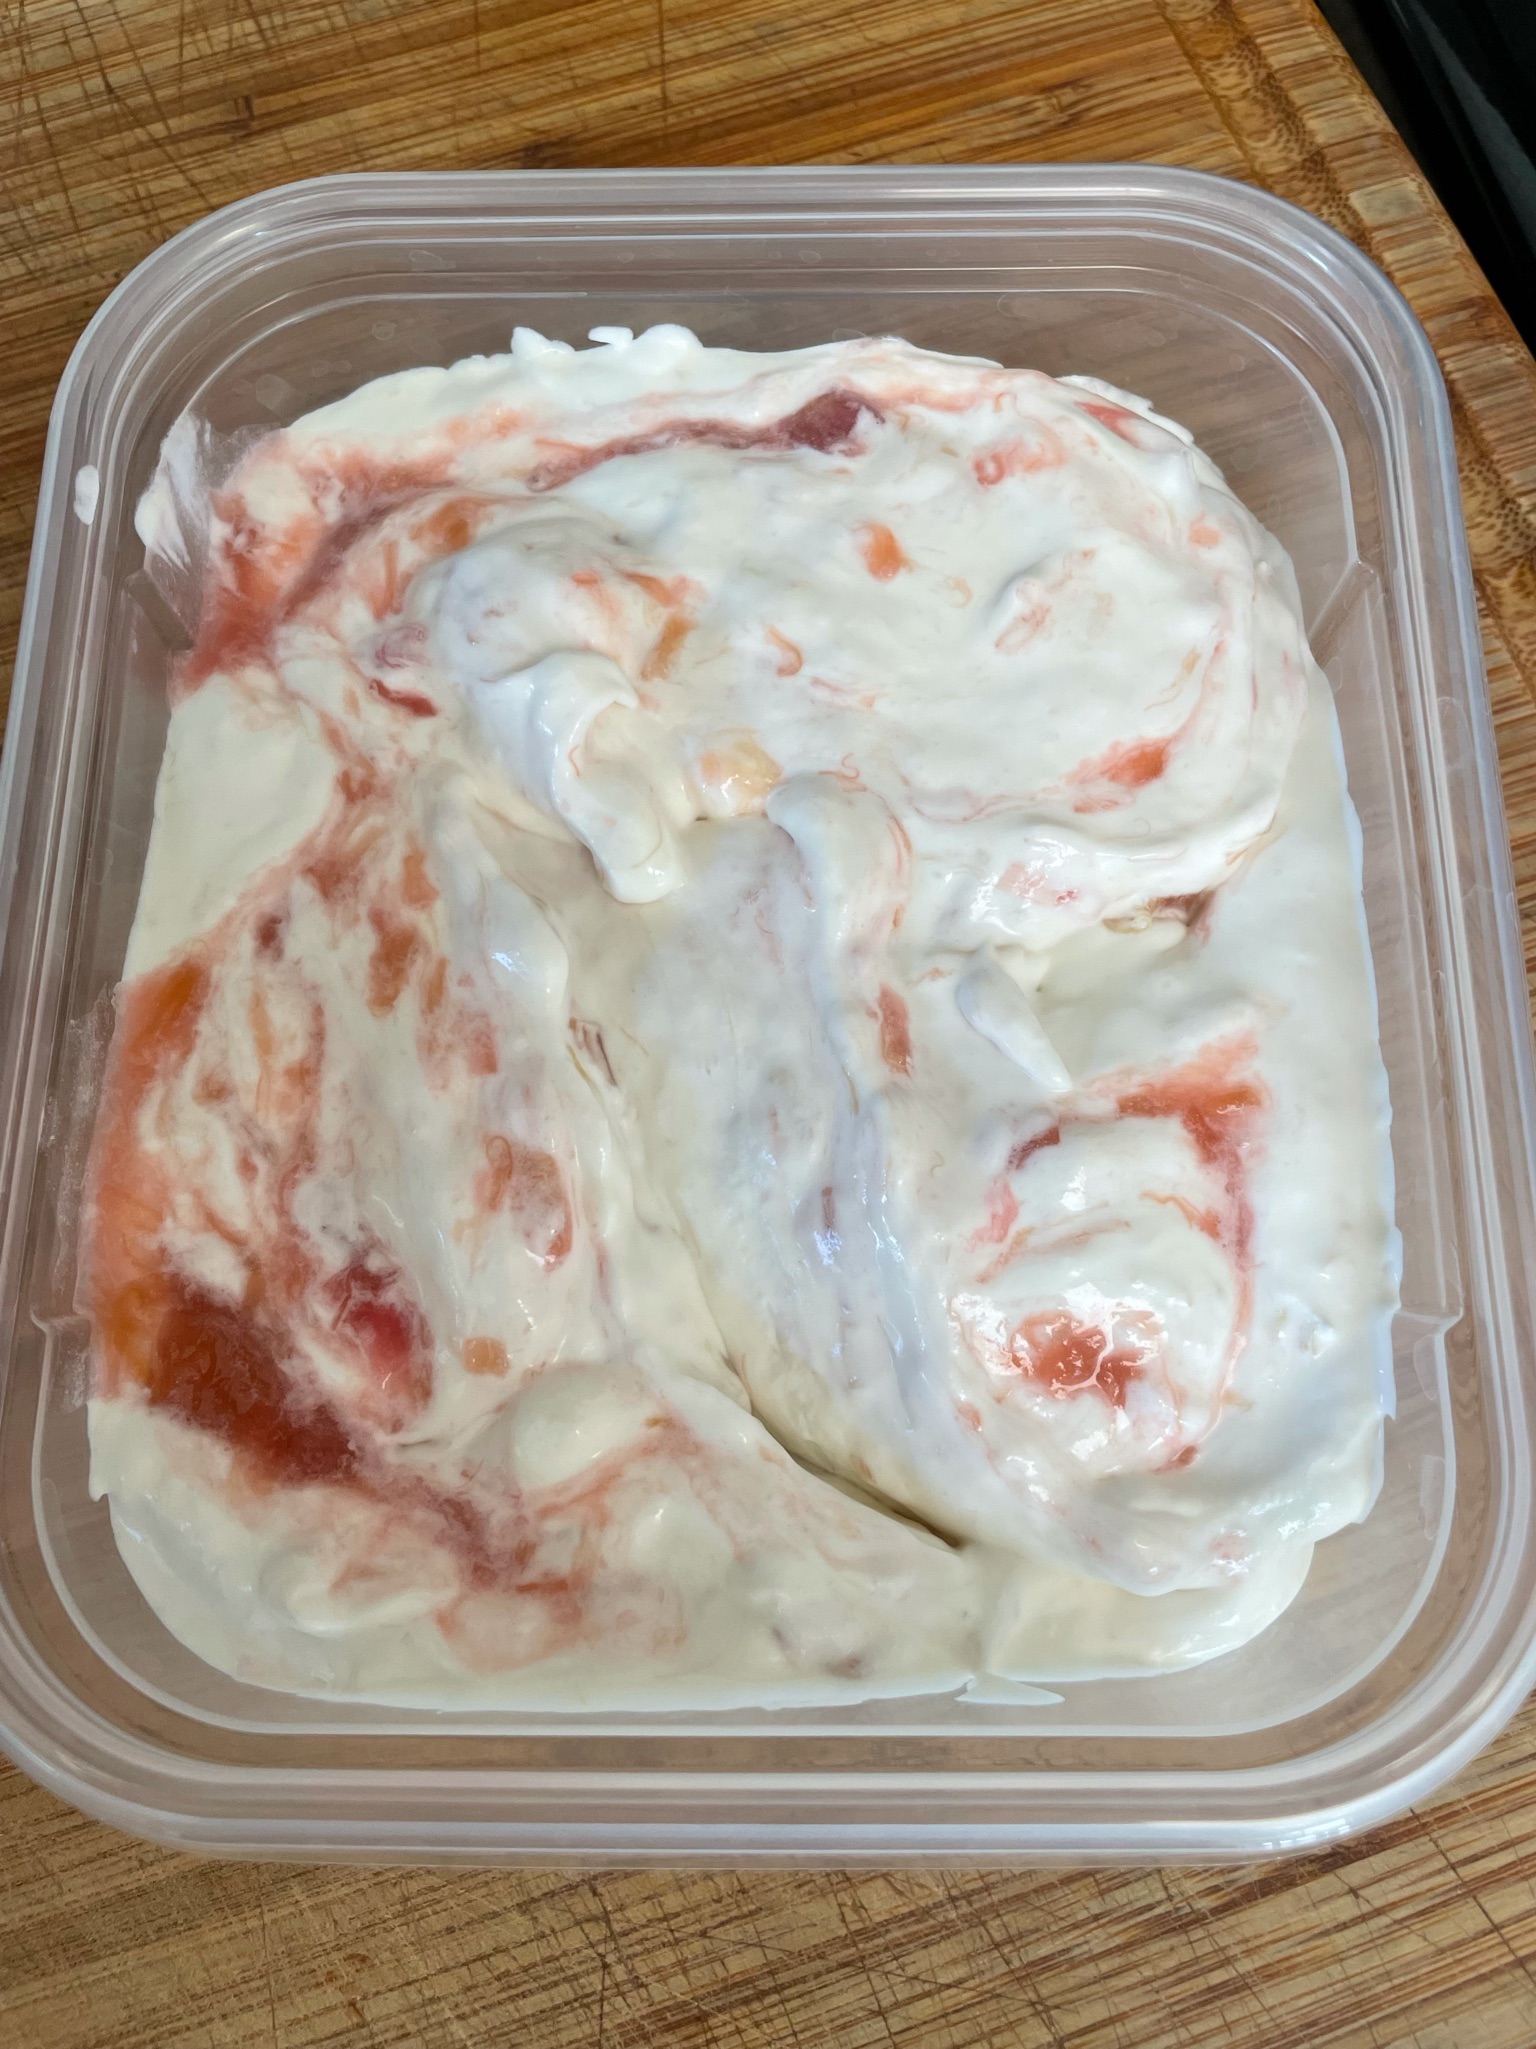
This is a delicious no-churn ice cream made with the first fruit of summer: rhubarb. The recipe comes from Older Mommy Still Yummy.
- Ingredients
- 3 cups chopped rhubarb
- 1/2 cup sugar
- 1 14oz. can sweetened condensed milk
- 2 cups whipping cream, whipped
In a saucepan, stir together rhubarb and sugar. Cook, stirring frequently, until rhubarb is tender and starts to fall apart. Remove from heat and let cool. Chill until cold. This may take a couple hours in the refrigerator.
Remove about 1/2 cup of rhubarb mixture and set aside. Mix together the remaining rhubarb mixture and the sweetened condensed milk. Fold in the whipping cream, about a third at a time until the whipping cream is well incorporated.
Pour into a freezer-safe dish or dishes. I like to use small plastic tubs, they’re about 1-1/2 cups each, because the ice cream freezes faster and I can give them away without giving it ALL away and takes up less space in the freezer as they’re used up. But you can put it into one large dish if you want. Once you’ve got the ice cream divvied up, take the remaining 1/2 cup rhubarb and dollop onto the top and then run a utensil through it to make swirls. This is the wow factor of the ice cream, that pop of rhubarb tartness. Super yummy!

Everyone knows how to make 7-Layer Bars, right? Well, in case you don’t, here are the instructions. This is the easiest, yummiest recipe to assuage that chocolate craving right now (or in thirty minutes anyway)!
- Ingredients
- 1/2 cup (1 stick) of butter
- 1 cup (or 1 pack) of crushed graham crackers
- 1 cup shredded coconut (sweetened or unsweetened . . . it does not matter)
- 2 cups chips (chocolate, white chocolate, milk chocolate, butterscotch, peanut butter, whatever kind you like or have on hand or a mixture . . . it does not matter)
- 1 can sweetened condensed milk
- 1 cup raw chopped nuts (walnuts, pecans, almonds, whatever . . . it does not matter)
Preheat oven to 350 degrees F. Melt butter in a 9×13″ pan. Tip the pan to make sure the bottom, and up the sides a little bit, is coated with melted butter. Sprinkle the graham cracker crumbs evenly over the melted butter on the bottom only of the pan. Sprinkle the shredded coconut over the crumbs. Sprinkle the chips over the coconut layer. Pour sweetened condensed milk over all. Sprinkle with nuts. Bake at 350 degrees F for thirty minutes. Remove from heat. Let cool if you can wait. Serve. Tastes great warm and melty or cold and less messy.
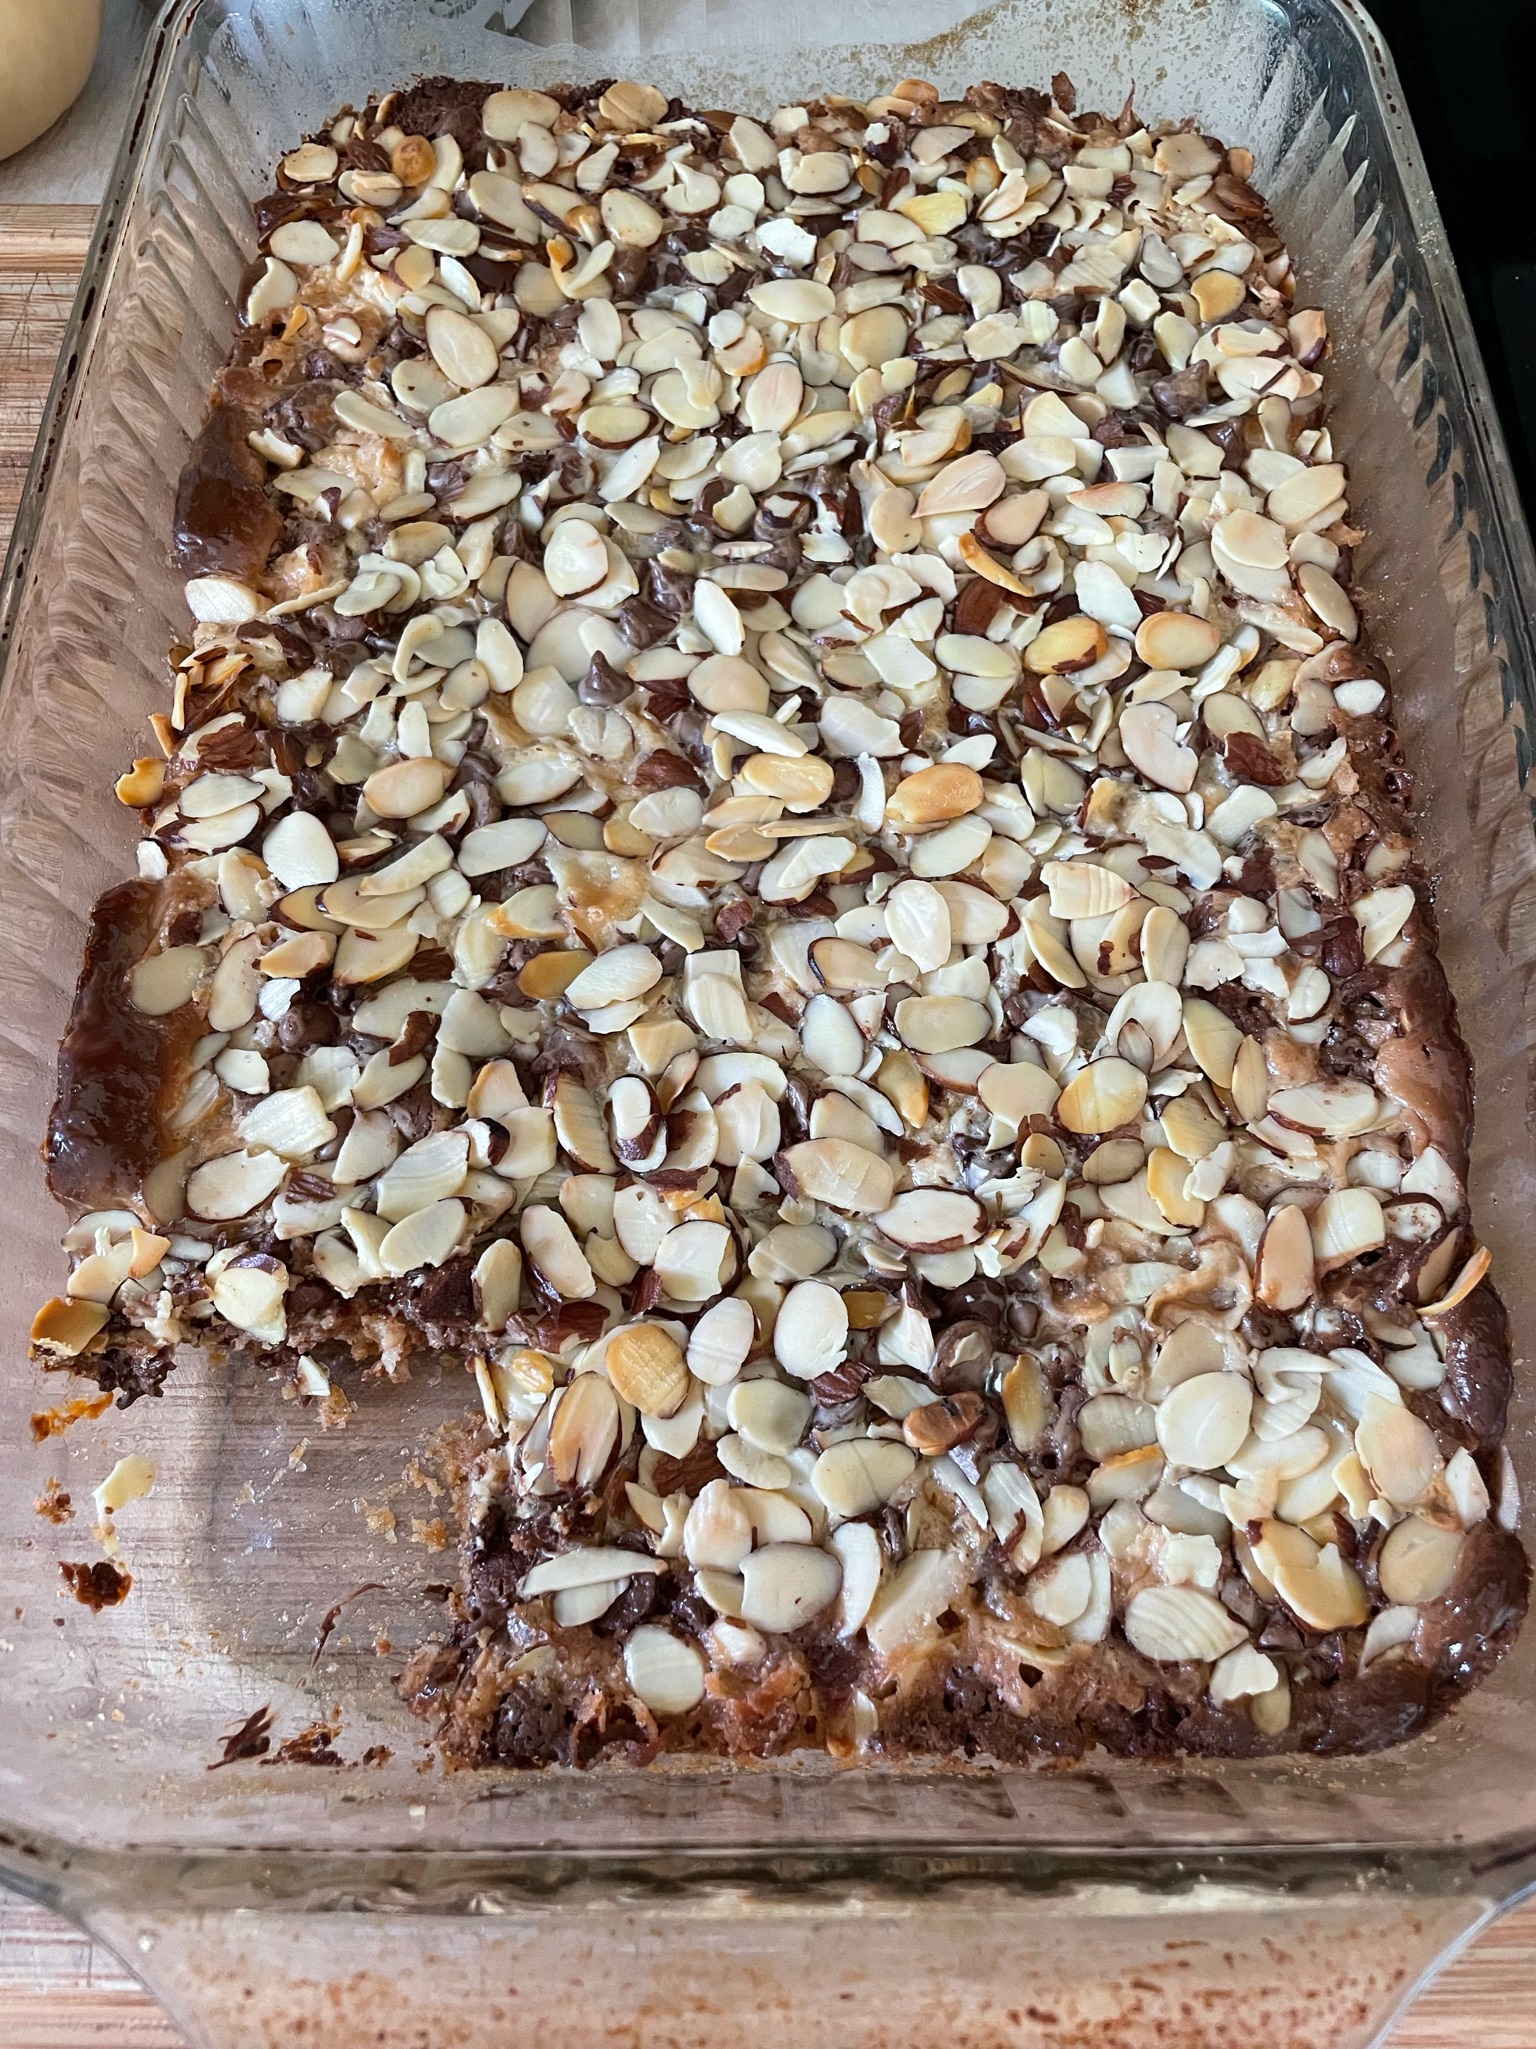
NOTE: What you see pictured here is two cups total of semi-sweet chocolate chips, white chocolate chips and milk chocolate chips. I had several bags with just a few chips left in them so I mixed it all together. I used sliced almonds for the nut component. The “usual” 7-Layer Bar would be semi-sweet chocolate chips, butterscotch chips, and chopped walnuts. I’ve never used salted, roasted nuts before, but that might be good. If you used gluten-free graham cracker crumbs, this could be a gluten-free dish.

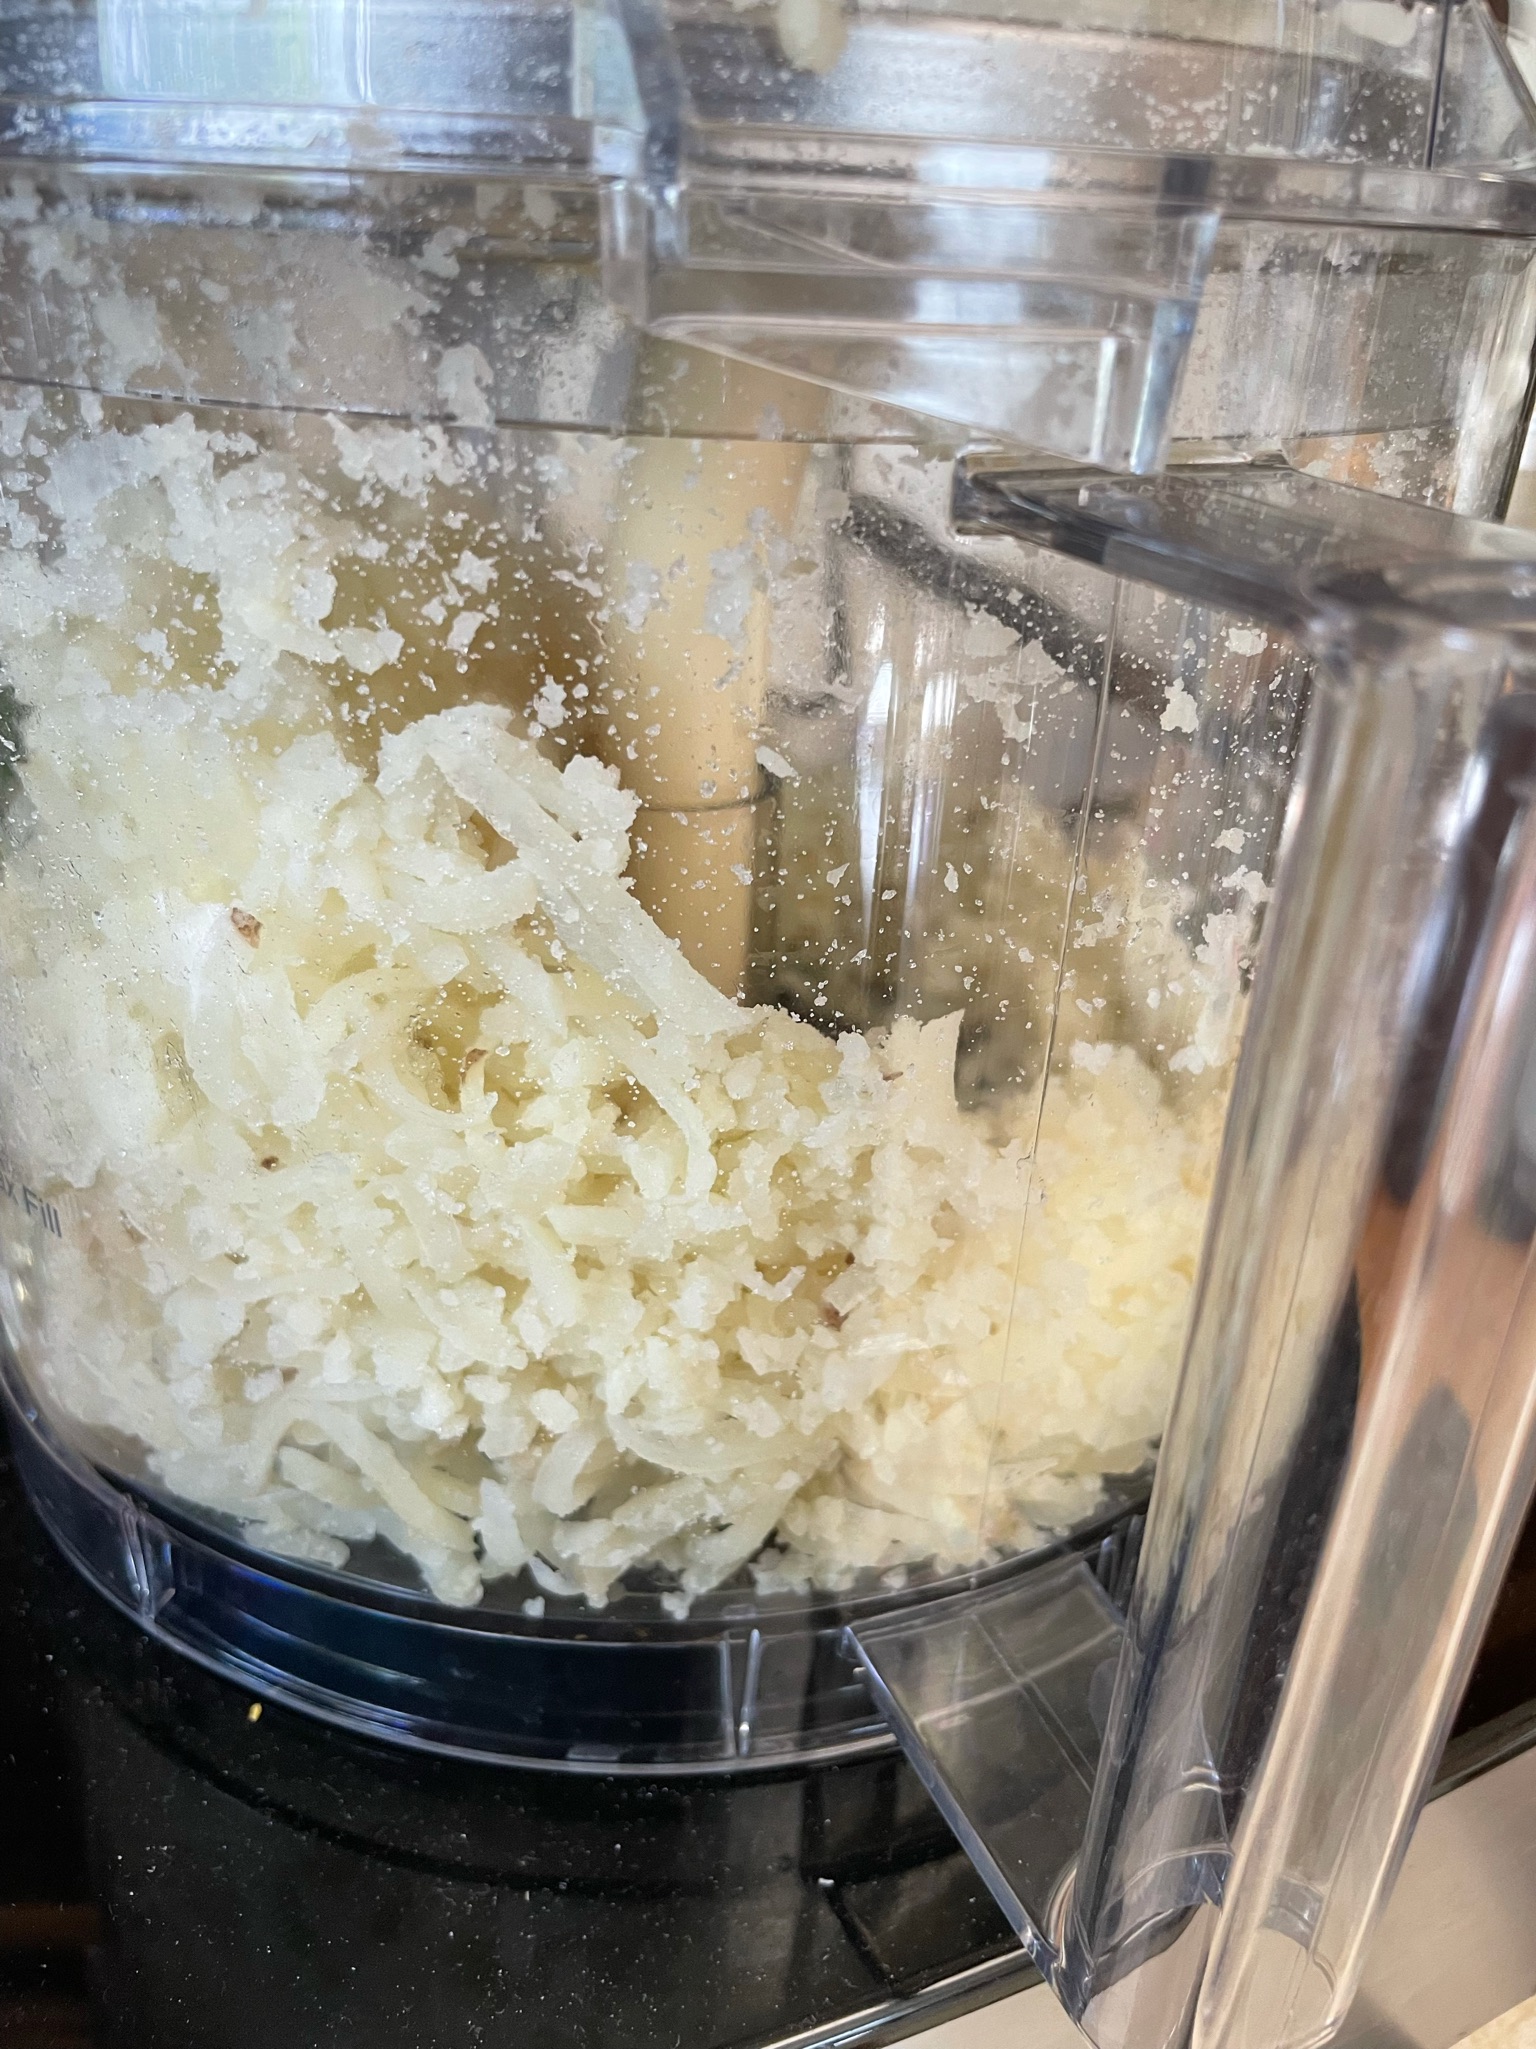
I’ve been trying to tweak this dish since I first had it at a family gathering. It was so, so good that I wanted to add it to my arsenal of gluten-free foods. You could go a lot of different ways with this to punch up the flavor. I’ve used canned diced green chiles here, but consider how bacon bits would be amazing.
- Ingredients
- 2 large russet potatoes, parboiled, then shredded
- 1 cup sour cream
- 1-1/2 cups shredded sharp cheddar cheese, divided
- 4 oz. can diced mild green chiles
- Salt and pepper
Preheat oven to 375 degrees F. Grease or spray an 8×8″ baking dish with non-stick spray.
In a large bowl, mix together the shredded potatoes, sour cream, 1 cup cheese, and chiles. Stir in a liberal amount of salt and add pepper to taste. Spread into the prepared dish. Sprinkle remaining 1/2 cup cheese over the top. Bake, uncovered, at 375 degrees F for 45-60 minutes. Serves 4.
NOTE: Parboiling was an interesting challenge as I had never done that before. It means to boil the potatoes whole, or in large pieces, until the outsides are tender, but the insides are still hard. Kinda tricky. They shred rather nicely, though. I used a hand shredder one time and then another time I used my Cuisinart shredder attachment. Either way is fine. The dish requires a generous amount of salt. The first time I tried this I didn’t use enough and the whole thing was rather, muh blah. The last time I made it using garlic sea salt. REALLY good! When I ate this at Easter dinner for the first time, Andrew and Sharon had added just a teensy bit of diced (I assume pickled) jalapeno. My husband thinks I’m killing him with spicy food, so I didn’t put any jalapenos in the potatoes. The baking time will depend upon how big and how parboiled the potatoes were to begin with. You want to make sure they’re very soft before removing the finished product from the oven. I served these with stove-top pork spare ribs in a type of barbecue sauce. The potato dish’s green chile component complimented the ribs nicely.