
You are currently browsing Paula Lindstam’s articles.
This is from Better Homes and Gardens’ Home Canning and Freezing (1973 Meredith Corp).
 Note: I quadrupled the batch in order to make 6 quarts. I used my canner to do the boiling water bath. Start the 20 minute processing time when I put the jars into boiling water. Don’t wait for it to re-boil. I put the cover on my canner, but left the stopcock open so it’s not pressurized. Removed the jars immediately at the end of 20 minutes processing.


 Makes 2 pints. I used one wide-mouth and one regular.
Chop clean, fresh rhubarb (approximately 4-5 stalks) into chunks about 1″ long. Try to use stalks about the same diameter as your finger. In some places that’s big rhubarb, in others (like here in Alaska) that’s quite small. Pack the rhubarb loosely into the jars.
Divide these spices evenly between the two jars: 2 tsp. peppercorns, 1/2 tsp. whole cloves, 1 tbsp. sliced fresh ginger, 2 bay leaves, 2 dry red chiles.
In a small saucepan mix together 1 cup cider vinegar, 1 cup water, 1 cup sugar, and 1/2 tsp. salt. Bring to a boil, stirring occasionally. Make sure the sugar and salt has dissolved. Remove from heat and pour, hot, into the jars. Run a knife or something like that around the inside of the jar to release air bubbles and then make sure the jars are filled to within 1/2″ of the top. I did have a little bit of leftover liquid that I threw away.
Cover the jars with lids, let cool, and then place in the refrigerator. They’re okay to eat in two days and should be eaten within two weeks. All good! It’s a very nice pickle eaten with salty foods.


 One thing I really noticed was how the liquid turned pink after a couple days, even using fairly green rhubarb as seen above.
I based this upon a recipe found at lifelovefood.

I always enjoy finding interesting recipes using rhubarb. I found this one on an aggregate site called “astray recipes”. It was originally posted to EAT-L Digest by Marie Whitman in 1997. I had never tasted or made anything quite like this before. Broccoli Kugel was the extent of my kugel-making attempts prior to this. And I do love Broccoli Kugel. I’m going to estimate that this recipe makes 16 servings. I’d call it a dessert, but it would make a nice breakfast, too.


Chop rhubarb and dried cherries. Place rhubarb, dried cherries, raisins, and 1/2 cup sugar into a large saucepan. Cook over low heat, stirring constantly, until the rhubarb is soft and most of the liquid has evaporated.

Nearly boiling.

This is what Matzos are. I had to hunt for them in my grocery store, but they were there. The recipe calls for 5 Matzos and this box has two packages of 5 Matzos each. Someone was thinking!


Crumble Matzos and cover with warm water. Soak until soft.
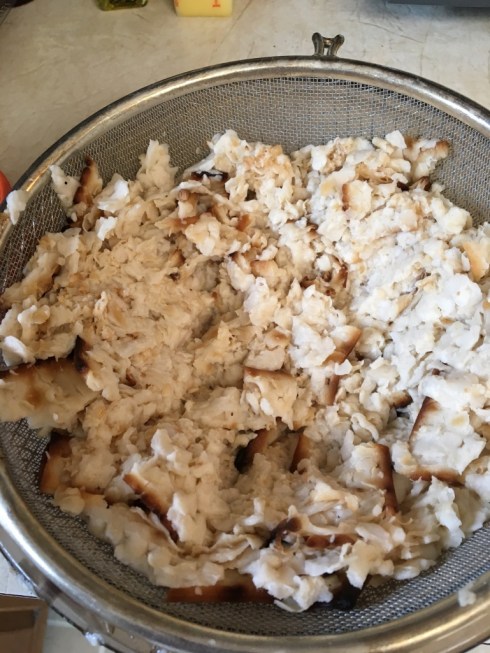 Squeeze as much excess liquid as you can. I did not have much excess.


Beat eggs, yes 9 of them!!! Add remaining 1/2 cup sugar, salt, cinnamon, nutmeg, and cardamom. Continue beating until well blended.
 The recipe calls for 6 Granny Smith apples. I thought it would be way too much. It wasn’t. It was just the right amount. Stir together all the ingredients and pour or scoop into a 4-quart prepared pan.
 Pour melted butter over the top and sprinkle with cinnamon/sugar topping. I used a 10×15″ baking pan. The size is perfect and the bake-time was just right. I’m going to assume that if you use a deeper, rounded, dish your baking time will be longer. Please excuse the look of my pan. I use it to roast spaghetti squash and it’s going to be stained forever.
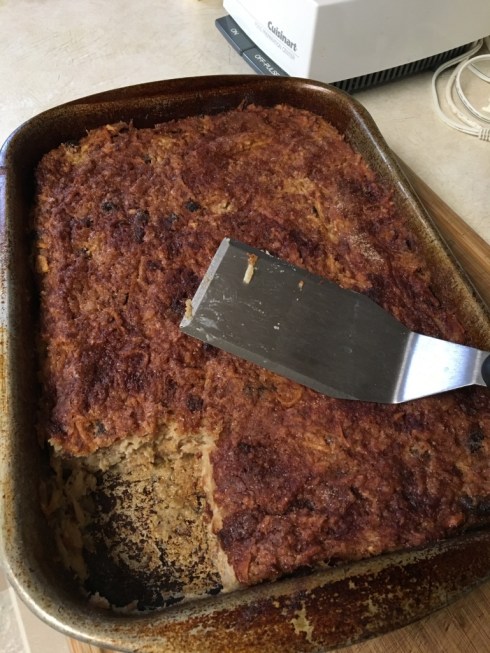
Bake until firm. Mine took about an hour. The two of us ate this for days. I kept it refrigerated, but not covered. It was firm enough to eat by hand, but a plate and fork works, too. There is not much rhubarb flavor, but the dried cherries jump out of each mouthful. I really liked this. It would make a great potluck dessert.
Recipe:
1 lb. rhubarb, sliced
1/2 cup chopped dried cherries
1/2 cup seedless raisins
1 cup sugar, divided
5 Matzos
Warm water
9 eggs
1 tsp. salt
1 pinch nutmeg
1 pinch cardamom
1 tsp. cinnamon
3/4 cup almonds, chopped
6 Granny Smith apples, shredded
1-1/2 Tbsp. orange zest
1/4 cup melted butter
1 tsp. cinnamon
1/3 cup sugar
Preheat oven to 350 degrees F. Prepare a 4-quart baking dish by buttering, greasing, or spraying with non-stick spray.
Place rhubarb, dried cherries, raisins, and 1/2 cup sugar into large saucepan. Cook, stirring constantly, over low heat until the rhubarb is soft and most of the liquid from the fruit has evaporated.
Crumble Matzos into a bowl and cover with warm water. Soak until soft. Squeeze dry.
Beat eggs. Add 1/2 cup sugar, salt, and spices. Continue beating until well blended.
Stir Matzos, almonds, apples, orange zest, and rhubarb mixture into the egg mixture.
Pour mixture into prepared dish. Pour melted butter over the top. Stir together 1 tsp. cinnamon with 1/3 cup sugar and sprinkle it over the top.
Bake until firm, about an hour.
Credit goes to Annalise at Completely Delicious for the basic recipe and the idea for this piece of heaven. I am mostly posting this in order for me to remember how I did it.
 My husband is a home wine maker. He usually buys kits that include a hermetically sealed bag of juice that he dilutes by adding water. His latest kit was called Strawberry White Merlot. It’s a low-alcohol-content “wine cooler.” What’s different about this particular wine is that he reconstituted his bag of juice with birch water that he tapped from our birch trees. Then oh, la, the wine was ready at the same time the rhubarb was ripe. A match made in heaven.
Rhubarb Filling Recipe:
You’ll have to wing this part, it’s what I did. I made my filling the night before I baked and finished the cupcakes. I wanted to give the filling a chance to really thicken. In a large saucepan, add 3 or 4 cups chopped rhubarb, 1 cup sugar and 1 Tbsp. water. Bring it to a boil and then let it simmer until it’s thick. How thick? Filling thick. It was sort of like jam. Let cool and then chill, if possible. I was disappointed the next day to see liquid around the edges of my filling, like it had seeped. But in the end it was really fine. No problem at all.
The cupcake recipe:
Prepare for 15 cupcakes. I used paper liners, but you could spray or grease 15 regular “muffin cups”. However you usually do it. Preheat your oven to 350 degrees.
1/2 cup butter (1 stick), room temperature
1 cup sugar
2 eggs
1 egg yolk
1/2 cup blush-colored wine
1/2 tsp. almond extract
1-1/2 cups flour
2 tsp. baking powder
1/4 tsp. salt
Cream together the butter and the sugar in a mixer until it’s light and fluffy. In a separate bowl beat eggs and egg yolk, mix in the wine and almond extract. In another bowl stir together flour, baking powder, and salt. Into the butter mixture stir in about 1/3 of the flour mixture, then stir in 1/3 of the egg mixture, repeating by thirds until it’s all stirred in the mixer together. Beat briefly until it’s incorporated.
Divide the batter evenly into the cupcake liners or greased cups. Each cup will be about 2/3 full. I found this recipe to be true to quantity. Nice!
Bake at 350 degrees for 15-18 minutes. Test by pressing lightly in the center of one of the cupcakes. If it bounces right back, it’s done. Mine took 18 minutes exactly. Like I said, this was a really true recipe.
Remove from the oven. I always let mine cool in the tins. That’s probably wrong, but I never have any raw centers. Let the cupcakes cool to room temperature.
Caveat: I can’t take pictures for anything.
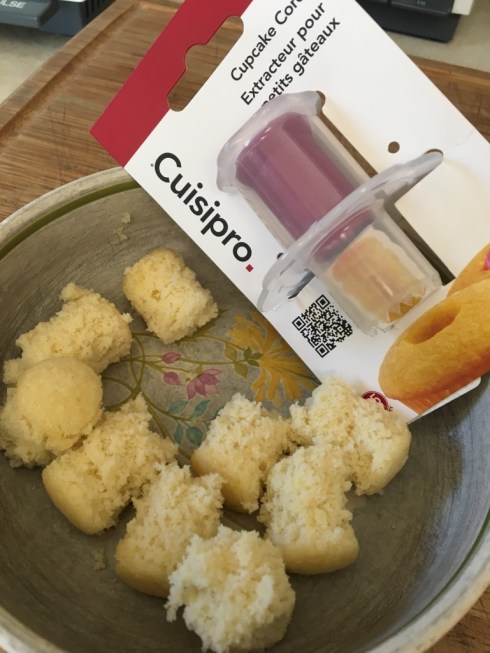
Remove the centers from the cooled cupcakes. I have this REALLY handy device that cores the cupcakes. I kid you not. It’s a cupcake corer. Makes the task really simple. Before I got it, I used a piping tip (upside down) to cut out the center and then scooped out the rest with a small spoon. It’s not hard. The challenge is keeping people from popping those centers into their mouths. But why should you care, you’ll only throw them away once they dry out, right? So, go for it. Eat away. I envision someday making a trifle out of cupcake centers, custard, and fruit. Okay, now I’m thinking this through, it would be great with rhubarb!


Why rhubarb? What you see laid out on the lawn is a very small percentage of what’s growing at my house. That’s why!

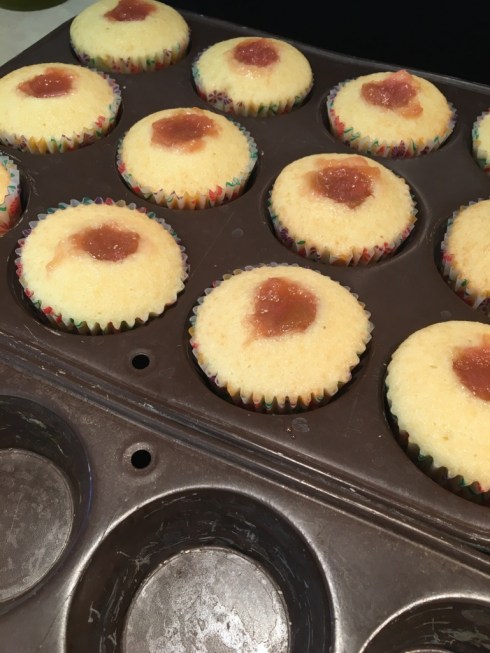
So, once you’ve got the cupcakes made and cored, the filling ready to go, fill them. I used a teaspoon to scoop filling out of the bowl and then dribble it into the holes in the cupcakes.
Frosting recipe:
1 cup butter (2 sticks), room temperature
4 cups powdered sugar
¼ to 1/3 cup rhubarb filling
1-2 Tbsp rhubarb syrup (optional)
Pink food coloring (optional)
Once again, you’ll have to wing it. I put the butter into my mixer and softened it, adding 4 cups powdered sugar and then adding rhubarb filling a tablespoon at a time. I had earlier made a rhubarb syrup and I slowly added a couple tablespoons of it. [I had meant to make a simple syrup, but lost track of time and ended up with a very thick rhubarb reduction, not jelly but definitely not simple syrup. It is more like a rhubarb sauce without pulp. That’s it.] I also added a few drops of pink gel food coloring. Once you have frosting at the appropriate consistency for spreading, frost your cupcakes. I piped mine because I knew trying to use a knife over that loose rhubarb filling in the centers would be a mess, no thanks. So, as much as I hate piping because I’m so bad at it, I piped.

I took half a batch to my daughter’s workplace and they loved them! They are really good.
**Note: the next day, because I had leftover filling and frosting, I made another batch of cupcakes, but this time I used Namaste Perfect Flour Blend instead of all-purpose flour. I have a relative with a wheat allergy. They browned across the top, but it did not affect the flavor or the moisture. The cupcake corer didn’t get enough friction to remove the cores easily, so the cake’s crumb is much lighter than regular wheat flour, I guess. Everything else about it was good and they were enjoyed! See picture below . . .
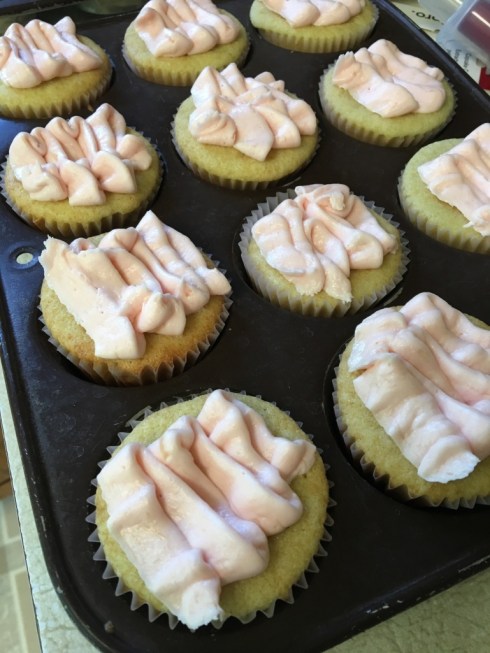
As you can probably see, I didn’t have enough filling, or frosting, to do a second batch properly, but they were delicious none the less.

Recipe:
1-1/2 cups milk
1 cup raisins
1 cup water
2 pkg active dry yeast (4-1/2 Tbsp.)
½ cup sugar
3 eggs
1 tsp salt
½ cup butter, melted
8 cups bread flour
2 Tbsp. milk
¾ cup sugar
2 Tbsp. ground cinnamon
2 Tbsp. melted butter
Warm the 1-1/2 cups milk until it just starts to bubble (either microwave or stovetop). Stir in the raisins. Let this start cooling while preparing other parts.
Warm the water and stir in the yeast and the ½ cup sugar. Let sit while the yeast activates and it froths. I do this in my KitchenAid mixture. Mix in the eggs, salt, and butter. Stir in the warm, not hot, milk with raisins. Add about 4 cups of flour and run the machine to build the gluten for about 5 minutes. Gradually add the remaining flour until it’s smooth and elastic. Place the dough in a very large greased bowl and turn it over so that the top of the dough is greased and the plastic wrap won’t stick to it. Cover with plastic wrap and let rise until doubled.
Roll dough out on a lightly floured surface about 1/2 inch thick. Moisten dough with 2 Tbsp. milk. Mix together ¾ cup sugar and 2 Tbsp. cinnamon. Sprinkle across top of moistened dough. Roll up lengthwise tightly; so it’s about 3 inches in diameter.* Cut the roll into thirds. Tuck under the ends. Place rolls into greased 9×5 inch loaf pans with the seam at the bottom. Spray the tops of the loaves lightly with oil (or don’t). Let rise again for an hour.
Bake at 350 degrees (175 degrees C) for 45 minutes, or until loaves are lightly browned and sound hollow when knocked. Remove loaves from pans and brush with melted butter. Let cool before slicing.
*Note: As you can see from the pictures, my loaves split. They still had that beautiful swirl for each slice and tasted great, but I believe a looser roll might have alleviated the splitting problem. Next time! And next time I’ll try to remember to snap a picture of a slice.

Warm the 1-1/2 cups milk until it just starts to bubble (either microwave or stovetop). Stir in the raisins. Let this start cooling while preparing other parts. Warm the water and stir in the yeast and the ½ cup sugar. Let sit while the yeast activates and it froths. I do this in my KitchenAid mixture. Mix in the eggs, salt, and butter. Stir in the warm, not hot, milk with raisins. Add about 4 cups of flour and run the machine to build the gluten for about 5 minutes. Gradually add the remaining flour until it’s smooth and elastic. Place the dough in a very large greased bowl and turn it over so that the top of the dough is greased and the plastic wrap won’t stick to it. Cover with plastic wrap and let rise until doubled.

Roll dough out on a lightly floured surface about 1/2 inch thick.

Moisten dough with 2 Tbsp. milk. Mix together ¾ cup sugar and 2 Tbsp. cinnamon. Sprinkle across top of moistened dough.

. Roll up lengthwise tightly; so it’s about 3 inches in diameter.* Cut the roll into thirds. Tuck under the ends. Place rolls into greased 9×5 inch loaf pans with the seam at the bottom. Spray the tops of the loaves lightly with oil (or don’t). Let rise again for an hour.

Bake at 350 degrees (175 degrees C) for 45 minutes, or until loaves are lightly browned and sound hollow when knocked. Remove loaves from pans and brush with melted butter. Let cool before slicing.

*Note: As you can see from the pictures, my loaves split. They still had that beautiful swirl for each slice and tasted great, but I believe a looser roll might have alleviated the splitting problem. Next time!

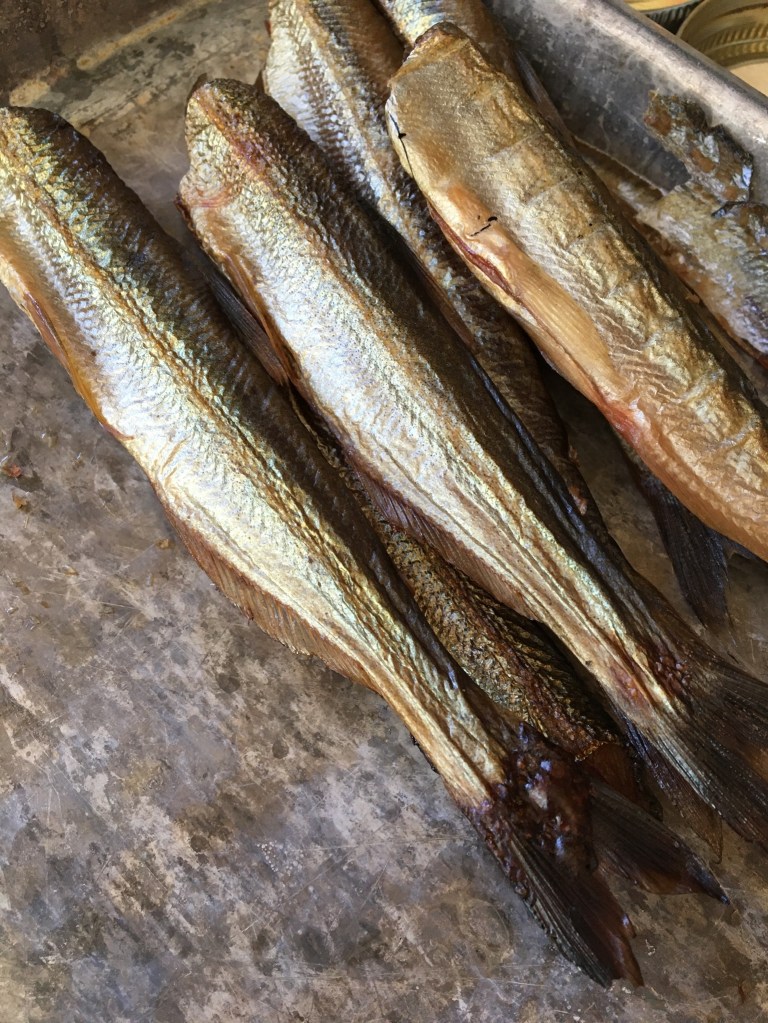
So as not to be confused with something like a soccer hooligan, I give you Eulachon which will take you to the Wikipedia definition and genus, species, etc. everything you learned in biology. I am in Anchorage, Alaska but I grew up in Bristol Bay and these are NOT the smelt that we caught in winter on the Naknek River back home. Not at all. Hooligan are incredibly oily and tend to fall apart once cooked. If you cannot eat your hooligan immediately out of the frying pan, then I would say that smoking them is the best way to go. I only wish that my spring/summer months were leisurely enough to get the smoker out and try a few things. Alas.
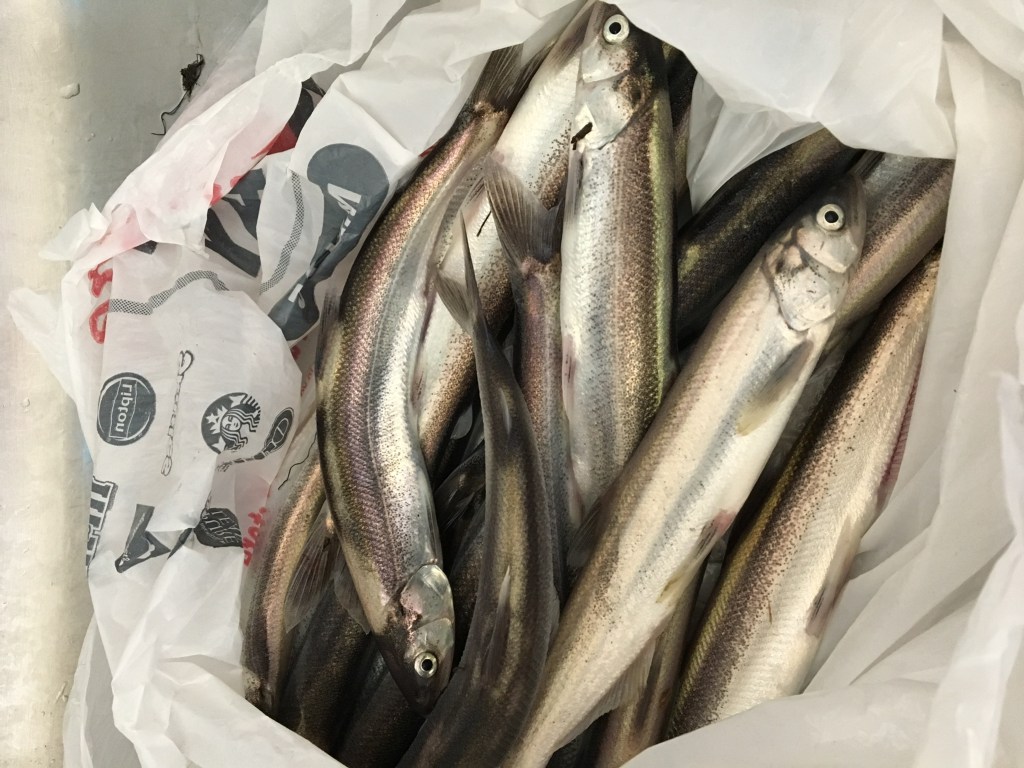


I felt like an elder when my daughter stopped by 20-mile River on our way back from Seward and she caught enough hooligan for me and my husband to have lunch. She’s allergic to fish (it’s a crying shame). Then my husband and second daughter and her friend returned a week later and got more than 100 of them. I try to clean them right away by removing the heads and gutting them. In my opinion, they do not freeze well. It’s best to cook them or smoke them right away.
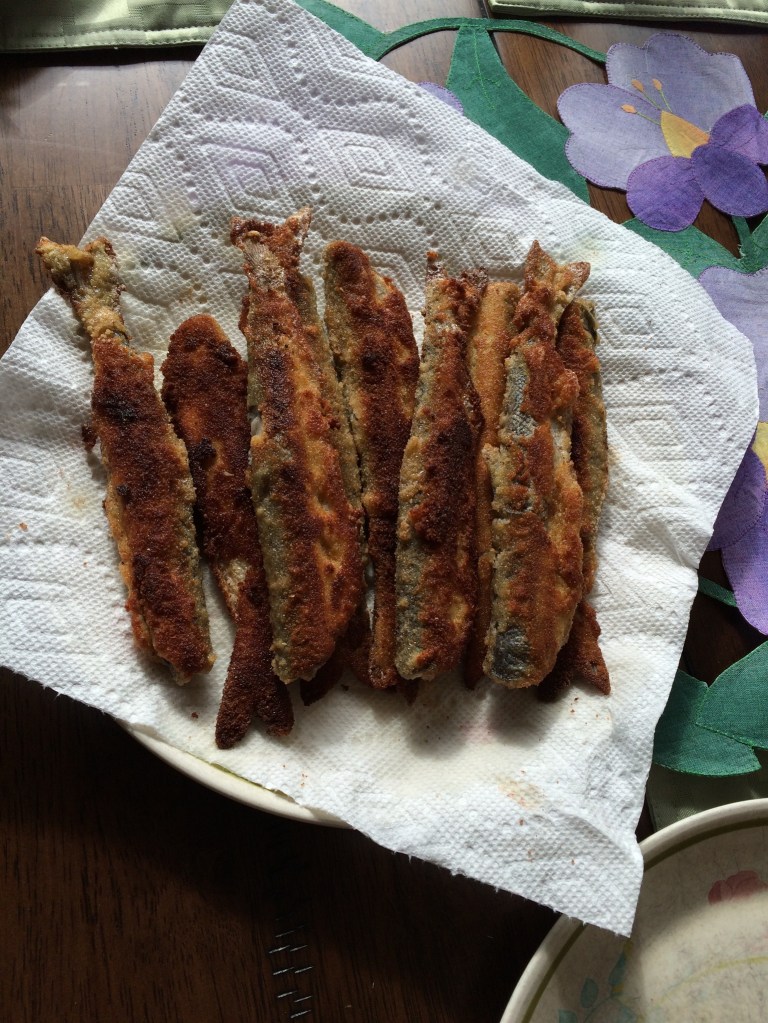
The best way to fry hooligan is to dry them as well as possible in towels or paper towels. Heat about a half inch of oil (I use canola) in a large skillet, very hot. Make a highly seasoned flour by putting about a cup of flour into a plastic “Ziploc” bag and then sprinkling in seasoned salt, pepper, cayenne pepper, paprika, and onion powder. You can do what you like and each time I do it differently. This instruction is more about the method. Then make an egg wash of 2 eggs mixed with a couple tablespoons of water in a pie tin. Then sprinkle regular unseasoned bread crumbs in another pie tin, so you have three things: bag of seasoned flour, pie tin of egg wash, and pie tin of bread crumbs.
Drop five or six cleaned, fairly dry hooligan into the bag of seasoned flour. Shake off the excess flour mixture and roll fish in the egg wash, then roll in the bread crumbs. Fry. Each batch does not take long at all. They are tiny fish, 6-10 inches usually. My husband and I can eat 6-7 at a sitting, so I divvied them up over two days and I delivered about 20 to my daughter’s office. That was a bad idea, by the way. It’s like saying “I’ll deliver pancakes to your office.” They’re pretty terrible by the time you get there. Hooligan really need to be eaten out of the frying pan. Really. No one complained, but me.
Place onto paper towels to absorb the extra oil and serve immediately. Yummy!
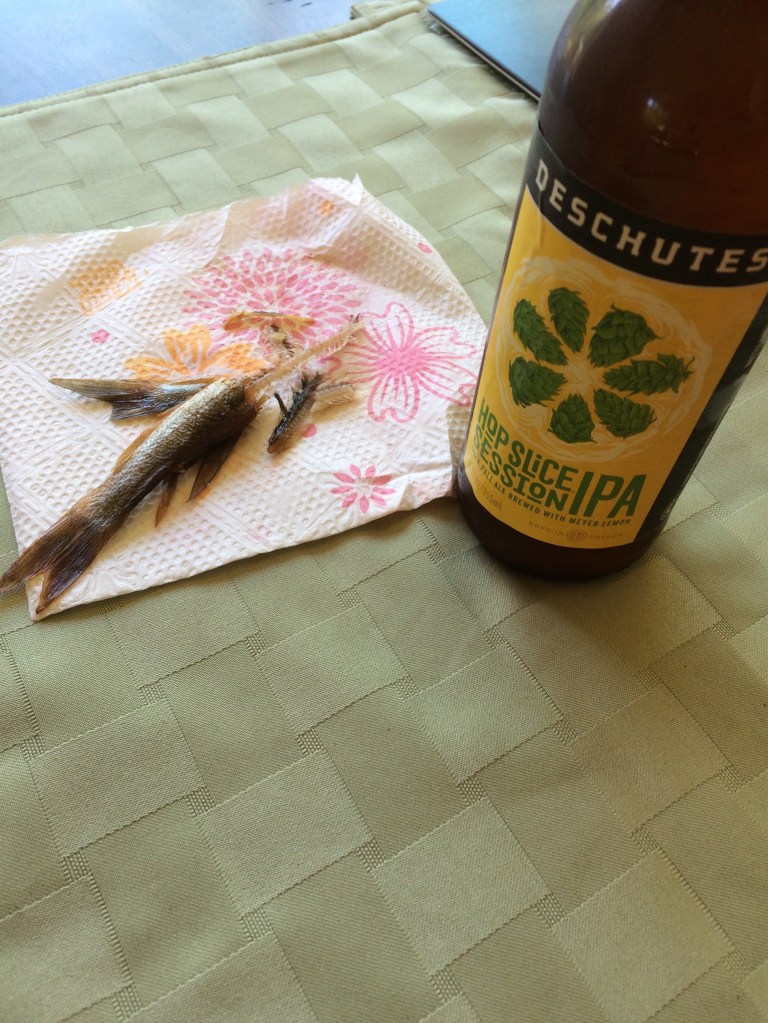
BW and my husband, they eat theirs backbone and all. Me, I pull the backbone out and then eat the rest. The backbone is a bit too much crunch for my tastes. I fed the crispy tails to the dog and he seemed to enjoy it very much.
Here below is a picture of smoked hooligan. As I recall, we did not brine them, simply placed them in a smoker for awhile.*


*More info on smoked hooligan added 5/19/2020.
- Smoked Hooligan Ingredients
- 1/2 cup salt
- 1-1/2 cups brown sugar
- 1-1/2 tsp. garlic powder
- 1 tsp. red pepper flakes
- 3 cups water
- About 30 fresh hooligan, heads and guts removed
In a large bowl, stir together first five ingredients. Add hooligan. Try using a plate or bowls to weight the fish in the brine, so that they’re fully submerged. Cover the bowl and refrigerate for at least three hours. I did three hours, but they could have used a more salty flavor, so next time I might try 4-6 hours.
Remove fish from brine and rinse with water as you lay the fish out on towels. Pat dry.
Spray your smoker racks with non-stick spray. Get your smoker going with your choice of wood chips. Place fish onto racks and then into smoker. Our smoker runs really hot, so it only took an hour to fully smoke/cook the fish.
Remove fish from racks. They are ready to eat, freeze, or can.
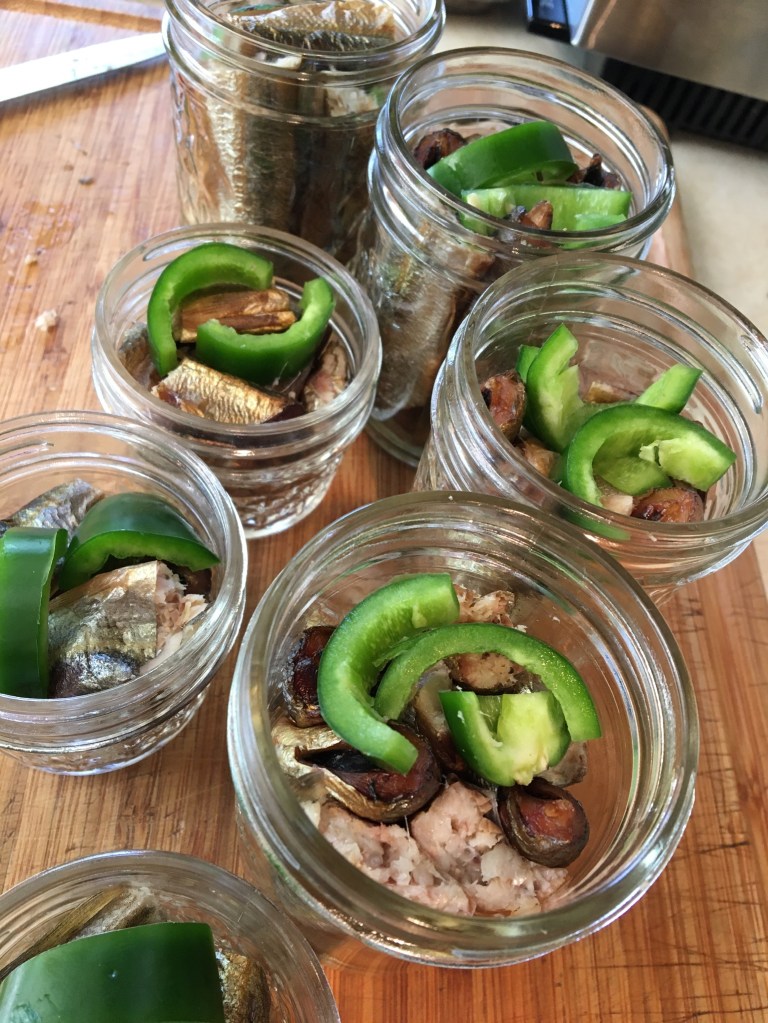
- Canning Smoked Hooligan in Jars
- MUST use a pressure canner. The instructions I’ve read on Insta-Pot say that it cannot be used for canning. Maybe that has changed. Follow the instructions on your own pressure canner.
- I used four half-pint and three quarter-pint jars.
- I used approximately 25 smoked hooligan, cut to fit in the appropriate jar.
- I added a couple slices of fresh, de-seeded, jalapeno to each jar.
- The water in my pressure canner was hot when I loaded the jars into it. I strapped the lid onto the canner, but left the stopcock open.
- Once the stopcock exhausted a steady stream of water vapor for ten minutes, I closed it.
- Once the pressure reached 10 psi I started the timer for 100 minutes.
- I kept an eye on the pressure guage to makes sure the pressure stayed at 10 psi.
- At 100 minutes I turned off the heat and then let the canner sit for many hours to cool. I opened the stopcock to vent, then I removed the lid of the canner and removed the jars.
- Voila!
10 psi for 100 minutes
Serve on crackers. The flavor is very mild. I could have left the seeds in the jalapenos for a bit more kick and I could have left the fish in the brine for a little more salty flavor.


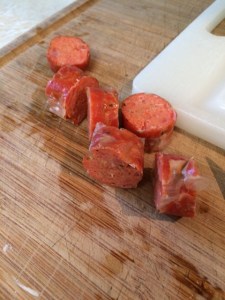
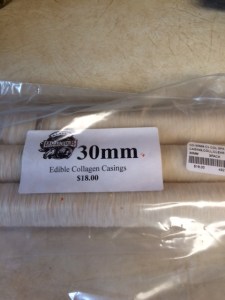
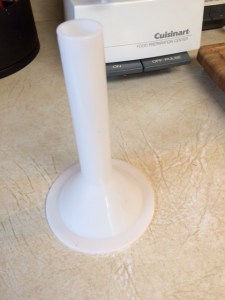
I had never made sausages in casings before and I’d never eaten salmon sausage before. It’s an adventure. So, I went to Alaska Butcher Supply and bought collagen casings (30mm) and a sausage stuffing funnel that looked like it would fit my sausages. The casings are a size one would use to make hotdogs or bratwurst. They are dry casings that do not require soaking before stuffing. I could have tied knots in the casings themselves, but I used string to tie the ends.
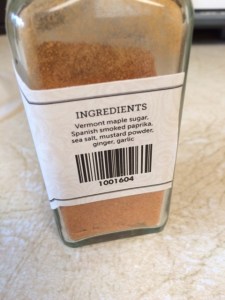
 Ingredients
1.5 to 2# raw salmon, deboned (mostly salmon bellies)
1.5 cups raw zucchini cubes (do not peel)
1 Tbsp. salt
Seasoning (I used a couple tablespoons of Summit Seasonings Smoky Maple Salmon Rub), but next time I’ll try more spice (red pepper flakes) and maybe some mustard seed. A little more salt, too.
I used a Cuisinart to grind all the ingredients together into a rough paste. Then I wet my hands and started stuffing the sausages. Never again by hand. Never. It was such a chore. Part of the problem was that I did not have a utensil to move the meat down the stuffer tube. Once I figured out that my finger worked best, things went a little faster. Never again. I’m probably going to invest in a sausage stuffing attachment for my KitchenAid mixer.
I kept the sausages refrigerated for several hours and then set them out on a plate with paper towels for an hour or so. The temperature change from my kitchen to the refrigerator had caused them to sweat a little and I wanted them to be dry.

Then my husband went out to smoke my regular salmon and he put the sausages on the bottom of the smoker where it is hottest. It took about three and a half hours. Our smoker runs really hot.
 I will say that my sausages are beautiful. They are also tasty, but a little too mild for me. Next time, spice it up!
 This has become a favorite. It’s based upon the recipe found at Simplex. The recipe requires cooked spaghetti squash. I prepare mine by cutting the squash in half (or in quarters if it’s very large), sprinkling it with olive oil, salt, and pepper and then laying it cut-side down in a greased baking dish. Bake at 425 degrees F for about 40-50 minutes.
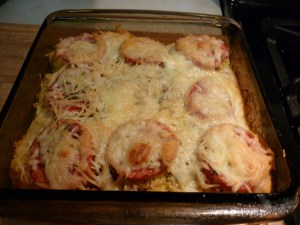
Once you have cooked spaghetti squash, scoop out about 3 cups. In a 8″ square baking dish layer a cup of the squash, then a layer of sliced tomatoes, then sprinkle with salt, pepper, a pinch of dried basil and oregano. Sprinkle with Mozzarella cheese. Cover with another layer of squash, tomatoes, spices, and cheese. End with a layer of squash and then sprinkle with Parmesan cheese. Bake at 350 degrees F for 30 minutes.
This is a very forgiving recipe. You can use any kind of cheese, any kind of spices.
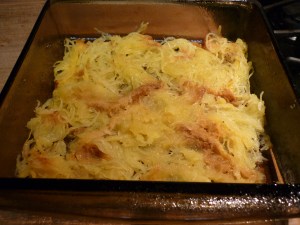
Layer of spaghetti squash.
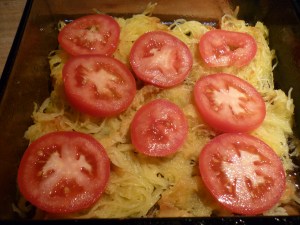
Layer of tomatoes.

Layer of cheese.
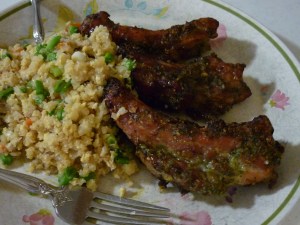
This recipe comes from Epicurious.com. I have made this many, many times. It is quite easy and exceedingly delicious.
Ingredients:
1 cup sliced shallots (red onion works as a substitute)
10 coarsely chopped scallions (green onions)
1 3″ piece of fresh ginger, sliced
8 cloves garlic, chopped
1 cup cilantro, chopped
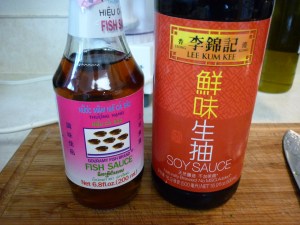
6 Tbsp. soy sauce
2 Tbsp. fish sauce
1 tsp. kosher salt
1 tsp. ground black pepper
2 Tbsp. sugar
4# pork baby-back ribs, cut into individual ribs
Sweet chili sauce

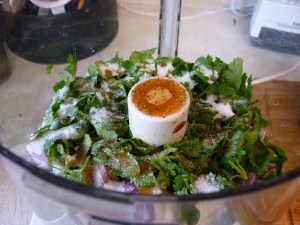
Place all ingredients, except the ribs and sweet chili sauce, into a food processor and whir until it forms a paste.

Put the ribs and paste into a plastic bag and mash it around a bit. Place in the refrigerator for several hours or overnight.
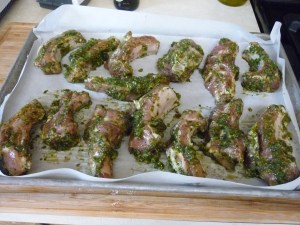
Prepare a couple baking sheets with parchment paper and lay the ribs out in a single layer.

Bake at 350 degrees F for one and a half hours. Serve dipped in sweet chili sauce. YUM!

This is a favorite of mine. The recipe comes from the 1982 St. John’s Lutheran ALCW Cookbook of Donnelly, Minnesota. My poor copy of that cookbook is tattered and the cover is missing because I’ve used it so often. The funny part about this recipe is that it’s called Ginger Balls in the cookbook and I made them for years before it dawned on me that there is no ginger in it. I think it may be a typo, that there really is supposed to be ginger in it, but why mess with perfection? They are so, so good without it.
¾ cup shortening
1 cup sugar
¼ cup molasses
1 egg
2 cups flour
2 tsp. baking soda
1 tsp. salt
2 tsp. ground cinnamon
½ tsp. ground cloves
Sugar to roll the dough balls in
Preheat oven to 350 degrees F. Cream shortening and 1 cup sugar together. Stir in molasses and egg. Mix in dry ingredients.
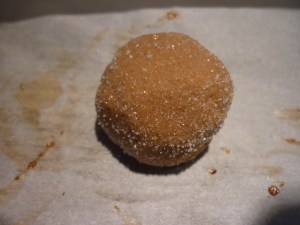
Form into 1” balls and roll in sugar.
![Place dough balls, well-spaced, on greased (or parchment-lined) baking sheet. [My parchment paper was used to make Berlinerkranzer just before making these.]](https://foodspassion.com/wp-content/uploads/2015/11/p1040815.jpg?w=300)
Place dough balls, well-spaced, on greased (or parchment-lined) baking sheet. [My parchment paper was used to make Berlinerkranzer just before making these, that’s why the sheets look used. I was on a Christmas cookie baking roll.]
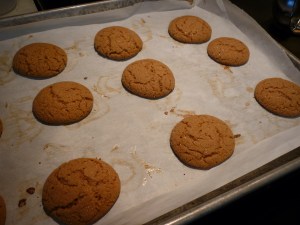
Bake 10 minutes. The dough spreads and puffs.

Then it collapses into flat rounds and the sugar forms a nice crackly crust.

