Prepare an 8×8″ baking dish by greasing or spraying with non-stick. Preheat oven to 350 degrees F.
In a bowl, mix together the Base Ingredients. Spread the mixture into the prepared baking dish. Set aside.
For the Topping: beat together egg, sugar, and hot water. Fold in flour and baking powder. Dollop the batter over the mixture in the baking dish as evenly as possible. Bake at 350 degrees for about 40 minutes. Serve warm or at room temperature.
NOTES: This tastes good with whipped cream or ice cream. It’s a weird little dessert because the marshmallows form a crinkly crust, kind of like a pavlova, but underneath the crinkle is a rich cake-like topping on top of a luscious rhubarb sauce. It’s SUPER simple to make and very forgiving if you think it needs more egg or more rhubarb, etc.
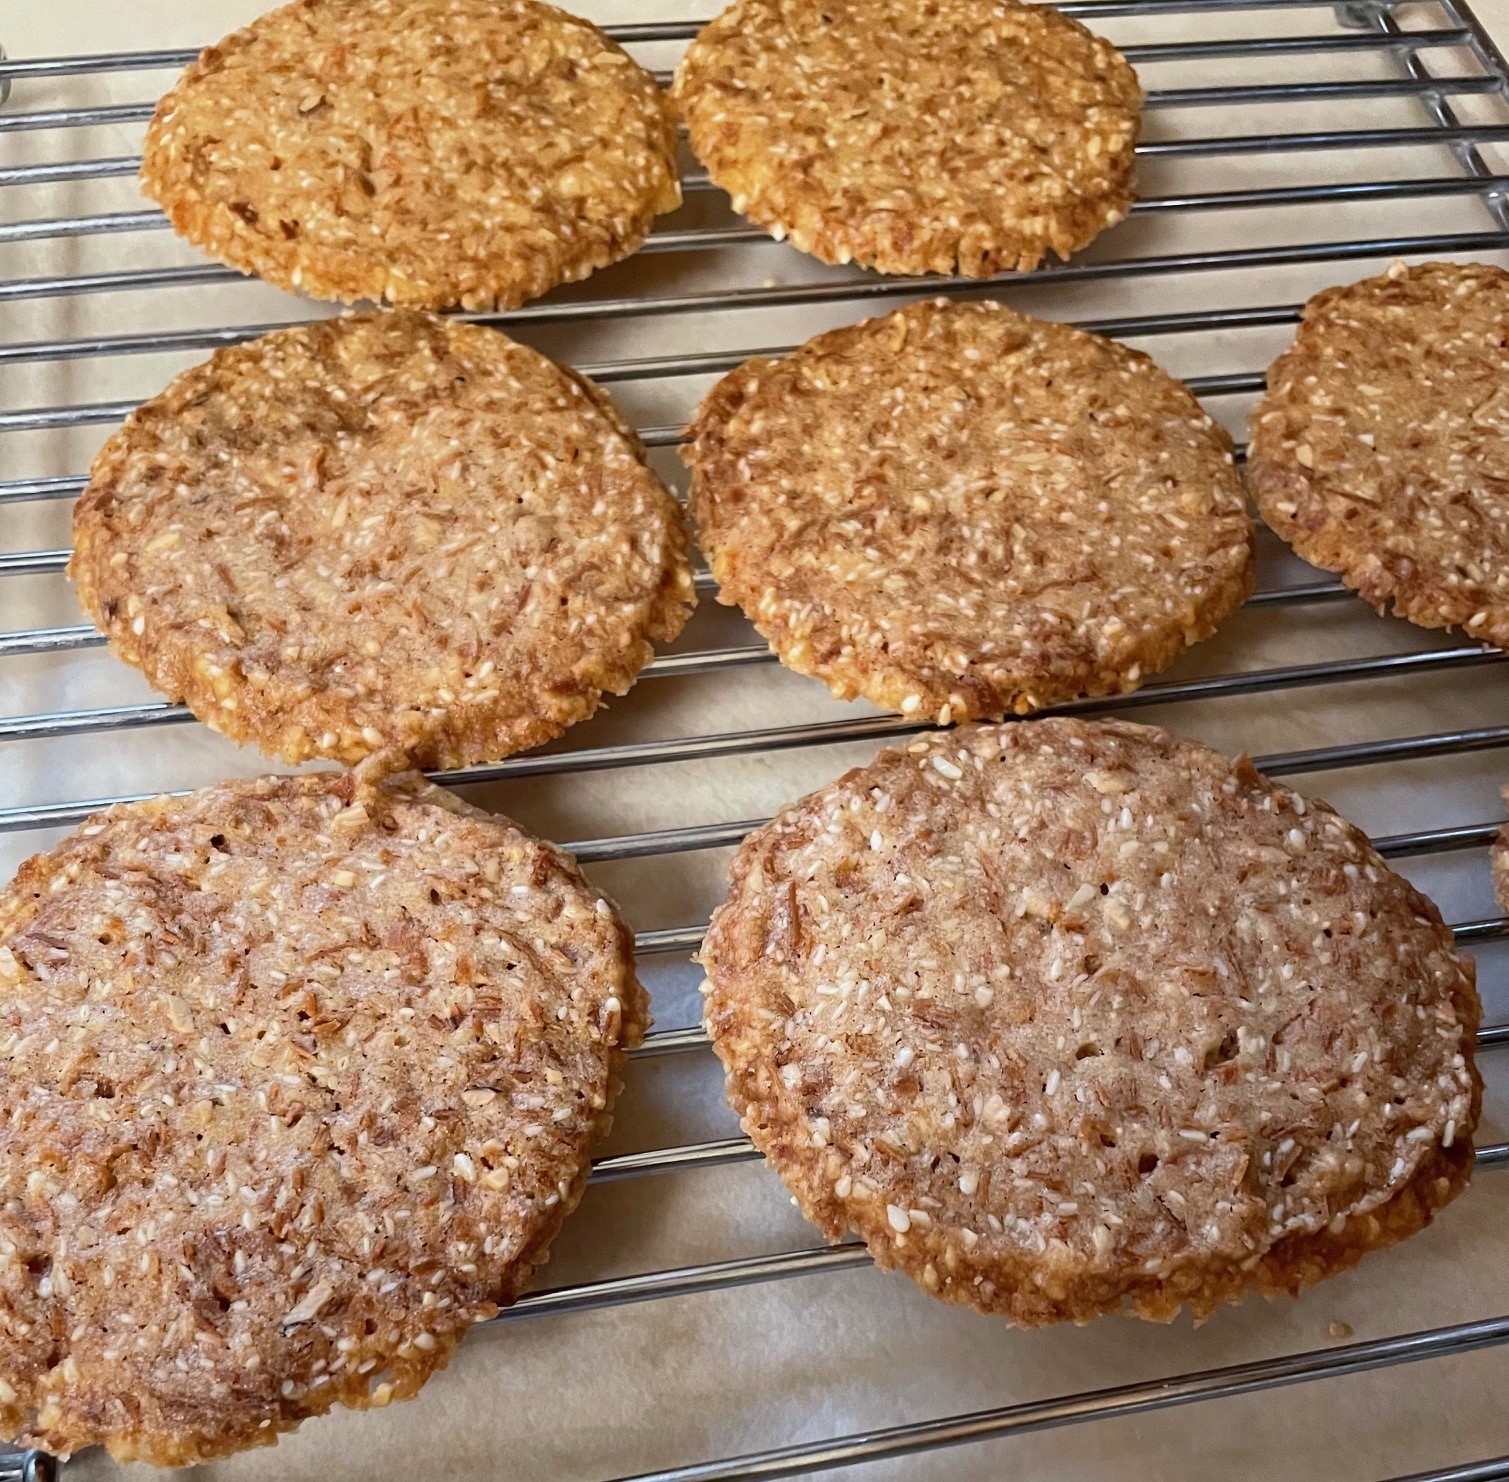
Cream together butter and sugar until fluffy. Gradually add flour. Mix until just combined. Stir in sesame seeds, coconut, and almonds. Divide dough into thirds. Place 1/3 on long sheet of waxed paper. Shape into long roll, 2″ in diameter. Repeat with remaining dough. Wrap and refrigerate until firm. Preheat oven to 300 degrees F. Cut rolls into 1/4″ slices and place on ungreased cookie sheets. Bake for 30 minutes. Remove to wire racks to cool. Yield about 4 dozen.
NOTES: This recipe comes from my late friend Lois Hermansen. They take time because of the baking time. Yes, thirty minutes! These are very crispy, fragile cookies. Oh, so yummy, but they break easily. Find a good box or other flat surface to store them in.
Melt 2 Tbsp. butter in skillet and saute half the mushrooms until nicely browned. Remove from skillet and set aside. Melt another 2 Tbsp. butter in skillet and add the remaining mushrooms. Saute until nicely browned. Stir in garlic, one green onion, and the set-aside mushrooms. Continue stirring over heat until the garlic is fragrant and soft. Stir in broth, thyme, salt and pepper. Let broth reduce over heat, stirring occasionally. Keep warm over low heat.
In the meantime: Place a baking dish (about 9×13″) or other oven-proof dish into oven and preheat oven to 400 degrees F. In a food processor or blender, add eggs, flour, milk, and salt. Whir until it is thoroughly combined without any lumps. Remove heated dish from preheated oven and drop remaining 2 Tbsp. butter onto dish. Once it has melted, turn the dish so butter coats all sides. Pour batter from food processor into baking dish and sprinkle 1/2 cup shredded parmesan over top. Return dish to oven for 18-20 minutes. Do not open the oven to peek at this. Just wait 18 minutes before checking.
At 18 minutes, the Dutch baby should be puffed and golden brown with crispy looking edges. It may need another minute or two in the oven. Remove from oven and sprinkle the mushroom mixture over all. Sprinkle with remaining parmesan and remaining one green onion. Serve immediately.
Note: Timing is key, don’t start making this unless you can serve it immediately. It doesn’t take long, so that helps. I use the lid of my Dutch oven as a baking dish because it is cast iron and the perfect size. A Dutch Baby is a puffed pancake that falls very quickly, so once it’s removed from the oven it must be served immediately for best taste and effect. Opening the oven to peek, or taking it out of the oven prematurely, will start the falling process and I don’t think there’s any coming back from that. Just leave it alone in the oven and then look at it quickly after the 18-minute mark to see if it needs more time.
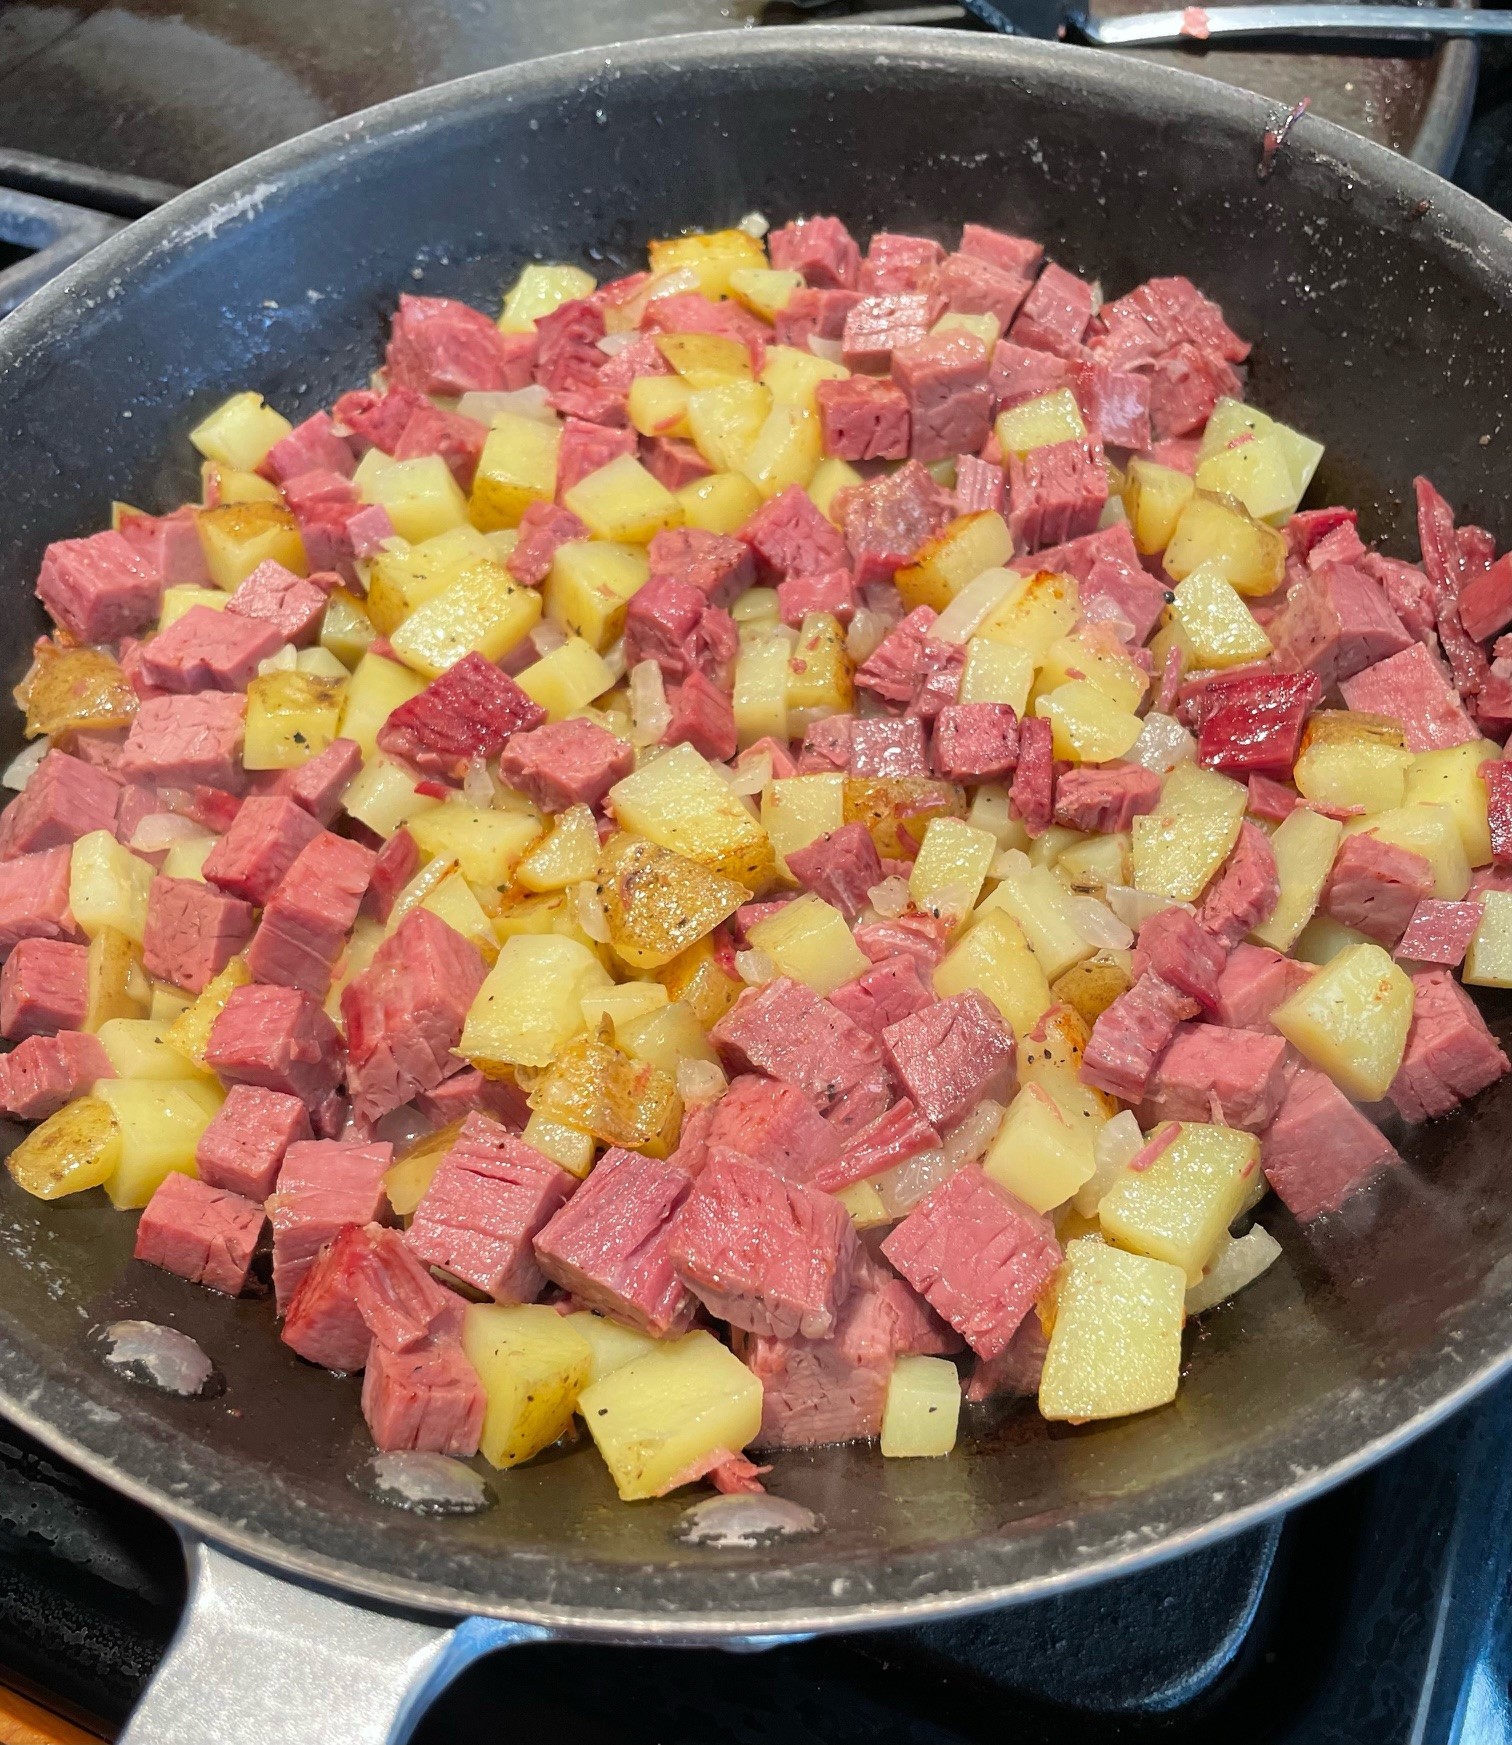
In a skillet, melt a pat of butter with a bit of oil and saute onion in it until transparent. Turn the heat up and stir in equal amounts of cooked and diced corned beef and potatoes. When it’s all well mixed, press down on it and leave it over the flame for a few minutes. Put your spatula beneath the mixture and turn sections of it over, so the browned parts are on top and the bottom gets browned again. Once your hash is a healthy brown color, create indentations in the hash with a spoon and crack eggs into the indents. Reduce heat and cover the skillet until the eggs are done to your liking. My liking is a very soft-cooked egg that forms a sauce in my bowl. Serve warm!
NOTES: Add as many eggs as you feel like eating. You can see in the photograph what I did. It always depends upon how much corned beef I have leftover from dinner (usually St. Patrick’s Day dinner). I do love this dish. I used to make it in the oven for dinner once in awhile. When we go on cruise vacations (frequently), I eat corned beef hash and poached eggs nearly every morning. It’s a bit of a trick up at the buffet deck, scooping up their runny corned beef hash onto a plate and then standing in line waiting for the egg poacher to notice me, hoping the whole mess is still reasonably warm when I find a place to sit down and devour it. First-world problems. I get it. The corned beef hash I make at home is SO MUCH better! And now you can make it, too!
2 cups gluten-free flour mix (Bob’s Red Mill 1 to 1 is what I used)
2 tsp. ground cinnamon
1 tsp. ground ginger
1/2 tsp. ground nutmeg
2 tsp. baking soda
3/4 tsp. salt
4 large eggs (I used extra-large)
1-1/2 cups sugar
3/4 cup unsweetened applesauce
1/2 cup oil (I used canola)
1 tsp. vanilla extract
14.5 oz. peeled and grated carrots (about 4 cups)
Preheat oven to 350 degrees F. Prepare 24 muffin cups by using paper liners or another non-stick method.
Stir together gf flour, cinnamon, ginger, nutmeg, soda, and salt. Set aside.
In a large bowl, beat the eggs and then stir in the sugar, applesauce, oil, and vanilla. Beat until combined. Add the flour mixture and stir until just combined. Stop stirring. Fold in the carrots until just combined.
Spoon the batter evenly into the prepared cups. Bake 15-20 minutes at 350 degrees F. They are done when muffin springs back when lightly pressed. It took mine about 24 minutes, probably because my eggs were extra-large.
Frosting Ingredients
8 oz. cream cheese, softened
1/2 cup (4 oz.) butter, softened
4 cups powdered sugar
2 tsp. vanilla extract
In a mixer, beat together cream cheese and butter until well mixed. Stir in powdered sugar and vanilla until well combined.
NOTES: The cupcake recipe comes from texanerin.com and she has a variety of ways to do this in different pans, like to make cakes, and also offers ingredient substitution possibilities. I only used her cake recipe, not her frosting. These cupcakes had rave reviews. It may be one of the first things I’ve made gluten-free that I couldn’t tell. They were delicious! Most of the cupcakes I “cored” and filled with my Lemon Curd, then I frosted with Cream Cheese Frosting. I think you could play around with these quite a bit. Orange curd? Orange frosting? I think yes!
Preheat oven to 350 degrees F. Grease, or line with parchment paper, a 9×13″ baking dish.
Stir brown sugar into warm melted butter. Let sit a few minutes. Stir in eggs until well blended. Sift together flour, baking powder, and salt. Stir flour mixture, walnuts, and chocolate chips into sugar mixture. Spread into prepared baking dish. Bake at 350 degrees F for 25-30 minutes. Cool. Cut into squares.
You will need 3-4 juicy lemons to make this. Stir together lemon zest, lemon juice, and water. Let stand 10 minutes. Strain 2 cups liquid into a large pan. Stir in sugar. Heat to a full roiling boil and stir in Certo. Stir in food coloring, if using. Bring to a full rolling boil again and boil 1 minute. Remove from heat and skim off foam. Ladle into jars and seal.
NOTE: I do not water-bath can my jam or jelly. There is so much sugar in it that it acts as a natural preservative. Back in the olden days when my mother made jam and jelly, she poured melted paraffin over the top of the jam or jelly, instead of using lids. Paraffin “sealed” the product and kept air from turning the it brown. I have done it that way, too, but find that lids are less muss. I screw the lids onto the jars and turn them upside down for 30 minutes. The heat seals the jars to keep air out. Of course, I only do this with fruit jam and fruit jelly loaded with sugar.
I used a few drops of yellow gel food coloring in this. Lemon jelly has the same bright taste as marmalade without the rinds or zest. It was super easy to make.
Salmon pieces, about 2-1/2 cups (or lightly smoked salmon)
Roma tomatoes, about 3 of them, chopped
Chives, dried or fresh, about 1 tsp. dried
Salt and pepper
Juice of 1/2 lemon
Preheat oven to 400 degrees F. Prepare a shallow baking dish with non-stick spray. [I use a 9″ ceramic pie pan.]
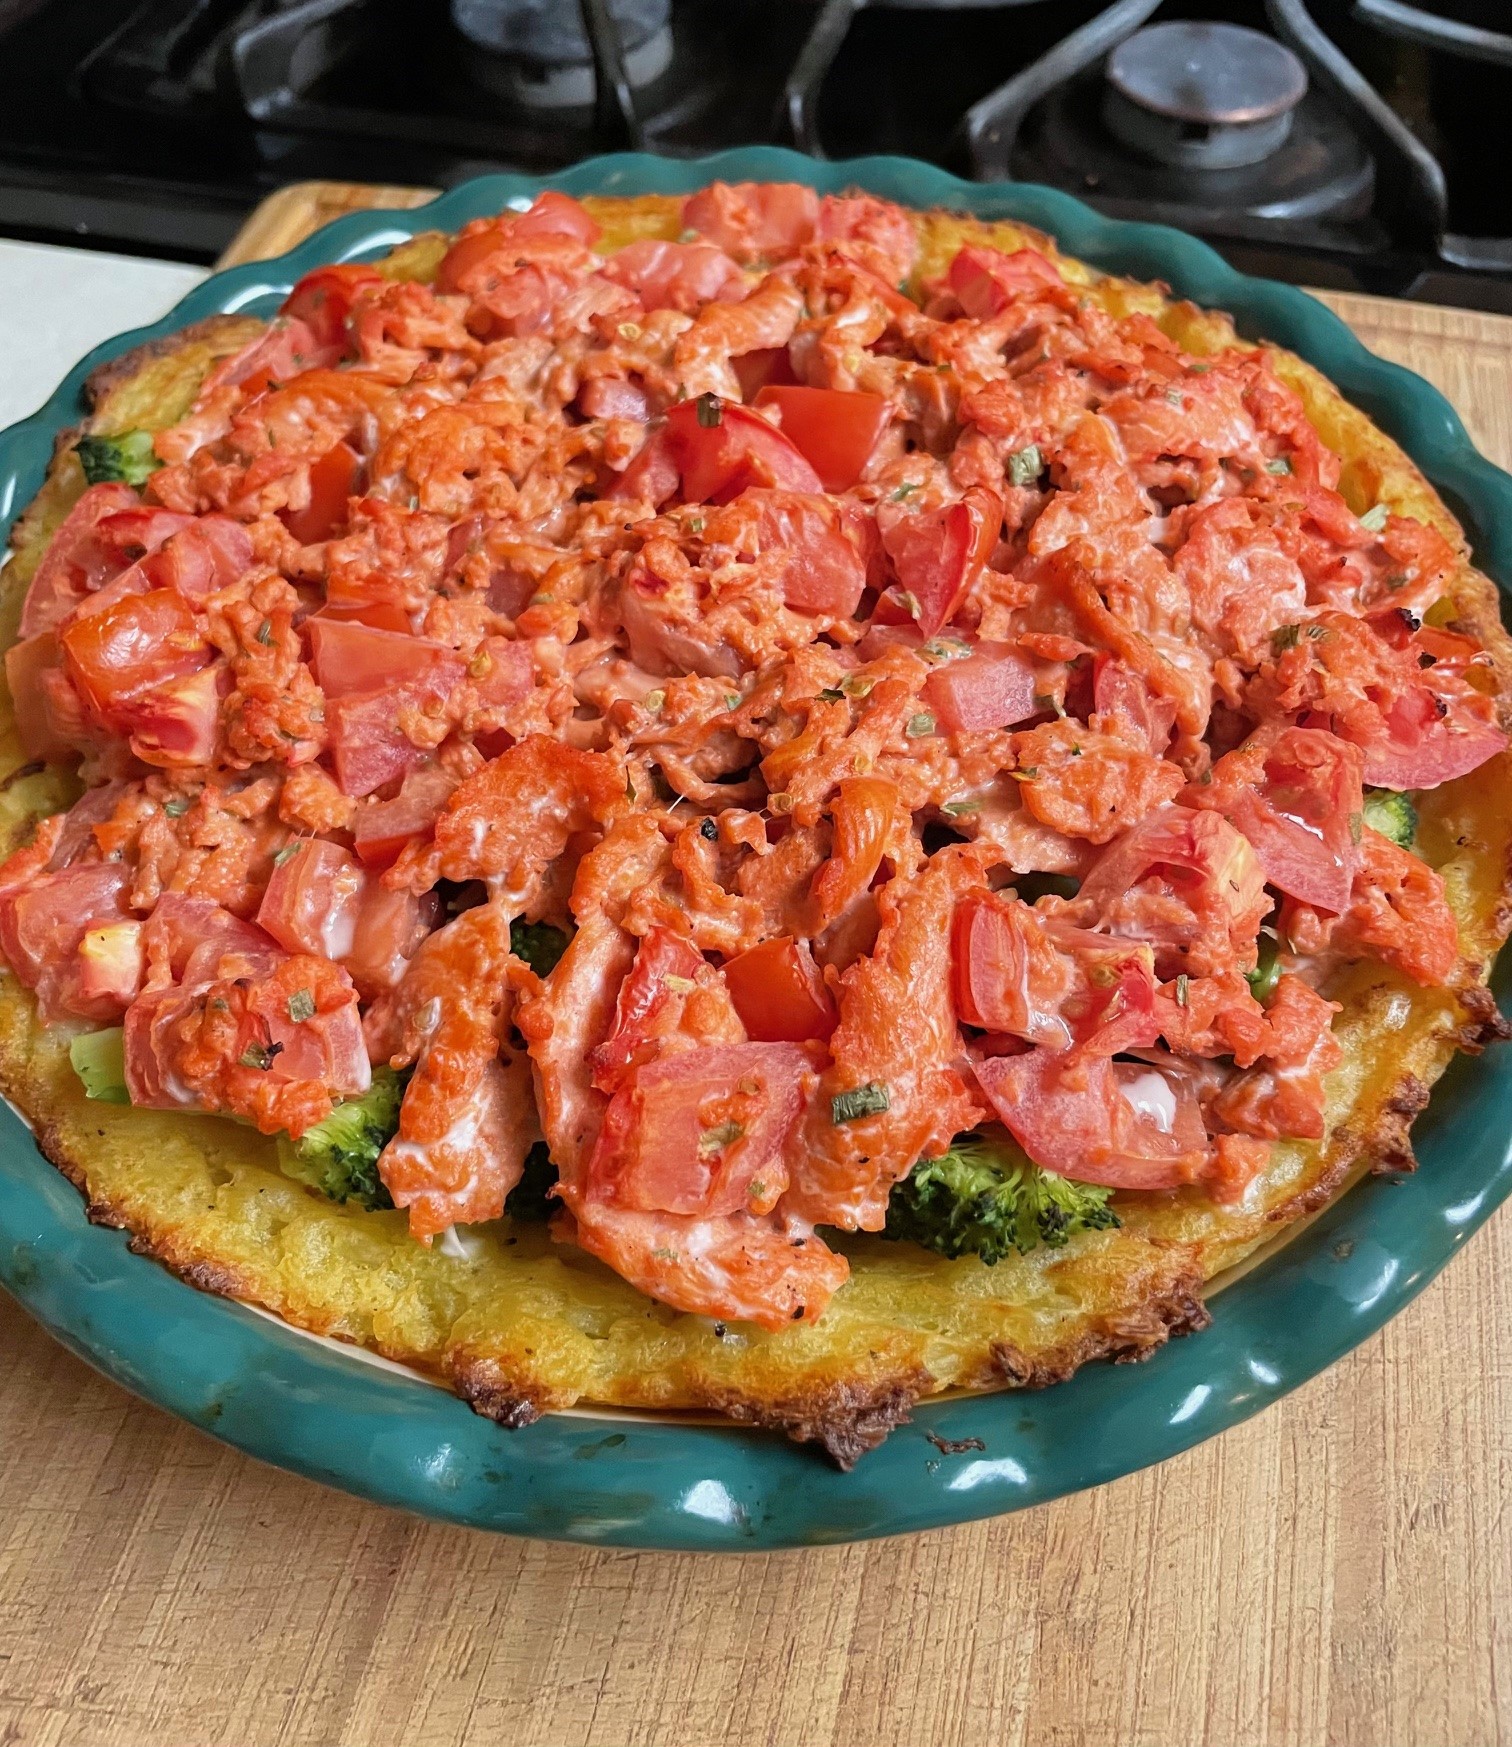
Boil potatoes until soft. Strain potatoes and season with salt and pepper (or seasoning salt). Mash the potatoes. Stir tartar sauce into the mashed potatoes. Stir about 1/2 Tbsp. olive oil into mashed potatoes. Spoon the mashed potatoes into the prepared baking dish and tamp it into the bottom and sides with a spoon or rubber scraper. Drizzle with olive oil. Bake at 400 degrees F for 20-30 minutes, until golden.
Steam or broil or otherwise cook broccoli. Set aside.
Stir together salmon, tomatoes, chives, salt and pepper, and lemon juice. Set aside.
Remove potatoes from oven and arrange broccoli over the top. Scoop the salmon mixture over the top of the broccoli. Bake an additional 15-30 minutes at 400 degrees F, until fish is cooked.
*Lightly Smoked Salmon . . . Spread one salmon filet with Dijon mustard and then sprinkle with salt and pepper (heavy on the pepper). Smoke at 225 degrees F for 1-1/2 hours. Good to go.
NOTES: This recipe started from Jamie Oliver. I have SO MUCH salmon. I had lightly smoked a salmon filet, but then realized I wasn’t having a dinner party so what would I do with it all. Improvise! I couldn’t really figure out where Jamie Oliver was headed just by reading the recipe, but once I started making this, I was like, “Oh, I get it!” So, that time I used smoked salmon instead of regular. It was already “cooked” instead of raw. I didn’t use any prawns because, well, I have SO MUCH salmon. I get salmon from my friend Sandy, and she had sent me a couple frozen bricks of boneless salmon meat. Another time, I used nearly the whole brick making this. It’s perfect! I didn’t have cherry tomatoes, so I used Romas instead. And on and on it goes. Mixing tartar sauce with mashed potatoes was the real mind-blower, but it’s great! I cannot overstate how flavorful this dish is, a mix of earthy and tart. Try it!
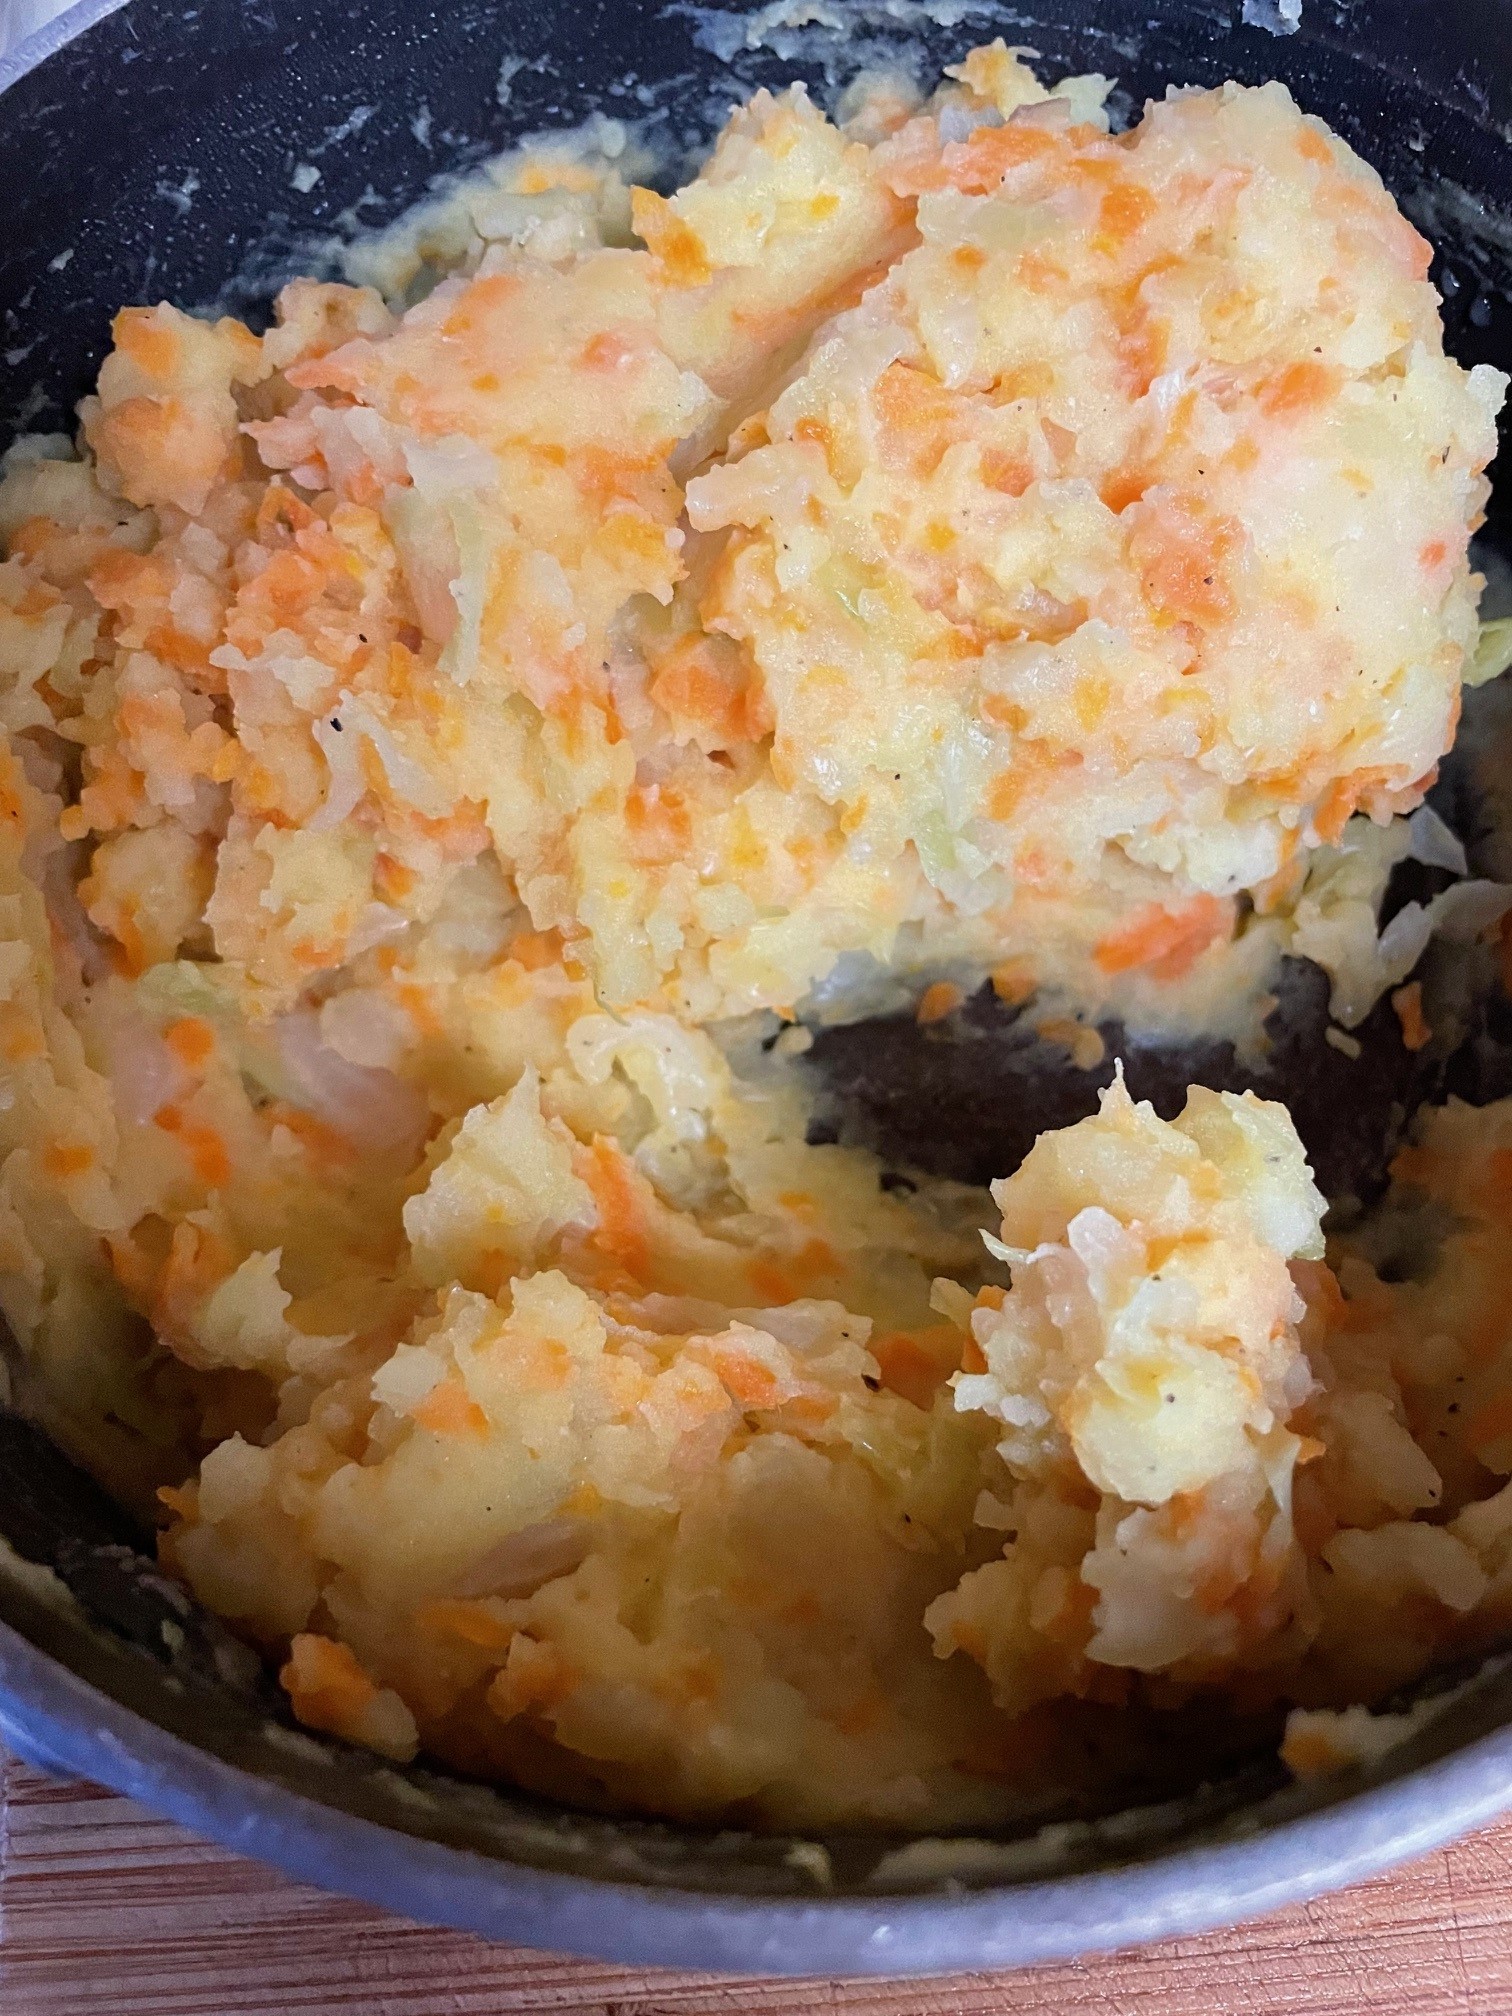
Make mashed potatoes: Cut the potatoes into manageable chunks for boiling and boil until they are cooked. While they are still warm, mash them and stir in milk until they are a firm mash, not too loose. Stir in salt and pepper.
While the potatoes are cooking: Heat olive oil in skillet and stir fry cabbage and carrots until very soft. Sprinkle with salt and pepper.
Stir the cabbage and carrot mix into the mashed potatoes and mix together very well. Set aside to cool to room temperature.
Mix the egg and flour into the mashed mixture.
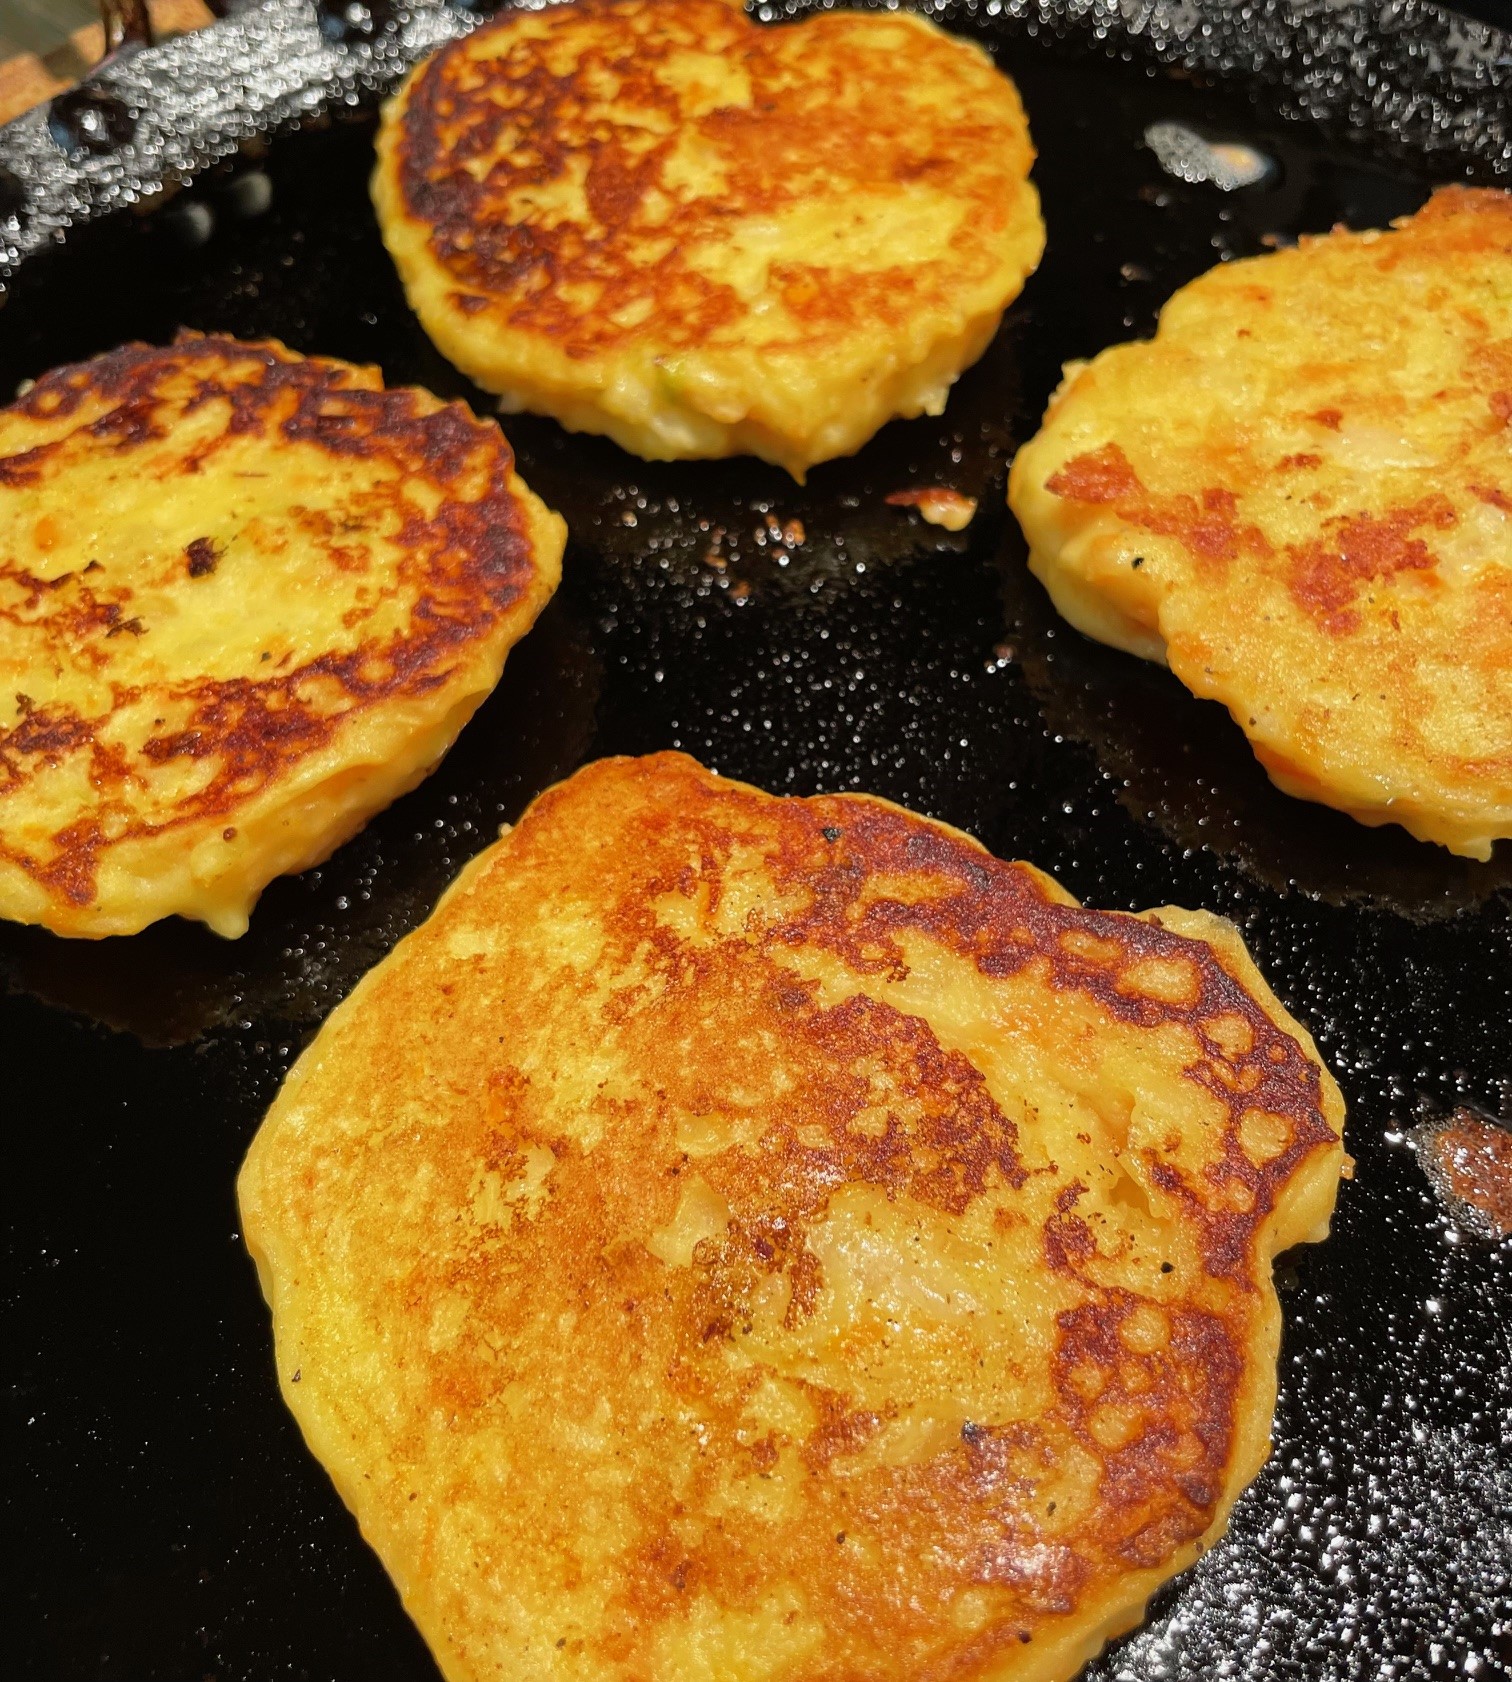
On an oiled medium-hot griddle, dollop about 1/4 cupfuls of mix. Spread the batter around to make the cakes about 1/2″ thick. Once the bottoms are browned, flip over and brown the other side. Make sure the cakes are heated through by using a medium temperature so they don’t get browned too quickly. Yield is about a dozen cakes.
NOTE: These are an excellent side dish for roast chicken or beef stew. I had leftover potatoes, cabbage, and carrots from a corned beef dinner one St. Patrick’s Day and I made these cakes the next day. Wow! They are really tasty. Another time, I added scallions. I suppose you could jazz them up with any number of vegetables or flavorings. In the photos, I used rendered chicken fat/butter to fry my cakes. I had browned a whole chicken in butter and instead of discarding the fat, I fried the cakes in it. These could be made gluten-free by using gluten-free flour instead of regular flour. The dish isn’t at all fussy, so do what you want! I also like these leftover cakes served with eggs for breakfast.
Optional: other vegetable, chopped (mushrooms, bok choy, zucchini, spinach, etc)
3 cups broth
1/4 cup rice vinegar
1/4 cup soy sauce
1 Tbsp. shiracha
8-12 oz. frozen potstickers (Japanese gyoza – dumplings)
In a medium saucepan, heat sesame oil. Stir in ginger and garlic and saute until fragrant, a minute or so. Stir in carrot and optional vegetable, if using. Stir fry awhile longer. Stir in broth, vinegar, soy sauce, and shiracha. Bring to a boil and then simmer until vegetables are cooked through. Stir in potstickers and bring to a boil again. Simmer until potstickers are cooked/tender, about 8 minutes. Serve. Serves 2-3 depending upon how hungry they are.
NOTES: The recipe originated at Wholesomelicious, where she created the perfect hot and sour soup base. I’ve made this many times now and each time is different, except for the proportions of sesame oil, ginger, garlic, broth, vinegar, soy sauce, and shiracha. Everything else, I just throw in as I go. I’ve used leftover chicken, yellow squash, spinach, and celery. What you see pictured here is boy choy as the optional vegetable. Wholesomelicous uses mushrooms and a vegetable broth. You can make this vegetarian by using vegetable broth and vegetable potstickers. I cannot emphasize enough how perfect the soup base is. You wouldn’t even have to add postickers if you simply want a hot and sour soup base. It’s absolutely delicious, no matter what you put into the soup.